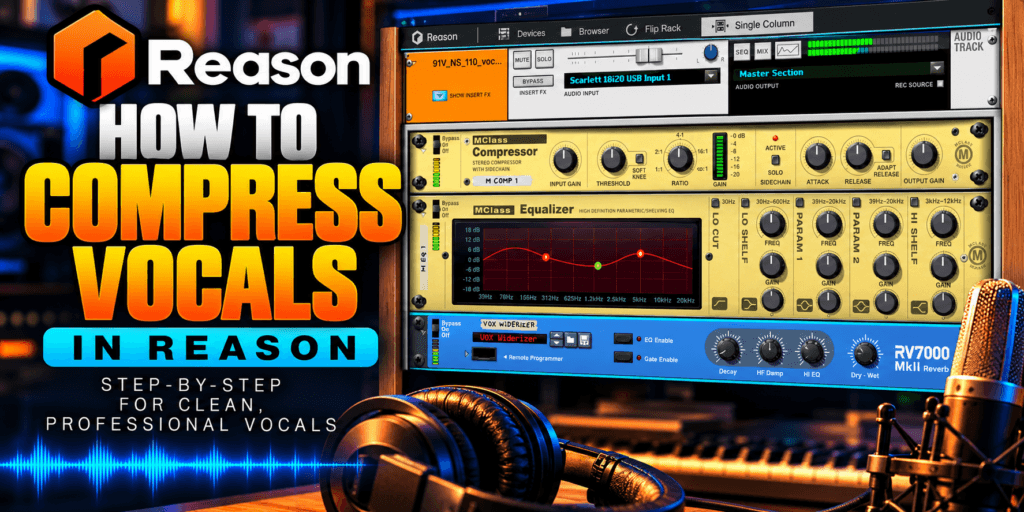
 How to Compress Vocals in Reason (Step-by-Step)
Vocal compression is one of the most important techniques to learn when mixing music. Whether you’re producing Hip-Hop, R&B, Trap Soul, or Pop, knowing how to compress vocals in Reason can help your recordings sound more consistent, controlled, and professional.
One of the biggest challenges when mixing vocals is managing changes in volume throughout a performance. A singer might deliver one phrase softly and the next with significantly more energy. Without proper compression, certain words can disappear behind the instrumental while others jump out of the mix.
Fortunately, Reason includes powerful compression tools that can help you manage these differences without purchasing additional plugins.
In this guide, we’ll explore how vocal compression works, how to use Reason’s SSL-style mixer compressor, and how to achieve smoother vocals with the MClass Compressor.
We’ll also look at practical settings for different vocal styles, common mistakes, and when it makes sense to use more than one compressor.
What Is Vocal Compression?
Vocal compression is a mixing technique that reduces the dynamic range of a vocal recording.
Dynamic range refers to the difference between the loudest and quietest parts of an audio signal.
For example, imagine recording an R&B singer who delivers a soft verse followed by a powerful chorus.
The verse might sound perfect at your current mixer level, but the chorus could become noticeably louder. If you lower the track’s volume to accommodate the chorus, the softer parts might become difficult to hear.
Compression helps control these differences by reducing the level of audio that exceeds a selected threshold.
The result can be a more consistent vocal performance that sits comfortably within the instrumental.
However, compression doesn’t automatically make a recording sound better. Applying too much compression can remove the natural movement and emotion from a singer’s performance.
The goal is to control dynamics while preserving the character of the original recording.
Understanding Vocal Compressor Settings
Before adding compression to your vocal tracks, it’s important to understand what the primary controls do.
Threshold
The threshold determines the signal level at which the compressor begins reducing gain.
For example, if your compressor threshold is set to -18 dBFS, audio that exceeds that threshold will trigger compression.
Lowering the threshold generally causes more of the performance to be compressed.
Beginner tip: Rather than choosing a threshold based on a specific number, adjust it while watching the compressor’s gain reduction meter.
Ratio
The ratio determines how strongly the compressor reduces levels above the threshold.
Common compression ratios include:
- 2:1: Gentle compression suitable for natural-sounding vocals.
- 3:1: Moderate compression that can help maintain consistent vocal levels.
- 4:1: Stronger compression often useful for energetic singing and rap.
- 6:1 and above: More aggressive dynamic control or special effects.
For example, with a 4:1 ratio, an input signal that rises 8 dB above the threshold produces approximately 2 dB of output increase above the threshold, assuming a hard-knee compressor operating in its steady state.
Higher ratios create stronger compression, but they aren’t automatically better.
Attack
Attack controls how quickly a compressor responds after the audio crosses the threshold.
A fast attack can control sharp vocal peaks and consonants.
A slower attack allows more of the initial vocal transient to pass through before compression takes effect.
For many vocals, a moderately slow attack can help preserve clarity and articulation.
However, some compressors, including Reason’s mixer compressor, use simplified attack controls rather than offering a continuously adjustable attack time.
Release
Release determines how quickly the compressor stops reducing gain after the signal falls back below the threshold.
A release that is too fast may cause noticeable pumping or fluctuations in the vocal.
A release that is too slow may keep the compressor working between phrases, reducing the natural movement of the performance.
The ideal release depends on the tempo, phrasing, and dynamics of the recording.
Make-Up Gain
Compression reduces the level of louder audio.
Make-up gain allows you to increase the processed signal’s output level after compression.
This is useful for matching the perceived loudness of the compressed vocal to the original recording.
Always compare compressed and uncompressed audio at similar listening levels.
Otherwise, you may prefer the compressed version simply because it sounds louder.
How to Compress Vocals Using Reason’s SSL-Style Mixer
One of Reason’s biggest advantages is its built-in mixing console.
The Main Mixer includes an SSL-inspired channel strip with EQ, compression, gating, and other useful mixing controls.
You can achieve excellent vocal compression using this mixer without adding any third-party plugins.
Step 1: Import or Record Your Vocal
Open your Reason project and locate the vocal recording you want to process.
If you’re starting from scratch, create an audio track and record or import your vocal performance.
Before applying compression, listen carefully to the recording.
Pay attention to the following:
- Words that become too loud.
- Phrases that disappear behind the instrumental.
- Sharp consonants and sudden peaks.
- Changes in energy between verses and choruses.
- Background noise that may become more noticeable after compression.
You should also establish a reasonable input level and avoid clipping.
If some phrases are dramatically louder than others, consider using clip gain or volume automation to reduce those differences before compression.
Step 2: Open Reason’s Main Mixer
Click the Mixer button at the top of Reason to open the Main Mixer.
Find the channel strip associated with your vocal recording.
Locate the Dynamics section near the top of the channel strip.
This section contains the compressor and gate controls.
If the Dynamics section is hidden, double-click its section header to expand it.
The compressor has its own On button, allowing you to activate compression independently of the gate.
Step 3: Enable the Compressor
Activate the compressor in the Dynamics section.
Start with a moderate ratio and a relatively high threshold so that little compression occurs initially.
For a natural vocal, try a ratio of approximately 2:1 or 3:1.
Leave Peak mode disabled initially and use the standard compressor behavior.
Now play the loudest section of your vocal recording.
Slowly lower the threshold until the gain reduction meter begins responding to the louder phrases.
Step 4: Adjust the Threshold
For your first experiment, aim for approximately 2–4 dB of gain reduction on louder vocal phrases.
This is a starting point rather than a strict rule.
Listen to how the vocal changes as the compressor begins working.
Ideally, the loudest words should become more controlled without making the entire performance sound flat.
If you’re hearing obvious pumping or losing the emotional impact of the performance, reduce the amount of compression.
Step 5: Adjust Attack and Release
Reason’s Main Mixer compressor offers a Fast Attack switch rather than a continuously variable attack knob.
For your first pass, leave Fast Attack disabled to preserve more of the vocal’s initial articulation.
If sharp peaks remain too prominent, experiment with enabling Fast Attack.
Next, adjust the release control.
Listen for how naturally the compressor recovers between words and phrases.
A release that is too short may exaggerate fluctuations in the performance, while an overly long release can make the vocal feel restrained.
Experiment until the compressor follows the performance naturally.
Step 6: Compare Before and After
Now bypass the compressor and listen to the original vocal.
Then enable it again.
Ask yourself:
- Are the louder phrases better controlled?
- Can I hear the quieter words more consistently?
- Does the vocal still sound natural?
- Has the compression introduced pumping or unwanted artifacts?
- Does the vocal sit better within the instrumental?
Match the listening levels as closely as possible before deciding which version sounds better.
If the processed vocal sounds more balanced while maintaining its original character, you’re moving in the right direction.
How to Compress Vocals Using MClass Compressor in Reason
Reason also includes the MClass Compressor, a dedicated rack device that offers a different workflow and additional compression controls.
Unlike the Main Mixer compressor, MClass provides continuously adjustable attack and release controls.
This makes it particularly useful when you want more precise control over how compression responds to a vocal performance.
Step 1: Add MClass Compressor
Select your vocal track and open its Audio Track device in Reason’s rack.
Expand the Insert FX area.
From the Effects browser, locate MClass Compressor and add it to the vocal track’s insert effects.
This allows the compressor to process the vocal signal directly.
Remember that Reason’s channel-strip signal path can be rearranged, so check whether your insert effects are processing audio before or after the channel Dynamics and EQ sections.
Step 2: Choose Your Starting Settings
Try the following settings as an initial experiment for a smooth R&B vocal:
| Parameter | Starting Setting |
|---|---|
| Ratio | 3:1 |
| Attack | 20–30 ms |
| Release | 100–150 ms |
| Soft Knee | Enabled |
| Threshold | Adjust for 3–5 dB gain reduction |
| Output Gain | Match bypassed loudness |
These settings are not universal presets.
A soft, intimate performance may require less compression, while an energetic vocal might benefit from stronger dynamic control.
Step 3: Listen to the Vocal in Context
Avoid making every compression decision while the vocal is soloed.
A vocal can sound excellent by itself but disappear once the drums, bass, and instruments return.
Play the complete arrangement while adjusting the compressor.
For example, if you’re mixing Trap Soul, listen to how the vocal interacts with the 808, snare, melodic instruments, and atmospheric pads.
The compressor should help the vocal remain consistent without forcing you to raise its fader excessively.
Step 4: Fine-Tune the Attack
Experiment with different attack settings.
A faster attack may smooth out aggressive consonants and peaks.
A slower attack may preserve more of the vocal’s initial impact.
Try switching between approximately 5 ms and 30 ms while listening to the same phrase.
Pay attention to the way the words begin.
Choose the setting that supports the performance rather than automatically selecting the fastest option.
Step 5: Adjust Release for the Performance
Start with a release around 100 ms.
If the compressor sounds too active or produces noticeable pumping, try a longer release.
If the compressor remains engaged too long and suppresses subsequent words, experiment with a shorter release.
Use the gain reduction meter as a visual reference, but let your ears make the final decision.
Best Vocal Compression Settings for R&B, Hip-Hop, and Trap Soul
Different vocal styles may benefit from different approaches to compression.
The following settings provide useful starting points when using a compressor with adjustable attack and release controls, such as MClass.
| Vocal Style | Ratio | Attack | Release | Gain Reduction |
|---|---|---|---|---|
| Smooth R&B | 2:1–3:1 | 20–35 ms | 100–180 ms | 2–4 dB |
| Trap Soul | 3:1–4:1 | 10–25 ms | 80–150 ms | 3–5 dB |
| Hip-Hop/Rap | 3:1–4:1 | 5–20 ms | 60–120 ms | 3–6 dB |
| Soft Background Vocals | 2:1–3:1 | 15–30 ms | 100–200 ms | 2–4 dB |
These ranges are educational starting points, not guaranteed settings.
The recording level, microphone technique, singer’s dynamics, and instrumental arrangement all influence how much compression is appropriate.
What Is Serial Compression?
Serial compression involves using two or more compressors consecutively on the same audio signal.
Instead of asking one compressor to perform all the dynamic control, you divide the work between multiple stages.
For example, you could use Reason’s Main Mixer compressor to control the sharpest vocal peaks and an MClass Compressor to smooth the overall performance.
Example: Two-Stage Vocal Compression in Reason
Stage 1: Main Mixer Compressor
Use the channel-strip compressor to control the loudest peaks.
- Ratio: 2:1
- Peak mode: Enabled for transient control
- Fast Attack: Experiment based on the recording
- Gain Reduction: Approximately 1–2 dB on louder peaks
Stage 2: MClass Compressor
Use MClass to smooth the vocal’s overall dynamics.
- Ratio: 2:1
- Attack: 20–30 ms
- Release: 100–150 ms
- Soft Knee: Enabled
- Gain Reduction: Approximately 2–3 dB on louder phrases
To place MClass after the channel compressor, use Reason’s Signal Path controls so that the channel Dynamics section processes the audio before the Insert FX section.
The first compressor catches the more aggressive peaks, while the second gently controls the remaining dynamic changes.
This approach can produce a controlled, polished vocal without relying on one compressor to apply excessive gain reduction.
However, serial compression isn’t always necessary.
If one compressor delivers the sound you want, there’s no reason to add another.
Should You EQ Vocals Before or After Compression?
Both approaches can work.
EQ before compression allows you to remove unwanted frequencies before they reach the compressor.
For example, excessive low-frequency rumble can trigger compression even when those frequencies aren’t musically useful.
Cleaning up the signal first can help the compressor respond more appropriately.
EQ after compression allows you to shape the tone of the already-compressed vocal.
This can be useful when adding presence, clarity, or air.
In Reason’s Main Mixer, the default channel signal path places Dynamics before EQ.
You can activate Dyn Post EQ to place the EQ section before Dynamics instead.
You can also change the position of Insert FX relative to those sections.
A useful approach is to remove obvious rumble or muddiness before compression, then make any final tonal adjustments afterward.
However, you don’t need multiple EQs simply because you are using compression.
Make processing decisions based on what the recording actually needs.
Five Common Vocal Compression Mistakes
1. Using Too Much Compression
Excessive compression can remove the emotional dynamics from a performance.
If every word sounds equally loud, the vocal may begin to feel lifeless.
Use enough compression to control the performance while preserving its natural movement.
2. Choosing the Wrong Attack
An attack that is too fast can reduce the impact of consonants and make a vocal sound less articulate.
An attack that is too slow may allow sharp peaks to pass through without sufficient control.
Adjust the attack according to the vocal’s character.
3. Ignoring Release Settings
Poor release settings can create pumping or cause the compressor to remain engaged between phrases.
Listen carefully to how the gain reduction meter returns toward zero.
The compressor should generally recover in a way that complements the singer’s phrasing.
4. Compressing Without Listening to the Instrumental
Compression should help the vocal work within the overall mix.
Always return to the complete arrangement before finalizing your settings.
A vocal that sounds heavily compressed in solo may work perfectly in a dense mix, while a vocal that sounds natural alone may need additional control to remain audible.
5. Using Compression Instead of Volume Automation
Compression isn’t a replacement for every volume adjustment.
If one word is dramatically quieter than the rest of the performance, clip gain or automation may be a better solution.
Use automation to correct major inconsistencies and compression to control the smaller dynamic variations.
Do You Need Third-Party Plugins to Compress Vocals in Reason?
No.
Reason’s Main Mixer compressor and MClass Compressor are capable of producing professional-quality vocal results when used correctly.
Before purchasing additional plugins, learn how to identify compression problems and solve them using the tools you already own.
However, third-party compressors can provide different workflows, visual feedback, and tonal characteristics.
For example, FabFilter Pro-C 2 offers detailed visual feedback, multiple compression styles, and flexible controls.
Other compressors may introduce analog-inspired coloration that complements certain vocal performances.
These tools can be valuable, but they aren’t required to achieve a good mix.
Affiliate disclosure: Some links in this article may be affiliate links. If you purchase through these links, Pluginera may earn a commission at no additional cost to you.
Frequently Asked Questions
Is Reason good for mixing vocals?
Yes. Reason includes a comprehensive mixing console with EQ, compression, gating, insert effects, and send effects. Its built-in tools are capable of handling many common vocal mixing tasks without additional plugins.
What is the best compression ratio for vocals?
A ratio between 2:1 and 4:1 is a useful starting point for many vocal recordings. However, the best ratio depends on the performance, recording dynamics, and desired sound.
Should I use MClass Compressor or Reason’s mixer compressor?
Both are useful. The mixer compressor is convenient for straightforward dynamic control, while MClass offers more detailed attack and release adjustments. You can also combine them for serial compression.
How much gain reduction should I use on vocals?
For moderate vocal compression, approximately 2–5 dB of gain reduction on louder phrases can be a useful starting point. Some performances may need less, while others may benefit from more. Always judge the results by listening.
Should I compress vocals before adding reverb?
In many vocal mixes, compression is applied to the dry vocal before it is sent to reverb. This helps maintain a consistent vocal level while allowing the reverb to create depth. Other routing choices can also work depending on the desired effect.
Final Thoughts: Learning Vocal Compression in Reason
Learning how to compress vocals in Reason is an important step toward becoming a more confident mixing engineer.
The key isn’t memorizing one set of compressor settings.
It’s understanding how threshold, ratio, attack, and release interact with the performance you’re mixing.
Start with Reason’s built-in channel compressor and experiment with gentle gain reduction.
Once you’re comfortable hearing the difference, explore MClass Compressor for more detailed control.
As your skills improve, you can experiment with serial compression, volume automation, and more advanced vocal processing techniques.
Most importantly, remember that compression should support the music.
A well-compressed vocal doesn’t necessarily sound heavily processed. It simply feels consistent, clear, and connected to the instrumental.
And that’s the goal of a great vocal mix.