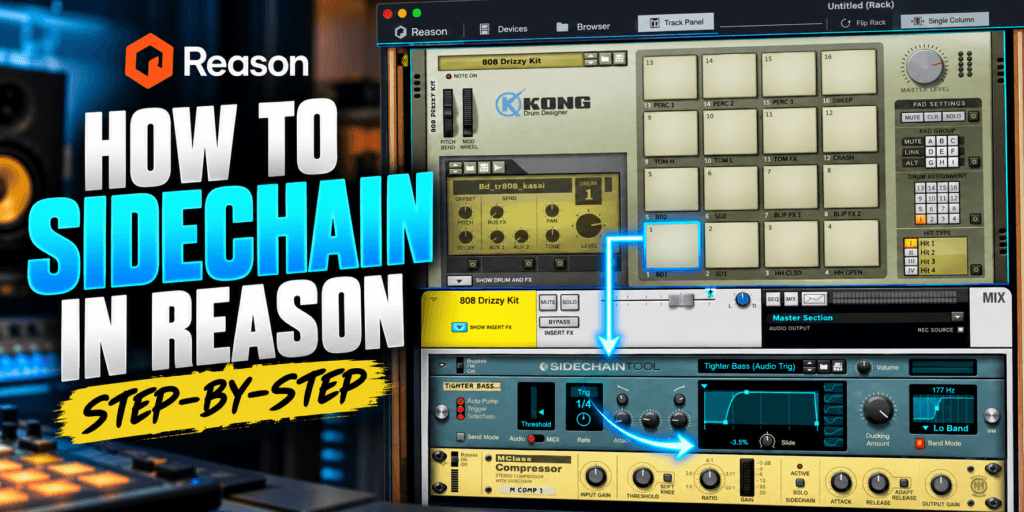
 How to Sidechain in Reason (Step-by-Step)
If you’ve ever struggled to get your kick drum and bass to sit together in a mix, sidechain compression might be exactly what you need.
One of the biggest challenges in music production is getting low-frequency instruments to work together without fighting for space. Your kick might sound powerful on its own, and your bass might sound incredible, but when you play them together, the mix can become muddy or lose its punch.
Fortunately, Reason gives you several ways to solve this problem.
Whether you’re producing Hip-Hop, R&B, Trap Soul, EDM, or Pop, learning how to sidechain in Reason can help you create cleaner mixes, tighter low-end relationships, and more rhythmic movement.
In this guide, we’ll explore how sidechain compression works, how to set it up using Reason’s built-in SSL-style mixer, and how to use Reason’s Sidechain Tool for even more control.
Let’s get started.
What Is Sidechain Compression?
Sidechain compression is a mixing technique that uses one audio signal to control the compression applied to another.
In traditional compression, a compressor responds to the dynamics of the audio passing through it.
With external sidechain compression, the compressor responds to a separate audio signal instead.
For example, imagine you have two tracks:
- A kick drum
- A bass instrument
Normally, both instruments play simultaneously, potentially competing for the same low-frequency space.
By using the kick drum as the sidechain trigger for a compressor on the bass, you can temporarily reduce the bass volume whenever the kick hits.
Once the kick stops triggering compression, the bass returns toward its original level.
This process is often called ducking.
The result can be a tighter, more controlled low end without needing to permanently lower the bass volume.
Why Is Sidechain Compression Important?
Sidechain compression can help solve several common mixing problems.
1. Kick and Bass Clashing
Kick drums and bass instruments often occupy overlapping frequency ranges. Sidechain compression can help create temporary space for the kick.
2. Muddy Mixes
When multiple instruments compete for the same space, a mix can lose clarity. Ducking selected elements can help improve separation.
3. Lack of Rhythmic Movement
Sidechain compression can create a pumping effect that adds movement to otherwise static sounds.
4. Vocals Getting Buried
You can use a vocal signal to trigger subtle compression on competing instruments, helping the vocal remain intelligible.
However, sidechain compression isn’t always necessary. Sometimes adjusting levels, EQ, arrangement, or sound selection is enough.
The goal isn’t to sidechain everything. It’s to use the technique when it improves the music.
How to Sidechain in Reason Using the SSL-Style Mixer
One of my favorite things about Reason is its built-in mixing console.
Reason’s SSL-inspired mixer provides EQ, dynamics processing, routing, and other useful tools directly on each channel.
You don’t necessarily need a third-party plugin to create a professional-sounding mix.
Let’s walk through setting up sidechain compression between a kick drum and bass instrument.
Step 1: Create Your Kick and Bass Tracks
Open Reason and create a project containing a kick drum and bass instrument.
For this example, you could use:
- Redrum, Kong, or an audio track for your kick
- Subtractor, Europa, Monotone, or another instrument for your bass
Make sure both instruments have their own mixer channels.
This is important because we’ll use the kick to control compression on the bass.
Play your beat and listen to how the two instruments interact.
Does the kick disappear when the bass plays? Does the low end feel congested?
If so, sidechain compression may help.
Step 2: Open Reason’s Rack
Navigate to Reason’s Rack view.
The Rack is where Reason’s instruments, effects, and routing connections live.
Each instrument or audio track routed to the main mixer has an associated channel device.
We’re going to work with the connections on the back of those devices.
Step 3: Flip the Rack Around
Press the Tab key to flip Reason’s Rack and reveal the rear-panel connections.
Locate the channel devices associated with your kick and bass tracks.
On the kick channel, look for the Parallel outputs.
On the bass channel, locate the Dynamics Sidechain inputs.
These connections allow you to send an external signal into the bass channel’s dynamics processor.
Step 4: Connect the Kick to the Bass Sidechain Input
Connect one of the kick channel’s Parallel outputs to the bass channel’s Dynamics Sidechain input.
For a mono kick signal, you can use the left connection.
This sends a copy of the kick signal to the bass channel’s compressor detector.
Importantly, the kick still plays through its normal mixer channel.
You’re not replacing the kick’s main audio path. You’re simply using a copy of its signal to control the bass compressor.
Step 5: Open Reason’s Main Mixer
Return to the front of the Rack and open Reason’s Main Mixer.
Find the bass channel.
In the Dynamics section, locate the compressor controls.
You should also see the KEY button activated when the external sidechain signal is connected.
The KEY indicator tells you that the channel’s dynamics processor is receiving an external signal.
Make sure the compressor is switched on.
Step 6: Adjust the Compressor Settings
Now it’s time to shape how the bass responds to the kick.
Start with these settings as a general guide:
| Parameter | Suggested Starting Point |
|---|---|
| Ratio | 4:1 |
| Attack | FAST enabled |
| Release | 100–150 ms |
| Threshold | Lower until you see approximately 2–4 dB of gain reduction |
These are starting points, not universal settings.
Reason’s mixer compressor uses a FAST attack switch rather than a continuously adjustable attack-time knob. With FAST disabled, the compressor uses its slower attack behavior.
For kick-and-bass ducking, start with FAST enabled and compare the result with FAST disabled.
Lower the threshold until you see the gain-reduction meter responding to the kick.
Listen carefully.
The bass should move out of the way briefly when the kick hits, then recover naturally.
If the bass sounds like it’s disappearing completely, you may be applying too much compression.
Step 7: Fine-Tune the Release Time
Release is one of the most important controls when sidechaining.
It determines how quickly the compressor stops reducing the bass after the triggering signal falls below the threshold.
If the release is too short, the bass may recover abruptly.
If it’s too long, the bass might remain suppressed into the next note or kick hit.
Try adjusting the release while your beat plays.
For slower R&B and Trap Soul productions, a release around 100–200 milliseconds can be a useful starting point.
For faster rhythmic material, shorter settings may work better.
The correct setting depends on the tempo, kick length, bass performance, and desired groove.
Producer Tip: Don’t adjust the compressor while listening only to the bass. Listen to the kick and bass together, then check the entire mix.
How to Use Reason’s Sidechain Tool
Reason also includes a dedicated device called Sidechain Tool, introduced with Reason 13.
This device makes sidechain-style pumping and ducking easier to create without always needing complex routing.
It provides three main operating modes:
- Auto Pump
- Trigger
- Sidechain
Each mode serves a different purpose.
Step 1: Add Sidechain Tool to Your Bass Channel
Open the Rack and select your bass instrument or its Mix Channel.
Add Sidechain Tool as an insert effect.
When inserted correctly, the bass signal passes through the device before reaching the main mixer.
For this first example, we’ll use Auto Pump mode.
Step 2: Select Auto Pump Mode
Auto Pump automatically creates rhythmic volume ducking based on Reason’s tempo.
Unlike traditional external sidechain compression, Auto Pump doesn’t need an incoming kick signal.
Instead, it follows an adjustable rhythmic curve.
This is especially useful when you want a consistent pumping effect.
Step 3: Adjust the Pumping Rate
Use the Rate control to determine how frequently the ducking occurs.
For a typical four-on-the-floor dance beat, quarter-note pumping is a common choice.
For Hip-Hop and Trap Soul, the ideal rhythm may be less predictable.
If your kick doesn’t play on every beat, automatic quarter-note pumping might not follow the actual drum pattern.
In that situation, Trigger mode or traditional sidechain compression may work better.
Step 4: Adjust the Ducking Curve
Sidechain Tool allows you to shape the volume movement using controls such as:
- Attack
- Hold
- Release
- Attack Shape
- Release Shape
- Slide
These parameters determine how quickly the volume drops, how long it remains reduced, and how it returns.
For subtle ducking, use a smaller Ducking Amount and a smooth recovery.
For an obvious pumping effect, increase the Ducking Amount and experiment with the curve shape.
You can also use the graphical display to customize the curve.
Step 5: Experiment With Band Mode
One particularly useful feature of Sidechain Tool is Band Mode.
Instead of reducing the entire signal, Band Mode allows you to duck a selected low- or high-frequency region.
For example, you might want to reduce the low frequencies of a bass instrument whenever the kick hits without affecting as much of its upper harmonics.
This can help maintain the bass’s audible character while controlling low-frequency competition.
Remember that Auto Pump is tempo-driven. If you need the ducking to follow the actual kick hits, use a suitable Trigger or Sidechain setup.
Using Trigger Mode for More Precise Sidechaining
Trigger mode provides additional flexibility.
Rather than applying ducking at a fixed rhythmic interval, you can trigger the ducking curve using audio, MIDI notes, or CV.
This is particularly useful for Hip-Hop and Trap Soul because kick patterns frequently include syncopation and unexpected rhythmic accents.
How to Trigger Sidechain Tool With a Kick
- Insert Sidechain Tool on your bass channel.
- Switch the device to Trigger mode.
- Select Audio as the trigger source.
- Flip the Rack to reveal the rear-panel connections.
- Connect a Parallel output from your kick channel to Sidechain Tool’s Sidechain Input.
- Return to the front panel and adjust the Audio Threshold until the kick reliably triggers the ducking curve.
- Adjust Ducking Amount, Attack, Hold, and Release to control the movement.
Now, instead of ducking automatically on every beat, the bass responds to the actual kick pattern.
This can produce a more natural result when the kick rhythm changes throughout the arrangement.
You can also use MIDI triggering when you want complete control over when the ducking occurs.
Using Traditional Compression in Sidechain Tool
Sidechain Tool also includes a conventional Sidechain mode.
This mode behaves differently from Auto Pump and Trigger.
Rather than using the editable ducking curve, it uses compressor controls such as Threshold, Ratio, Attack, Release, and Gain.
To use it:
- Insert Sidechain Tool on the track you want to compress.
- Select Sidechain mode.
- Connect your kick signal to the device’s rear-panel Sidechain Input.
- Adjust the Threshold until compression occurs.
- Set the Ratio to determine compression intensity.
- Adjust Attack and Release to control the compressor’s response.
- Monitor the compression display while listening.
You can also filter the incoming sidechain signal to change which frequencies trigger the compressor.
For example, filtering the detector signal can help focus the compressor’s response on the lower-frequency portion of a kick.
Unlike Band Mode, which controls the frequencies being ducked, detector filtering changes what the compressor listens to.
Understanding that difference gives you much more control.
Best Sidechain Settings for Hip-Hop, R&B, and Trap Soul
Different genres often benefit from different sidechain approaches.
Here are some useful starting points.
| Genre | Approach | Starting Gain Reduction |
|---|---|---|
| Hip-Hop | Controlled kick/bass ducking | 2–4 dB |
| R&B | Gentle, transparent ducking | 1–3 dB |
| Trap Soul | Rhythmic ducking that follows the kick | 2–4 dB |
| EDM | More pronounced pumping | 4–8 dB or more |
These values are creative guidelines rather than rules.
In R&B, you might want the bass to remain smooth and consistent.
In Trap Soul, the kick and 808 may need a stronger relationship, especially when they overlap.
In EDM, obvious pumping can become part of the musical identity.
Always make decisions based on what the production needs.
How to Sidechain an 808 to a Kick in Reason
808 bass sounds introduce a slightly different challenge.
Unlike a traditional electric bass, an 808 often contains a strong transient followed by a long, sustained low-frequency tail.
If your kick and 808 overlap, they can compete for headroom.
Here’s a practical approach.
Step 1: Balance the Kick and 808 First
Before inserting compression, adjust the levels of both instruments.
Make sure neither sound is unnecessarily loud.
Listen to the relationship between the kick transient and the 808 sustain.
Step 2: Check the Arrangement
Sometimes the easiest solution is to adjust the timing or length of the 808.
If the 808 already contains a strong kick-like attack, layering another kick may not always be necessary.
Step 3: Apply Subtle Sidechain Compression
Use the kick to trigger compression on the 808.
Start with approximately 2–3 dB of gain reduction.
Use a fast attack and adjust the release so the 808 recovers naturally after the kick.
Step 4: Compare With and Without Compression
Bypass the compressor and listen.
Does the kick become clearer when compression is active?
Does the 808 retain its energy?
If the answer is yes, you’re probably moving in the right direction.
If the mix loses impact, reduce the compression or reconsider whether sidechaining is necessary.
How to Sidechain Synth Pads and Melodies in Reason
Sidechain compression isn’t limited to low-frequency instruments.
You can also use it to create movement in pads, synthesizers, and other melodic elements.
For example, imagine an atmospheric Trap Soul beat with:
- A warm electric piano
- A wide synthesizer pad
- A deep bass
- A punchy kick
- A spacious vocal
The pad might sound beautiful by itself but occupy too much space when the drums enter.
By applying subtle sidechain ducking to the pad, you can create additional rhythmic movement without completely changing the sound.
You could use Auto Pump for consistent movement or Trigger mode to follow your kick pattern.
Start with a modest Ducking Amount.
The goal might be to make the pad breathe around the drums rather than create an obvious pumping effect.
This technique can be especially effective when transitioning from a sparse verse into a fuller chorus.
How to Sidechain Reverb in Reason
Another useful application is ducking reverb.
Reverb adds depth and atmosphere, but excessive reverb can reduce clarity.
This is especially noticeable on vocals.
Imagine a vocal with a long, lush reverb tail.
When the singer performs a phrase, the reverb may compete with the dry vocal.
One solution is to duck the reverb while the singer is performing and allow it to become more audible between phrases.
Setting Up Vocal Reverb Ducking
- Create a dedicated Mix Channel for your reverb return.
- Insert your preferred reverb, such as RV7000 MkII, and configure the return for wet-only processing.
- Send your dry vocal to the reverb return using an appropriate mixer send.
- Insert a compressor on the reverb return, after the reverb.
- Route a copy of the dry vocal signal to the compressor’s sidechain input.
- Adjust the threshold and release until the reverb becomes quieter during vocal phrases and recovers between them.
If you’re using Reason’s mixer compressor, you can make the sidechain connection through the reverb return’s Mix Channel Dynamics Sidechain input.
Keep the compressor after the reverb in the processing order so it ducks the reverb tail rather than simply reducing the signal feeding the reverb.
The result can be a vocal that remains clear and upfront while still benefiting from spacious effects.
For more vocal mixing techniques, read our guides:
- How to Mix Vocals in Reason: A Beginner’s Guide
- How to Build a Vocal Chain in Reason (Step-by-Step)
Common Sidechain Compression Mistakes
Although sidechain compression is useful, it’s easy to overdo it.
Here are some common mistakes to avoid.
1. Using Too Much Compression
Excessive gain reduction can make instruments sound unnatural or weak.
Start conservatively and increase the effect only when necessary.
2. Choosing the Wrong Release Time
A release that’s too long can cause the bass to remain suppressed.
A release that’s too short can create abrupt level changes or distortion-like artifacts.
Adjust the release while listening to the groove.
3. Sidechaining Before Balancing the Mix
Sidechain compression shouldn’t replace basic level balancing.
Set reasonable kick and bass levels first.
4. Ignoring the Arrangement
Sometimes instruments clash because they’re playing in the same register at the same time.
Changing the arrangement may solve the problem more effectively than adding processing.
5. Using Auto Pump When the Kick Pattern Is Irregular
Auto Pump is excellent for predictable rhythmic effects.
However, it doesn’t automatically follow every kick hit.
If your drums contain syncopation, Trigger mode or traditional sidechain compression may give you better control.
6. Forgetting to Compare the Processed and Unprocessed Signals
Always bypass your sidechain processing periodically.
If the mix doesn’t sound better, reconsider your settings.
Do You Need Third-Party Sidechain Plugins for Reason?
Not necessarily.
Reason’s built-in mixer, MClass Compressor, and Sidechain Tool provide several ways to accomplish sidechain compression and rhythmic ducking.
For many producers, these tools are more than enough.
However, some third-party plugins offer specialized workflows.
For example, dedicated volume-shaping plugins can provide graphical envelope editing, rhythmic triggering, and visual feedback.
Popular options worth exploring include:
A volume-shaping effect designed for detailed rhythmic volume movement. It’s useful for producers who want precise control over pumping patterns.
A dedicated ducking plugin offering envelope-based volume control and sidechain-oriented workflows.
Xfer Records LFO Tool
A creative modulation plugin commonly used for rhythmic volume shaping and pumping effects.
These tools can be useful, but they aren’t essential purchases.
If you’re new to sidechain compression, I recommend learning Reason’s built-in tools first.
Understanding what you’re trying to accomplish is more important than owning a particular plugin.
If you eventually decide to expand your setup, you can explore available mixing and creative effects through Plugin Boutique.
Affiliate disclosure: This article may contain affiliate links. If you purchase through qualifying links, Pluginera may earn a commission at no additional cost to you.
Frequently Asked Questions
Does Reason Have Sidechain Compression?
Yes. Reason supports sidechain compression through its Main Mixer’s dynamics section, compatible compressor devices, and the dedicated Sidechain Tool.
Can You Sidechain Without a Third-Party Plugin in Reason?
Absolutely. Reason includes built-in tools capable of traditional sidechain compression and rhythmic ducking.
What Is the Difference Between Sidechain Compression and Ducking?
Ducking refers to temporarily reducing the level of a signal.
Sidechain compression is one way to create ducking, using a separate signal to trigger compression.
Volume automation and envelope-based effects can also create ducking.
Should I Sidechain My Kick and Bass?
Only when the mix benefits from it.
If your kick and bass already work together, additional compression might be unnecessary.
What Is the Best Sidechain Release Time?
There isn’t one universal setting.
A release between 100 and 200 milliseconds can be a useful starting point for some slower productions, but the best value depends on tempo, instrument envelopes, and musical context.
Is Sidechain Tool Better Than Reason’s Mixer Compressor?
Neither is automatically better.
Reason’s mixer compressor is excellent for traditional compression-based ducking, while Sidechain Tool offers additional options such as Auto Pump, Trigger mode, and frequency-selective ducking.
Choose the tool that best fits your workflow.
Final Thoughts: Learning to Sidechain in Reason
Sidechain compression is one of those techniques that can make a noticeable difference once you understand when and why to use it.
Whether you’re trying to create space between your kick and bass, add rhythmic movement to synth pads, or keep reverb from overwhelming a vocal, Reason provides the tools you need.
The most important thing is learning to listen.
Don’t sidechain an instrument simply because you’ve seen another producer do it.
Identify a problem, choose an appropriate technique, and listen to whether the result improves your mix.
Start with Reason’s built-in SSL-style mixer, experiment with Sidechain Tool, and gradually develop your own approach.
With practice, you’ll begin making sidechain decisions based on what you hear rather than relying on presets or arbitrary settings.
And that’s where real mixing confidence begins.