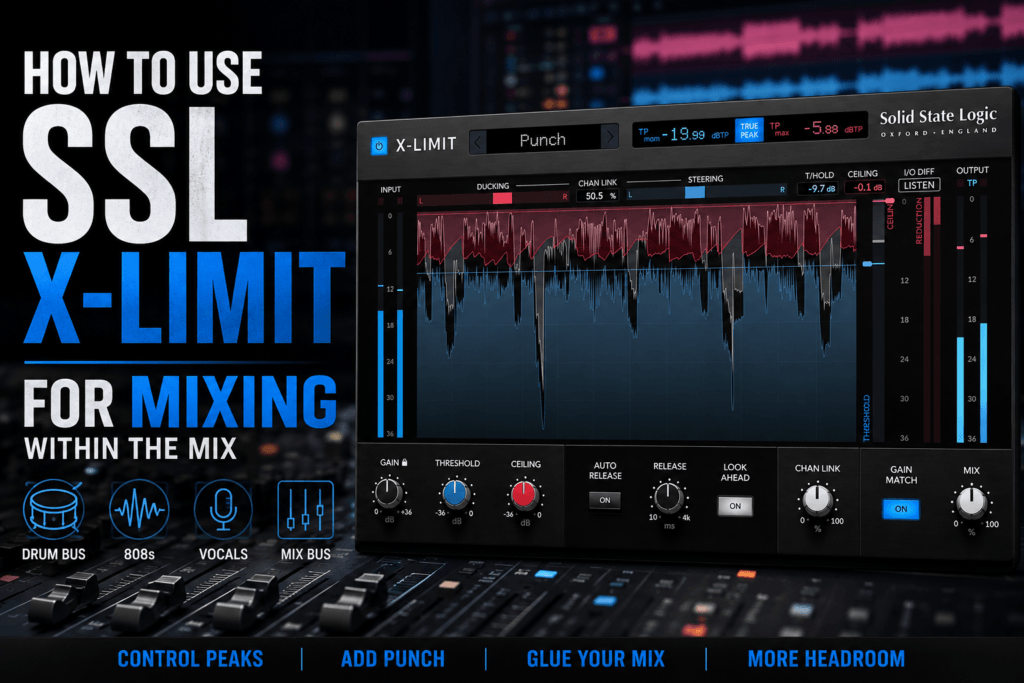
 Limiters are usually associated with mastering.
You finish your mix, put a limiter at the end of the mastering chain, increase the level, and try to make the song competitively loud.
But that’s only one way to use a limiter.
In Hip Hop and R&B production, a good limiter can also be an extremely useful mixing tool.
You can use limiting to tame unpredictable vocal peaks, control an 808, add density to drums, glue buses together, and prevent individual sounds from eating up unnecessary headroom.
That’s where SSL X-Limit becomes interesting.
With four limiting styles—Transparent, Glue, Punch, and Auto—along with True Peak processing, Lookahead, Auto Release, Channel Link, Gain Match, and a Mix control, X-Limit can handle much more than final-master loudness.
In this guide, I’ll show you How to use SSL X-Limit for mixing and, more importantly, explain when limiting actually makes sense during a mix.
What Does a Limiter Do During Mixing?
Before throwing X-Limit onto every track, it’s important to understand what we’re trying to accomplish.
A limiter is essentially an extremely aggressive form of dynamic control.
Once the signal reaches a certain level, the limiter prevents peaks from exceeding the level you’ve established.
During mastering, this allows us to increase perceived loudness.
During mixing, however, we can use that same behavior to control peaks and reshape dynamics.
Imagine your snare sounds great, but every few hits jump several decibels louder.
Instead of compressing the entire snare heavily, you could let X-Limit catch those occasional peaks.
The same concept applies to:
- Vocals
- 808s
- Kicks
- Snares
- Drum buses
- Samples
- Instrument buses
- Background vocals
The key is restraint.
We’re not necessarily trying to make every individual track louder.
We’re trying to make the mix easier to control.
Understanding the Four SSL X-Limit Styles
Before we start mixing, let’s quickly understand the four styles because choosing the right one can dramatically change the result.
Transparent
Transparent is the cleanest starting point.
Use this when you want peak control without dramatically changing the character of the sound.
I like Transparent for:
- Vocals
- 808s
- Bass
- Individual instruments
- Mix buses
- Mastering
If you’re unsure which mode to choose, start here.
Glue
Glue is useful when you’re processing several sounds together.
Rather than thinking about individual peaks, think about making a group of sounds behave more cohesively.
Try Glue on:
- Drum buses
- Background vocals
- Instrument buses
- Sample buses
- Synth groups
This can be especially useful in R&B arrangements containing several layered instruments.
Punch
Punch is where things get more aggressive.
Instead of trying to hide the limiting, Punch can make dynamic processing part of the sound.
This makes it especially interesting for Hip Hop drums.
Try it on:
- Drum buses
- Drum breaks
- Kicks
- Snares
- Percussion loops
- Samples
If you’re working on aggressive Hip Hop or Trap, this may become your favorite X-Limit mode.
Auto
Auto adapts its limiting behavior according to the incoming material.
It’s an excellent starting point when you aren’t sure which limiting characteristic will work best.
Beginners can also use Auto to learn what limiting sounds like before experimenting with more deliberate settings.
How to Use SSL X-Limit on Hip Hop Drums
Let’s start with drums because this is one of the places where X-Limit can really shine.
Imagine you’ve created a drum bus containing:
Kick + Snare + Clap + Hi-Hats + Percussion
Your drums already sound good individually, but together they don’t have the density you want.
Insert X-Limit on the drum bus.
Start with:
Style: Punch
Gain: 0 dB
Ceiling: 0 dB or slightly below
Auto Release: On
Lookahead: On initially
Mix: 100%
Now gradually lower the Threshold.
Don’t immediately chase a gain-reduction number.
Listen.
You should begin hearing the drums become denser and more controlled.
The kick and snare should still feel like they’re jumping out of the speakers.
If they begin sounding flat, you’ve pushed too far.
Back the Threshold off.
Try Parallel Limiting on Your Drum Bus
Here’s where things get fun.
Instead of using subtle limiting, intentionally push X-Limit hard.
Get the drums pumping.
Make them aggressive.
Then use the Mix control to blend the processed signal with the original drums.
For example, you might end up somewhere around:
Mix: 20–50%
Now you’re blending the aggressive character of X-Limit with the transient punch of the original drum signal.
This can make Hip Hop drums feel considerably larger without completely flattening them.
Just remember that blending the dry signal back in can allow peaks to exceed the Ceiling you’ve selected, so don’t treat the Ceiling as an absolute output guarantee when using parallel processing.
Punch vs Glue for Hip Hop Drums
Don’t automatically assume Punch is always better.
Try both.
Punch works when you want:
- Aggression
- Movement
- Energy
- Density
- More obvious dynamics processing
Glue works when you want:
- Cohesion
- Smoother dynamics
- Controlled peaks
- A unified drum sound
For something like boom bap, Punch could sound fantastic on a chopped drum break.
For smoother Trap Soul or R&B drums, Glue might fit the record better.
Let the song decide.
How to Use SSL X-Limit on an 808
808s are one of the biggest challenges in modern Hip Hop mixing.
The problem isn’t always that the 808 sounds too loud.
It’s often the peak-to-average relationship.
Certain notes can create enormous peaks while others sit comfortably in the mix.
Those peaks eat up headroom.
That becomes a problem when you eventually try to make the entire record louder.
X-Limit can help control them.
Try this chain:
EQ → Saturation → Compression if needed → SSL X-Limit
Set X-Limit to Transparent.
Then gradually lower the Threshold until the limiter catches the loudest peaks.
You don’t need to destroy the 808.
We’re simply trying to shave off excessive peaks.
Watch Your 808 Gain Reduction
This is where your ears matter.
An 808 needs movement.
If you aggressively limit it, you can remove the dynamics that make the bass line groove.
Start conservatively.
Try allowing X-Limit to catch approximately 1–3 dB of the biggest peaks as an initial experiment.
That’s not a rule.
Some sounds may need less.
Others might tolerate considerably more.
But it gives you somewhere to start.
By controlling those peaks earlier in the mix, you may find that your master limiter doesn’t need to work nearly as hard later.
Using X-Limit on Kicks
You can apply a similar technique to kicks.
Sometimes a kick has an enormous transient that makes the meter jump even though the kick doesn’t actually sound particularly loud.
Transparent limiting can shave down that transient.
Start with:
Style: Transparent
Auto Release: On
Lookahead: On
Gain reduction: Very light
Compare the processed and unprocessed kick.
You want the kick to retain its impact.
If the kick starts sounding soft, you’ve gone too far.
Using X-Limit on Snares and Claps
Snares and claps can be extremely transient-heavy.
That’s usually a good thing.
You don’t want to automatically remove those transients.
But occasionally a snare has so much peak energy that it unnecessarily limits how loud the rest of your mix can become.
Try X-Limit in Transparent mode first.
Let it catch only the hardest peaks.
For more aggressive Hip Hop production, try Punch.
The difference can be dramatic.
Transparent should preserve the original character.
Punch can turn the limiter into part of the sound design.
How to Mix R&B Vocals with SSL X-Limit
Vocals are another excellent use case.
Modern R&B vocals often need to feel extremely close to the listener.
Even when the instrumental becomes dense, the vocal should remain present and controlled.
Compression handles most of that job.
But compression doesn’t always catch every peak.
That’s where X-Limit comes in.
A vocal chain could look something like:
Corrective EQ → Compression → De-Esser → Tone/Saturation → SSL X-Limit
Notice that X-Limit is toward the end.
The compressor handles the overall dynamics.
X-Limit catches the peaks that remain.
SSL X-Limit Vocal Starting Point
Try:
Style: Transparent
Auto Release: On
Lookahead: On
Mix: 100%
Then lower the Threshold until you’re catching occasional peaks.
You might start by experimenting with roughly:
1–2 dB of peak limiting
Again, that’s not a rule.
Listen to the vocal.
You shouldn’t necessarily hear the limiter working.
Instead, the vocal should simply become easier to keep consistently positioned in the mix.
Why Limit Vocals After Compression?
This is an important concept.
Suppose you ask your compressor to control everything.
Now the compressor might need to perform 6, 8, or even 10 dB of gain reduction when the vocalist gets loud.
That can dramatically change the character of the performance.
Instead, you can divide the workload.
The compressor handles the musical dynamics.
X-Limit handles the extreme peaks.
That allows each processor to do less.
And that’s a principle you’ll see constantly in professional mixing:
Several processors doing small amounts of work can sound more natural than one processor doing everything.
Using X-Limit on Background Vocals
Background vocals are different.
Individual dynamics matter less because we’re often trying to make several voices behave like a single musical layer.
This makes Glue worth trying.
Route your background vocals to a bus.
You might already have:
EQ → Compression → Saturation
Then add X-Limit.
Choose Glue.
Lower the Threshold slightly and listen to how the vocals begin interacting.
You’re not trying to crush them.
You’re trying to make the background vocals feel like one instrument behind the lead vocal.
Using SSL X-Limit on Samples
Samples can have unpredictable dynamics.
This is particularly true when sampling older records.
A sample might contain:
- Drums
- Bass
- Vocals
- Strings
- Keys
- Percussion
all inside one stereo file.
Controlling that with traditional compression can sometimes be difficult.
X-Limit can catch the extreme peaks without requiring you to completely reshape the sample.
Try Transparent first.
If you’re deliberately creating something gritty or aggressive, experiment with Punch.
For chopped soul samples, you may find that harder limiting adds a character that actually complements the production.
Using X-Limit on Instrument Buses
Modern R&B arrangements often contain layers.
You might have:
- Electric piano
- Pads
- Synths
- Guitar
- Strings
- Vocal textures
Instead of processing every instrument individually, route related instruments to a bus.
Then try X-Limit in Glue mode.
Use very light limiting.
The objective isn’t loudness.
We’re trying to make several instruments feel like they’re occupying the same musical space.
Don’t Limit Everything
This deserves its own section.
Once you discover how useful peak control can be, it’s tempting to put limiters everywhere.
Don’t.
Not every track needs limiting.
Some sounds benefit from dynamics.
A piano should breathe.
A guitar might need transient movement.
A percussion loop might groove specifically because certain hits are louder than others.
Ask yourself:
What problem am I solving with this limiter?
If you don’t have an answer, you probably don’t need it.
Using Auto Release
Release controls how quickly X-Limit stops reducing the signal after a peak.
A poorly chosen release can create:
- Pumping
- Distortion
- Reduced punch
- Unnatural dynamics
X-Limit’s Auto Release makes this considerably easier.
When enabled, the plugin adapts its release behavior according to the incoming audio.
For most mixing situations, I’d start with Auto Release enabled.
Then manually adjust Release only when you have a specific sound you’re trying to achieve.
Using Lookahead
Lookahead allows X-Limit to anticipate incoming peaks.
That can produce cleaner peak control.
For things like:
- Vocals
- 808s
- Bass
- Transparent limiting
I’d generally start with Lookahead enabled.
For drums, however, experiment.
Sometimes the behavior you get without Lookahead can produce a more aggressive transient response.
There isn’t one correct answer.
A/B both settings.
Use Gain Match Before Making Decisions
One of the biggest mistakes producers make when using dynamics processors is assuming:
Louder = better.
Our ears naturally prefer louder signals during quick comparisons.
X-Limit’s Gain Match feature helps compensate for this.
Turn Gain Match on and compare your processed signal against the original.
Ask:
Does the kick actually hit harder?
Is the vocal actually more controlled?
Does the drum bus actually sound better?
Or was it simply louder?
This feature can save you from over-processing your mix.
SSL X-Limit on the Mix Bus
Now we reach the dangerous part.
You absolutely can use X-Limit on your mix bus.
But don’t use it to hide problems.
Your mix should already work before the limiter.
Start with Transparent.
Use very light limiting.
You may only want X-Limit catching occasional peaks.
The goal at this stage isn’t necessarily mastering-level loudness.
Instead, think of X-Limit as controlling the final few peaks that are sticking out of your mix.
A Simple Hip Hop Mix Bus Chain
You could experiment with something like:
EQ → Bus Compression → Saturation → SSL X-Limit
Each processor has a different job.
EQ handles tonal balance.
Compression controls movement and glue.
Saturation adds harmonics and character.
X-Limit controls final peaks.
Notice that we’re not asking X-Limit to fix everything.
That’s important.
A Simple R&B Mix Bus Chain
For smoother R&B, you might try:
Subtle EQ → Gentle Bus Compression → Light Saturation → SSL X-Limit
Use Transparent or experiment with Glue.
Keep the processing subtle.
R&B often benefits from maintaining movement and depth.
You don’t want the mix to become completely flat just because you’re chasing loudness.
True Peak Limiting While Mixing
True Peak processing is most important during final mastering and delivery.
You don’t necessarily need True Peak enabled every time you place X-Limit on an individual track.
For example, if you’re using X-Limit creatively on a drum bus, True Peak isn’t necessarily the priority.
When X-Limit becomes your final mastering limiter, however, True Peak becomes much more relevant.
That’s when you’re preparing the finished song for playback outside your DAW.
Common SSL X-Limit Mistakes
There are several mistakes I’d avoid.
1. Chasing Gain Reduction Numbers
Don’t decide that every track needs exactly 3 dB of limiting.
Different sounds require different processing.
Listen first.
2. Flattening Your Drums
Hip Hop drums need transients.
If your kick and snare stop hitting after adding X-Limit, reduce the processing.
3. Destroying Your 808
Controlling an 808 is good.
Removing all of its dynamics isn’t.
4. Using Limiting Instead of Fixing the Mix
If your vocal is buried, turning it up and limiting it harder isn’t always the answer.
You may need EQ, automation, compression, or better arrangement decisions.
5. Confusing Loudness with Quality
Always level-match your comparisons.
Gain Match exists for a reason.
My SSL X-Limit Starting Points for Hip Hop & R&B
Here’s a quick cheat sheet.
| Source | Style | Starting Approach |
|---|---|---|
| Lead Vocal | Transparent | Catch occasional peaks |
| Background Vocals | Glue | Light bus limiting |
| 808 | Transparent | Shave excessive peaks |
| Kick | Transparent | Very light peak control |
| Snare | Transparent/Punch | Control or enhance transients |
| Drum Bus | Punch/Glue | Add density or cohesion |
| Sample | Transparent/Punch | Control peaks or add character |
| Instrument Bus | Glue | Gentle cohesion |
| Mix Bus | Transparent | Light final peak control |
Treat these as starting points rather than rules.
How Much Limiting Should You Use?
This is probably the most important question.
Use as much as the record needs and no more.
If X-Limit makes your drums punchier, great.
If another decibel of limiting makes them smaller, stop.
If your vocal becomes more consistent, great.
If additional limiting makes it harsh and lifeless, back off.
Your meters provide information.
Your ears make the decision.
Final Thoughts: How to Use SSL X-Limit For Mixing
SSL X-Limit becomes much more useful once you stop thinking of it exclusively as a mastering plugin.
Yes, it can be your final limiter.
But it can also solve several common Hip Hop and R&B mixing problems.
Use Transparent when you need clean peak control.
Use Glue when several sounds need to behave more cohesively.
Use Punch when you want limiting to become part of the character.
Use Auto when you want X-Limit to adapt to the material or simply need a quick starting point.
The biggest lesson, however, isn’t about a particular setting.
It’s understanding why you’re limiting something in the first place.
Don’t put X-Limit on an 808 because someone told you every 808 needs a limiter.
Put it there because you’ve identified excessive peaks that are eating your headroom.
Don’t limit a vocal simply because you saw it in a vocal chain.
Use it when compression has controlled the performance but occasional peaks are still jumping through the mix.
And don’t crush your drum bus simply because Punch mode sounds exciting at first.
Use it because the additional density and movement actually improve the groove.
That’s how SSL X-Limit becomes more than another plugin in your collection.
It becomes another tool you can deliberately reach for when your mix needs control, cohesion, punch, or headroom.
And for modern Hip Hop and R&B production, those are problems you’re going to encounter again and again.