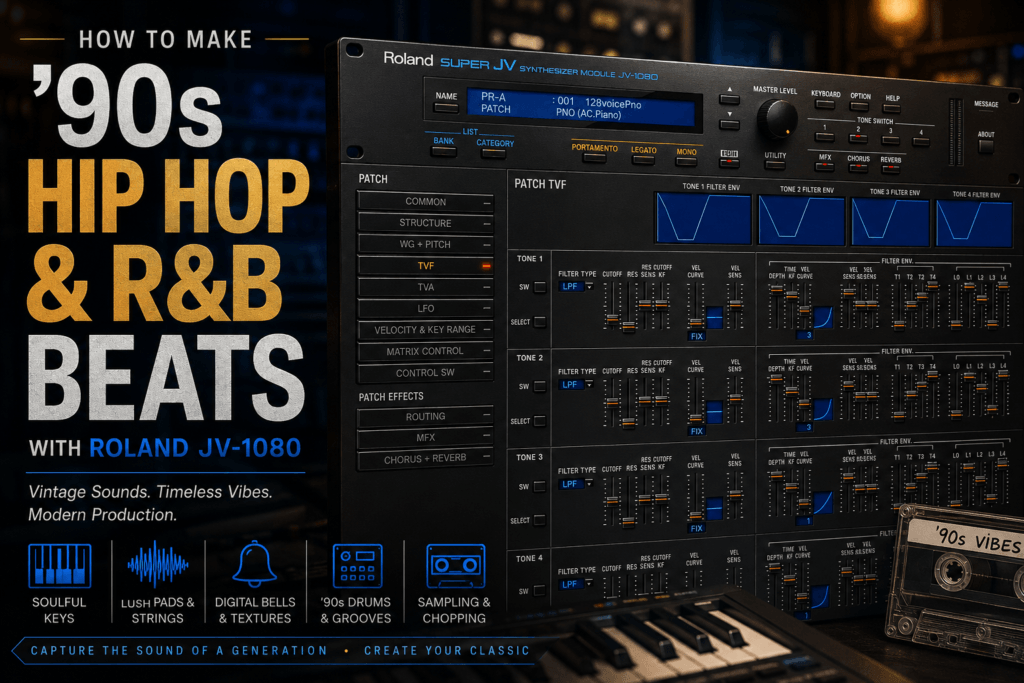
 How to Make ’90s Hip Hop & R&B Beats with Roland JV-1080
There’s something unmistakable about the sound of ’90s Hip Hop and R&B.
Warm keys. Digital bells. Lush strings. Smooth basslines. Atmospheric pads. Punchy drums. Chopped samples. And chord progressions that could carry an entire record before the vocals even entered.
The Roland JV-1080 fits naturally into that world.
Today, the software version brings that classic PCM-based Roland character directly into your DAW.
And while you can certainly use the JV-1080 for modern production, it becomes particularly interesting when you’re deliberately chasing the character of ’90s Hip Hop and R&B.
In this guide, we’ll build that sound from the ground up, covering chords, keys, bass, drums, melodies, strings, sampling techniques, arrangement, effects, and mixing.
Why the JV-1080 Works So Well for ’90s Production
Modern virtual instruments can sound incredibly realistic.
But realism isn’t always what you want.
The ’90s were filled with hardware workstations, rack modules, samplers, drum machines, and digital synthesizers that had their own sonic fingerprints.
The JV-1080 gives you access to that type of character.
Instead of enormous modern acoustic libraries, you get compact PCM-based sounds with an unmistakably digital quality.
That includes:
- Pianos
- Electric pianos
- Strings
- Pads
- Bells
- Synths
- Basses
- Brass
- Choirs
- Orchestral sounds
- Percussion
- Digital textures
These sounds can instantly push a production toward a different era.
The trick is knowing how to use them.
Step 1: Decide Between Hip Hop and R&B
Before choosing a sound, decide what kind of record you’re trying to create.
A ’90s Hip Hop beat might revolve around:
Sample → Bass → Drums → Additional texture
A ’90s R&B beat might lean more toward:
Chords → Bass → Drums → Strings → Melody
There’s obviously plenty of crossover.
But establishing the direction early can help you avoid throwing random sounds into the session.
For this tutorial, we’ll build something that sits somewhere between the two:
smooth ’90s R&B harmony with Hip Hop-inspired drums.
Step 2: Choose Your Tempo
Tempo immediately influences the feel.
Try starting around:
’90s R&B
68–90 BPM
Boom Bap / ’90s Hip Hop
80–100 BPM
Slow Jam
60–75 BPM
Uptempo R&B
90–110 BPM
For our example, let’s choose:
82 BPM
That’s slow enough for smooth R&B chords while still giving the drums enough room to create a Hip Hop groove.
Step 3: Start With a JV-1080 Electric Piano
Open the JV-1080 and begin browsing the keyboard sounds.
Look for an electric piano with enough character to carry the progression.
Don’t worry about finding the biggest or most impressive preset.
You want something that leaves room for:
- Vocals
- Bass
- Drums
- Strings
- Additional melodies
Play the patch by itself for a few minutes.
Then start building chords.
Step 4: Use 7th and 9th Chords
Basic triads can work, but extended harmony will immediately push your production toward R&B.
Let’s work in F minor.
Try:
Fm9 – Dbmaj7 – Abmaj7 – Eb7
You could voice them like this:
Fm9
F – Ab – C – Eb – G
Dbmaj7
Db – F – Ab – C
Abmaj7
Ab – C – Eb – G
Eb7
Eb – G – Bb – Db
Play the progression slowly.
Already, you should have the foundation for something soulful.
Step 5: Make the Chords Feel Played
Don’t leave everything perfectly quantized.
Part of creating a more musical groove is allowing subtle imperfections.
Try:
- Slightly shifting chord timing
- Changing velocities
- Playing some notes softer
- Letting certain notes overlap
- Shortening occasional chords
You don’t need huge timing differences.
Tiny variations are enough.
If every chord starts at exactly the same velocity and every note ends at exactly the same time, the performance can start feeling programmed.
Step 6: Experiment With Chord Inversions
You don’t need to play every chord in root position.
Instead, look for notes shared between neighboring chords.
For example, the C in Fm9 also appears in Dbmaj7.
Rather than moving every note dramatically when changing chords, keep common tones in similar positions.
This creates smoother voice leading.
That’s particularly useful for R&B.
The chords begin flowing into one another rather than sounding like separate blocks.
Step 7: Layer the Keys
Now open a second instance of the JV-1080.
Choose another keyboard or pad patch.
Instead of replacing your first sound, layer the two.
For example:
Electric Piano + Soft Pad
or:
Digital Piano + Strings
or:
Electric Piano + Bell Texture
Keep the second layer quieter.
It shouldn’t necessarily sound like two instruments.
The goal is to create a more complex overall texture.
Step 8: Add a Pad
Pads are one of the JV-1080’s biggest strengths for this style.
Look for something:
- Warm
- Glassy
- Airy
- Digital
- Dreamy
Copy your chord progression onto the pad track.
Then simplify it.
You might remove several notes and leave only:
Root + fifth + seventh
Or simply hold one sustained note underneath each chord.
Turn the pad down.
Now mute it.
If the track suddenly loses atmosphere, the pad is doing its job.
Step 9: Add a Simple Melody
Next, find a bell, mallet, digital synth, pluck, or soft lead.
Don’t immediately start playing dozens of notes.
Start with three.
If we’re in F minor, experiment with:
F – Ab – C
Then expand into:
F – G – Ab – C – Eb
Create a short phrase.
Then leave space.
For example:
Melody → Melody → Rest → Response
This creates room for a singer or rapper.
One of the easiest ways to make a beat difficult to write vocals over is filling every second with melody.
Step 10: Try a JV-1080 Bell
Digital bells can instantly introduce that vintage workstation character.
Find a bell patch and play a simple melody in the upper register.
Then add:
Delay + Reverb
Don’t make the reverb overwhelmingly wet.
You want enough ambience to create depth while keeping the melody recognizable.
Try placing the bell only during the hook.
That immediately helps distinguish your sections.
Step 11: Add Strings
Now let’s make the production more emotional.
Find a JV-1080 string patch.
Copy your chord progression onto it.
Then simplify the voicings.
You don’t necessarily need five-note chords.
Try:
F + C
then:
Db + Ab
then:
Ab + Eb
then:
Eb + Bb
These are essentially fifths.
Place them in higher octaves.
Now bring the strings into the chorus.
The beat should suddenly feel larger without changing the fundamental harmony.
Step 12: Create a Bassline
The bassline is extremely important for this style.
Instead of immediately reaching for an 808, browse the JV-1080’s bass sounds.
Look for something with:
- Warm low end
- Clear attack
- Enough midrange to hear the notes
- Minimal unnecessary brightness
Start by following the chord roots.
Our progression gives us:
F → Db → Ab → Eb
Now create rhythm.
Instead of holding every note for an entire bar, try something like:
F – F – C
Db – Ab – Db
Ab – Eb – Ab
Eb – Bb – Eb
Listen to how the bass interacts with the kick once the drums enter.
Step 13: Add Passing Notes
Passing notes can make a simple bassline feel much more musical.
If you’re moving from F to Db, for example, you might briefly use:
Eb
as a transition.
The bassline becomes:
F → Eb → Db
You can also use octave jumps.
Try:
F1 → F2 → C2
Little movements like this can make the bassline feel performed rather than programmed.
Step 14: Program the Drums
Now we need drums.
You don’t necessarily have to use the JV-1080 for every element.
In fact, combining vintage Roland textures with your favorite drum samples can produce better results.
Start with:
- Kick
- Snare
- Closed hi-hat
That’s it.
Don’t add percussion yet.
Step 15: Start With the Snare
Place your snare on beats:
2 and 4
This establishes the basic backbeat.
For Hip Hop, experiment with moving certain drum hits slightly away from the grid.
The amount should be subtle.
You’re trying to create groove—not bad timing.
Step 16: Create the Kick Pattern
Now program the kick.
Don’t simply follow the bassline exactly.
Let the kick and bass interact.
You might have:
Kick → space → Snare → Kick → Kick → space → Snare
Then adjust it by ear.
One strategically placed kick can create more groove than five unnecessary ones.
Step 17: Add Hi-Hat Swing
Start with eighth-note hi-hats.
Then adjust their velocity.
Try alternating:
Strong – Soft – Strong – Soft
Next, experiment with swing.
You don’t want the hats perfectly rigid.
Slight timing differences can create the relaxed pocket associated with many older Hip Hop and R&B records.
Step 18: Add Percussion
Now add subtle percussion.
Try:
- Shakers
- Tambourines
- Rimshots
- Congas
- Snaps
- Woodblocks
You don’t need all of them.
Choose one or two.
A shaker playing quietly behind the drums can completely change the groove.
Step 19: Make the Drums Feel Older
Modern drum samples can sound extremely clean and aggressive.
That’s not always ideal when you’re chasing a ’90s aesthetic.
Try processing the drum bus.
You could use:
EQ → Saturation → Compression
Experiment with reducing a little extreme high-frequency content.
Then add subtle saturation.
The goal is not necessarily to make the drums lo-fi.
You’re simply trying to make them feel slightly less pristine.
Step 20: Sample the JV-1080
Now we can take things further.
Write an eight-bar progression.
Maybe use:
Electric Piano + Strings + Bell
Add reverb.
Then export that section as audio.
Now start a new track.
Import the audio.
You have just created an original sample.
Step 21: Chop Your Own Sample
Take that audio and cut it into smaller pieces.
For example:
Chop A
First chord.
Chop B
Second chord.
Chop C
End of the progression.
Chop D
Small melodic phrase.
Now rearrange them.
You might play:
A → A → C → B
instead of the original:
A → B → C → D
You’ve transformed your own composition into something new.
This is one of the best ways to combine the JV-1080 with a Hip Hop workflow.
Step 22: Pitch the Sample Down
Try pitching your bounced composition down:
-2 semitones
-3 semitones
or even:
-5 semitones
Listen to how the texture changes.
The keys become darker.
The strings become heavier.
The digital character becomes more obvious.
You can create completely different material from the same original progression.
Step 23: Add Vintage Texture
Now experiment with processing.
Try:
JV-1080 → Saturation → EQ → Chorus → Reverb
For sampled material, you might use:
JV-1080 → Tape Effect → Filter → Saturation
You could also add:
- Vinyl texture
- Wow and flutter
- Bit reduction
- Noise
- Pitch instability
But be careful.
Vintage doesn’t automatically mean destroyed.
Sometimes a little saturation and filtering are all you need.
Step 24: Roll Off Some High Frequencies
One easy trick is reducing some extreme high-frequency content.
Modern digital productions can sound incredibly bright.
Older recordings often feel softer.
Try gently filtering or shelving the upper frequencies of:
- Keys
- Samples
- Pads
- Strings
Don’t automatically do this to everything.
But strategically darkening certain elements can help create a warmer overall presentation.
Step 25: Use Chorus
Chorus works beautifully with this style.
Try it on:
- Electric piano
- Pad
- Strings
- Bass
- Bell
- Synth
Keep the effect subtle.
You’re trying to create movement and width.
A little chorus can make a static digital patch feel much more alive.
Step 26: Use Reverb to Create Depth
Instead of putting every instrument at the front of the mix, create layers of depth.
For example:
Bass: Mostly dry
Electric Piano: Short reverb
Strings: Medium reverb
Pad: Long reverb
Bell: Long reverb + delay
Now the instruments occupy different spaces.
This can make the production feel significantly larger without adding more sounds.
Step 27: Arrange the Beat
Once your eight-bar loop sounds good, stop adding instruments.
Arrange it.
This is critical.
A basic ’90s-inspired R&B arrangement might look like:
Intro — 8 Bars
Keys + texture
Verse — 16 Bars
Keys + bass + drums
Pre-Chorus — 8 Bars
Add pad + percussion
Chorus — 8 Bars
Full drums + keys + bass + strings + bell
Verse 2 — 16 Bars
Return to simpler instrumentation
Chorus — 8 Bars
Full arrangement
Bridge — 8 Bars
Remove drums or change chords
Final Chorus — 8–16 Bars
Bring everything back
Outro — 4–8 Bars
Keys + pad
Now your loop has become a record.
Step 28: Create Section Changes Through Subtraction
You don’t always need new sounds for every section.
Remove sounds.
During the verse:
Mute the strings.
During the pre-chorus:
Remove the kick.
During the chorus:
Bring everything back.
During the bridge:
Remove the drums entirely.
These changes make the listener feel movement without requiring dozens of additional tracks.
Step 29: Add Transition Effects
Use transitions sparingly.
Try:
- Reverse cymbals
- Drum fills
- Reversed JV chords
- Delay throws
- Filter sweeps
- Cymbal crashes
- Short vocal textures
One of the coolest techniques is reversing your own JV-1080 chord.
Bounce a chord to audio.
Reverse it.
Place it directly before the chorus.
Now the sound sweeps naturally into the next section.
Step 30: Mix Around the Vocal
If you’re making R&B or Hip Hop beats for artists, remember:
The beat isn’t finished until there’s room for the artist.
Your instrumental doesn’t need to occupy every frequency.
Pay particular attention to the midrange.
That’s where you’ll find:
- Piano
- Electric piano
- Strings
- Synths
- Guitars
- Pads
- Vocals
If all of those elements are huge, the vocalist won’t have anywhere to sit.
Keep supporting elements supporting.
A Simple JV-1080 ’90s R&B Template
Here’s a straightforward session you can build.
Music
Track 1 — JV-1080 Electric Piano
Main chords.
Track 2 — JV-1080 Pad
Atmosphere.
Track 3 — JV-1080 Strings
Chorus lift.
Track 4 — JV-1080 Bell
Main melodic accent.
Track 5 — JV-1080 Texture
Background layer.
Bass
Track 6 — JV-1080 Bass
Main bassline.
Drums
Track 7 — Kick
Track 8 — Snare
Track 9 — Hi-Hat
Track 10 — Shaker
Track 11 — Percussion
Effects
Track 12 — Reverse FX
Track 13 — Texture/Noise
Aux Effects
Track 14 — Short Reverb
Track 15 — Long Reverb
Track 16 — Delay
That’s already enough to make a complete record.
Recipe: ’90s R&B Beat
Want a quick starting point?
Try this:
Tempo: 76 BPM
Key: F minor
Chords: Fm9 – Dbmaj7 – Abmaj7 – Eb7
Main Sound: JV-1080 Electric Piano
Layer: Soft JV Pad
Hook: JV Strings
Melody: Digital Bell
Bass: Warm Synth Bass
Drums: Punchy Kick + Snare + Loose Hats
Effects: Chorus + Reverb + Delay
Keep the arrangement spacious.
Let the vocalist become the final instrument.
Recipe: ’90s Hip Hop Beat
For something more Hip Hop-oriented:
Tempo: 91 BPM
Start with a JV-1080 piano or orchestral patch.
Write:
4–8 bars
Bounce it to audio.
Pitch it down.
Chop it.
Rearrange the chops.
Then add:
Kick + Snare + Hats + Bass
Add subtle saturation.
Keep the drums punchy.
Now the JV-1080 isn’t simply functioning as a synthesizer.
It’s functioning as your personal record collection.
Don’t Try to Make Everything Sound Old
This is important.
You don’t have to make every part vintage.
Some of the most interesting productions combine eras.
Try:
JV-1080 chords
Vintage-style strings
Modern 808
Modern Trap hats
Contemporary vocal production
Now you’re not simply recreating 1996.
You’re taking the character of that era and using it to create something new.
The Secret Is Restraint
The JV-1080 gives you a lot of sounds.
That doesn’t mean you need to use all of them.
A complete R&B beat might only need:
Keys
Pad
Bass
Drums
One melody
Strings during the chorus
That’s enough.
The emotional impact comes from how those elements interact—not how many tracks you can stack.
Final Thoughts
It’s about understanding what made that era sound different and bringing some of that character into your own productions.
Start with soulful seventh and ninth chords.
Choose JV-1080 keys with character.
Layer subtle pads.
Use strings strategically.
Write simple melodies with bells and digital textures.
Give the bassline movement.
Let the drums groove instead of perfectly following the grid.
And don’t be afraid to bounce the JV-1080 to audio and treat it like a sample.
That’s where this instrument can become especially powerful for Hip Hop producers.
The JV-1080 gives you access to the sound palette of another era, while your modern DAW gives you production capabilities producers in 1994 could only dream about.
Combine the two.
That’s where things get interesting.
If you’re considering adding it to your production setup, check out our Roland JV-1080 Review (2026): Is This ’90s Classic Still Worth It? for a deeper look at the instrument’s sounds, features, strengths, weaknesses, and overall value for modern producers.