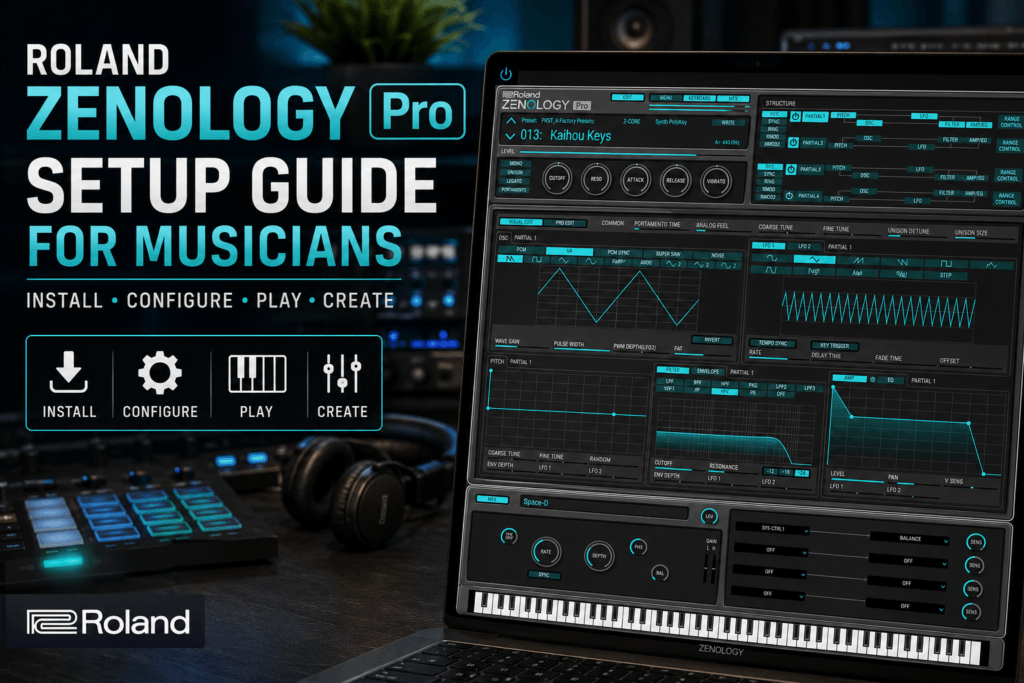
 Roland ZENOLOGY Pro Setup Guide for Musicians: How to Install, Configure, and Start Making Music
Roland ZENOLOGY Pro gives musicians access to a huge collection of synthesizer sounds inspired by decades of Roland instruments. From warm analog-style pads and basses to digital keys, leads, plucks, bells, and modern synth textures, it can become an incredibly versatile instrument inside a music production setup.
Before you start designing sounds or building tracks, however, you need to get everything installed and configured correctly.
In this Roland ZENOLOGY Pro setup guide for musicians, we’ll walk through the basic installation process, loading ZENOLOGY Pro inside your DAW, configuring MIDI, organizing sounds, and creating a simple workflow so you can spend less time navigating menus and more time making music.
What Is Roland ZENOLOGY Pro?
ZENOLOGY Pro is a software synthesizer based around Roland’s ZEN-Core Synthesis System.
Rather than emulating only one classic synthesizer, ZENOLOGY Pro is designed to cover a broad range of sounds within a single instrument. Musicians can use it for everything from bread-and-butter production sounds to more detailed synthesizer programming.
Depending on your Roland Cloud setup and installed expansions, your library can include sounds suitable for:
- Hip Hop
- R&B
- Trap
- Pop
- Electronic music
- Synthwave
- Lo-fi
- Gospel
- Funk
- Film and ambient production
ZENOLOGY Pro also gives you deeper editing capabilities than simply browsing presets. Once you’re comfortable with the instrument, you can modify tones and build sounds that better fit your own productions.
But first, let’s get the software running.
Step 1: Install Roland Cloud Manager
The first part of setting up ZENOLOGY Pro is installing Roland Cloud Manager.
Roland Cloud Manager acts as the central location for managing compatible Roland software, licenses, updates, and additional sound content.
After installing Roland Cloud Manager, sign into your Roland account.
From there, locate ZENOLOGY Pro within the software available through your account or membership.
Install the appropriate version for your computer.
It’s also worth checking Roland Cloud Manager periodically after installation because updates may include bug fixes, compatibility improvements, and other changes.
Step 2: Install ZENOLOGY Pro
Once you’ve located ZENOLOGY Pro, begin the installation.
Follow Roland’s installer prompts and allow the necessary plugin formats to be installed.
The exact plugin formats available can depend on your operating system and DAW.
For most musicians, the important thing is making sure your DAW receives a compatible plugin version.
After installation finishes, close and reopen your DAW if it was running during the installation.
Your DAW may automatically scan the new plugin.
If ZENOLOGY Pro doesn’t appear immediately, use your DAW’s plugin manager to perform another plugin scan.
Step 3: Load ZENOLOGY Pro in Your DAW
Create a new project and add a software instrument track.
Open your DAW’s instrument or plugin browser and look for Roland or ZENOLOGY.
Load ZENOLOGY Pro onto the instrument track.
The interface should appear and give you access to your installed sounds.
At this point, play a few notes using your MIDI controller.
If you hear sound, you’ve already completed the most important part of the initial setup.
If you don’t hear anything, check:
- Your MIDI controller is connected.
- Your DAW recognizes the controller.
- The ZENOLOGY Pro track is selected or record-enabled.
- Your audio interface or computer audio output is configured correctly.
- The track isn’t muted.
- Your speakers or headphones are connected to the correct output.
These simple checks solve many first-time setup problems.
Step 4: Configure Your MIDI Controller
ZENOLOGY Pro becomes considerably more enjoyable when paired with a MIDI keyboard.
Connect your keyboard before opening your DAW whenever possible.
Open your DAW’s MIDI settings and verify that the keyboard appears as an available MIDI input.
Enable the controller.
Create an instrument track containing ZENOLOGY Pro and play several notes.
You should see MIDI activity inside your DAW and hear the selected ZENOLOGY sound.
You don’t necessarily need an expensive controller.
Even a basic MIDI keyboard can give you access to ZENOLOGY Pro’s massive sound palette.
Keyboard players may prefer a larger 49-, 61-, or 88-key controller, while beatmakers working from a smaller studio setup may be perfectly comfortable with 25 or 37 keys.
Step 5: Understand the ZENOLOGY Pro Browser
Don’t immediately start tweaking synthesizer parameters.
Spend some time learning the browser first.
ZENOLOGY Pro contains enough sounds that randomly clicking presets can quickly turn into an hour-long audition session.
Instead, start thinking about sounds according to their role in your production.
For example, when creating an R&B beat you might search for:
Keys → Pad → Bass → Lead → Texture
For Hip Hop:
Keys → Bass → Synth → Lead → FX
For Trap Soul:
Bell/Pluck → Pad → Bass → Texture → Lead
This approach keeps sound selection connected to the actual arrangement you’re trying to build.
You’re no longer asking:
“Which preset sounds cool?”
You’re asking:
“What sound does this song need?”
That small difference can dramatically improve your workflow.
Step 6: Install Additional ZEN-Core Sounds
One of the major advantages of the ZENOLOGY ecosystem is expandability.
Depending on the content available through your Roland Cloud account, you may be able to install additional sound packs, expansions, and compatible ZEN-Core content.
You don’t need to install everything immediately.
In fact, musicians new to ZENOLOGY Pro may benefit from doing the opposite.
Start with a manageable collection.
Learn what you already have before adding hundreds or thousands of additional sounds.
Once you understand where your favorite basses, pads, keys, leads, and plucks live, expand the library according to your musical needs.
This makes the instrument feel much less overwhelming.
Step 7: Create a Favorites System
This may be the most important workflow tip in this entire Roland ZENOLOGY Pro setup guide.
Create a habit of saving your favorite sounds.
When you discover something you could realistically use again, add it to your favorites or otherwise organize it within the available browser system.
Don’t save everything that sounds impressive.
Save sounds that fit your music.
A Hip Hop and R&B producer might gradually build a go-to collection containing:
- Warm electric keys
- Dark pads
- Analog basses
- Soft bells
- Atmospheric plucks
- Vintage polysynths
- Smooth leads
- Synth brass
- Ambient textures
- Sub basses
Over time, you’ll essentially create your own personalized ZENOLOGY Pro sound library.
That can dramatically speed up production.
Instead of browsing hundreds of presets every time you start a beat, you can begin with sounds you’ve already identified as useful.
Step 8: Learn the Basic ZENOLOGY Pro Signal Flow
Once everything is installed and working, start exploring the synthesis engine.
You don’t need to understand every control immediately.
Focus on a few fundamental areas first.
Oscillators and Partials
These provide the raw material used to construct your sound.
Different waveforms create different tonal characteristics.
As a beginner, experiment with changing the waveform while holding the same note.
Listen carefully to how the character changes.
Filter
The filter is one of the easiest ways to reshape a preset.
Reducing the cutoff can make a bright sound darker and smoother.
Increasing it can reveal more upper-frequency content.
For R&B and Trap Soul production, simply adjusting the filter cutoff can sometimes transform a bright preset into something much more atmospheric.
Amp Envelope
The amplitude envelope determines how the volume of the sound behaves over time.
You’ll commonly encounter controls such as:
- Attack
- Decay
- Sustain
- Release
Increase the attack for sounds that fade in more slowly.
Increase the release for notes that linger after you release the keys.
Understanding these controls alone will give you significantly more control over presets.
Effects
Effects can completely change the character of a patch.
Experiment with reverb, delay, chorus, distortion, and other available processing.
However, avoid automatically drowning every sound in effects.
Sometimes a relatively dry ZENOLOGY Pro patch will sit better in a mix when you process it later using your DAW’s effects.
Step 9: Build Your First ZENOLOGY Pro Production Template
If you plan to use ZENOLOGY Pro regularly, create a DAW template.
For example, your starting project could contain:
Track 1 — ZENOLOGY Keys
Track 2 — ZENOLOGY Pad
Track 3 — ZENOLOGY Bass
Track 4 — ZENOLOGY Lead
Track 5 — Drums
You don’t have to use every track.
The goal is simply to remove unnecessary setup steps.
When inspiration hits, you can open the template and immediately begin playing.
This can be especially useful for musicians who frequently make beats or write songs from scratch.
Step 10: Create Your First Sound
After exploring presets, try modifying one.
Load a relatively simple patch.
Then make a few changes.
Try lowering the filter cutoff.
Increase the release slightly.
Add a small amount of chorus.
Add subtle reverb.
Adjust the oscillator or waveform if you’re feeling adventurous.
Save the result as your own patch.
Congratulations—you’ve moved beyond simply using ZENOLOGY Pro presets and started using the instrument as a synthesizer.
You don’t need to build complicated patches from scratch to benefit from sound design.
Small modifications are often enough to make a preset fit your production better.
A Simple ZENOLOGY Pro Workflow for Musicians
Once your setup is complete, your normal production workflow can be extremely straightforward.
Start by deciding what role you need the instrument to fill.
Search the appropriate sound category.
Audition a small number of presets.
Choose the sound that gets closest to your goal.
Adjust the filter, envelope, effects, or other parameters.
Record your musical idea.
Then move on.
The last part is important.
ZENOLOGY Pro gives you access to an enormous number of possibilities, but endless sound browsing can interrupt creativity.
Try to treat presets as starting points rather than destinations.
Find something close, customize it, record your idea, and continue building the song.
ZENOLOGY Pro Setup Tips for Better Performance
Large software instruments can place additional demands on your computer, particularly when you’re running multiple instances alongside effects and other virtual instruments.
A few habits can help keep sessions running smoothly.
Keep your DAW and Roland software updated.
Use an appropriate audio buffer size for what you’re doing.
When recording MIDI, lower buffer settings can provide more responsive playing.
When mixing larger sessions, increasing the buffer can reduce CPU strain.
You can also freeze, bounce, or render software instrument tracks once you’re happy with them.
This reduces the amount of real-time processing required by your project.
Should You Use Multiple Instances of ZENOLOGY Pro?
Absolutely.
You can use separate instances for different parts of your arrangement.
One instance might handle your bass.
Another could provide your chords.
A third could create an atmospheric pad.
A fourth could provide a lead melody.
However, don’t feel obligated to build the entire track using one instrument.
ZENOLOGY Pro works particularly well as part of a larger production setup.
You might use ZENOLOGY for the pad and bass, another instrument for piano, a sampler for drums, and audio effects from other developers to process everything.
Use the tools that best serve the song.
Common ZENOLOGY Pro Setup Mistakes
One of the biggest mistakes new users make is installing a huge library and immediately trying to understand everything.
You don’t need to.
Another mistake is constantly browsing presets without creating anything.
Give yourself a limit.
For example, audition ten sounds.
If one works, start recording.
You can always replace the sound later.
Also avoid believing that you need to understand advanced synthesis before using ZENOLOGY Pro effectively.
You can make complete productions using presets while gradually learning synthesis along the way.
Who Is ZENOLOGY Pro Best For?
ZENOLOGY Pro makes particular sense for musicians who want access to a broad collection of Roland-inspired sounds inside their DAW.
It can be especially useful for:
- Producers
- Keyboard players
- Songwriters
- Beatmakers
- Electronic musicians
- Hip Hop producers
- R&B producers
- Pop producers
- Synth enthusiasts
Its versatility is arguably its greatest strength.
Instead of opening a completely different synthesizer every time you need another type of sound, you can cover a large portion of your production needs from one environment.
Final Thoughts: Setting Up Roland ZENOLOGY Pro
Setting up ZENOLOGY Pro isn’t complicated once you understand the basic workflow.
Install Roland Cloud Manager, install and authorize ZENOLOGY Pro, make sure your DAW recognizes the plugin, connect your MIDI controller, and spend some time learning the sound browser.
After that, resist the temptation to learn everything at once.
Start making music.
Choose presets.
Favorite the sounds you like.
Modify filters and envelopes.
Experiment with effects.
Save your own patches.
As your familiarity grows, ZENOLOGY Pro can transition from being a massive preset library into a genuinely powerful sound-design environment tailored to your music.
The goal isn’t to master every parameter before writing your first track.
The goal is to get ZENOLOGY Pro configured properly, learn enough of the instrument to stay creative, and then develop your knowledge one production at a time.