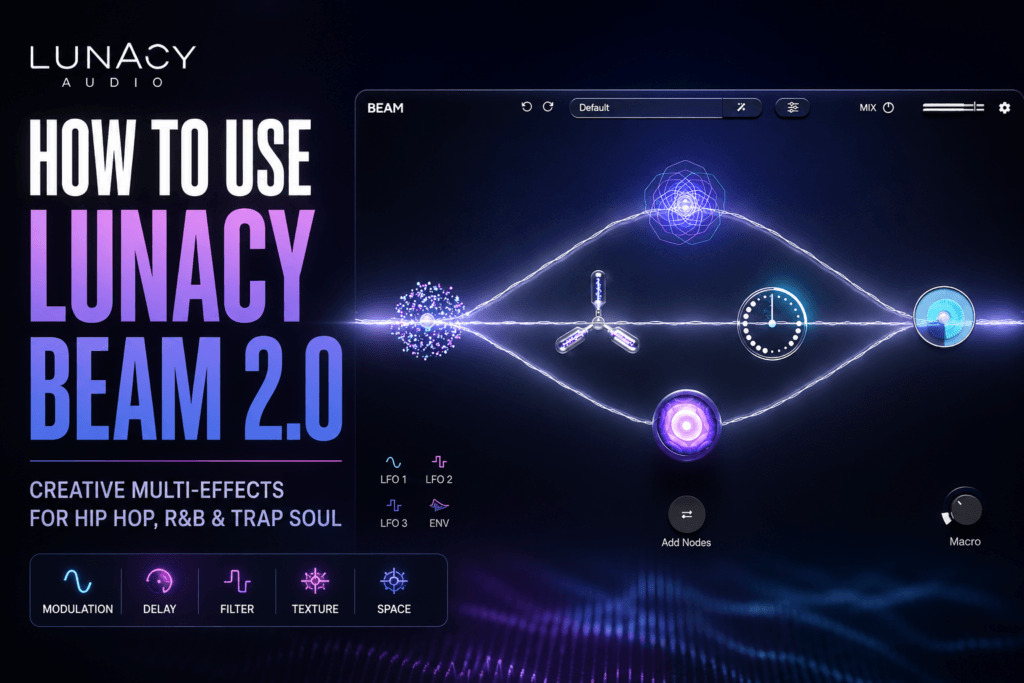
 How To Use Lunacy BEAM 2.0: A Beginner’s Guide to Creative Multi-Effects
If your beats are starting to sound a little too clean, predictable, or familiar, a creative multi-effects plugin can completely change the way you approach sound design.
Lunacy BEAM 2.0 is built for exactly that purpose.
Rather than loading several separate effects and routing them one by one, BEAM 2.0 gives you a creative environment where you can process sounds, experiment with different effects, and transform relatively simple material into something much more interesting.
That makes it especially useful for producers working in Hip Hop, R&B, Trap Soul, electronic music, lo-fi, and other genres where texture and atmosphere matter.
In this guide, we’ll look at how to use Lunacy BEAM 2.0, how to approach its workflow as a beginner, and several practical ways you can use it in your own beats.
What Is Lunacy BEAM 2.0?
Lunacy BEAM 2.0 is a creative multi-effects plugin designed around modular-style effects processing.
Instead of thinking of BEAM as one specific effect such as a reverb, delay, distortion, or filter, think of it as a sound-processing playground.
You can take an ordinary sound and use BEAM 2.0 to push it in a completely different direction.
For example, you could start with:
- A basic piano
- A synth pad
- A vocal chop
- A guitar loop
- A percussion sound
- A sampled melody
Then use BEAM 2.0 to introduce movement, ambience, filtering, distortion, modulation, delay, or other creative processing.
This makes BEAM particularly useful when you’re trying to make your sounds feel less like presets and more like something unique to your production.
How To Use Lunacy BEAM 2.0
The easiest way to learn BEAM 2.0 is not to immediately try to understand every feature.
Instead, start with a sound you already like.
Load BEAM 2.0 as an insert effect on that track and begin exploring what happens when you process it.
The basic workflow looks something like this:
Sound → BEAM 2.0 → Creative Processing → Mix
You might start with a Rhodes patch, for example.
The Rhodes could already sound good on its own, but BEAM can help transform it into a darker, wider, more atmospheric sound that fits better inside a modern R&B production.
The important thing is to think of BEAM as an extension of your original sound rather than something that has to completely replace it.
Start With the Presets
If you’re opening BEAM 2.0 for the first time, presets are one of the best places to begin.
Don’t think of using presets as cheating.
They’re actually one of the fastest ways to understand what a creative effects plugin is capable of doing.
Load a simple musical sound and begin scrolling through different BEAM presets.
Listen for how each preset changes things such as:
- Tone
- Stereo width
- Space
- Movement
- Rhythm
- Texture
- Harmonic character
- Depth
You may find some presets that subtly enhance the original sound while others completely destroy and reconstruct it.
Both approaches can be useful.
Once you find something interesting, stop browsing and begin adjusting it.
That’s where you’ll start learning how BEAM actually works.
Learn BEAM One Effect at a Time
One of the easiest mistakes with creative multi-effects plugins is doing too much.
You load the plugin, see a bunch of possibilities, and suddenly your piano sounds like it’s being transmitted from another galaxy.
That can be fun—but it isn’t always useful.
Instead, learn what individual processing stages are contributing to the sound.
Try reducing or bypassing different effects.
Listen to the sound before and after each change.
Ask yourself:
What is this effect actually doing to my sound?
You might discover that one section is creating movement while another is adding ambience and another is changing the tone.
Understanding those relationships will eventually allow you to build your own BEAM processing chains instead of relying entirely on presets.
Use BEAM 2.0 for R&B Chords
One of my favorite potential uses for BEAM 2.0 is processing chord instruments.
Modern R&B often relies on relatively simple musical elements that have been heavily shaped through sound selection and effects.
Imagine playing a progression using:
- Rhodes
- Electric piano
- Soft analog pad
- Pluck
- Guitar
- Bell
The original instrument provides the harmony.
BEAM provides the character.
Try using BEAM to add subtle movement and atmosphere to the sound.
The key word here is subtle.
You don’t necessarily need the listener to hear the effect itself.
Sometimes you just want them to notice that the sound feels different.
Create Dark Trap Soul Textures
BEAM 2.0 can also be useful when creating darker Trap Soul melodies.
Start with something simple.
For example:
- Record a four-chord progression.
- Choose a relatively clean keyboard or synth sound.
- Add BEAM 2.0.
- Find a darker processing preset.
- Reduce the wet signal if the effect is too extreme.
- Adjust the processing until the original notes remain recognizable.
- Add drums and bass around the processed melody.
This can quickly turn an ordinary preset into something much more atmospheric.
Try this with minor 7th, minor 9th, and minor 11th chords.
Those richer chord voicings combined with BEAM’s creative processing can work particularly well for moody R&B and Trap Soul.
Transform Vocal Chops
Vocal chops are another great candidate for BEAM 2.0.
A normal vocal sample can sometimes sound too obvious, especially when you’re working with loops or commonly used sample packs.
Creative processing gives you an opportunity to make the sample your own.
Try placing BEAM on a vocal chop and experimenting with more dramatic processing.
You can then blend the processed version underneath the original.
This gives you two layers:
Original vocal = clarity
BEAM vocal = texture
Together, they can create something much richer than either version by itself.
Make Simple Sounds More Interesting
You don’t always need complicated source material.
In fact, BEAM can become even more interesting when you feed it something extremely simple.
Try recording a single sustained synth note.
Then process that note heavily with BEAM.
Suddenly that single note might develop enough movement and texture to become an atmospheric layer underneath your entire beat.
You can do the same thing with:
- One piano note
- A vocal phrase
- A percussion hit
- Noise
- A guitar harmonic
- A synth chord
- A reversed sample
This is one of the most powerful lessons in sound design:
The source doesn’t have to be complicated if the processing is interesting.
Create Ear Candy
BEAM 2.0 doesn’t have to sit on the main melody throughout your entire track.
Try using it to create ear candy instead.
Duplicate a melody or vocal track and process the duplicate much more aggressively.
Then chop small pieces from the processed version and place them throughout your arrangement.
For example, you could place one before:
- The chorus
- A drum drop
- The second verse
- A transition
- The outro
This is a great way to create transitions without constantly reaching for traditional risers and impacts.
The effect originates from material already inside your song, which can make the transition feel more connected to the production.
Automate BEAM 2.0
Automation is where plugins like BEAM can become especially powerful.
Instead of using the same effect settings throughout the entire song, automate parameters over time.
For example, you might gradually increase the amount of processing during the final two bars before the chorus.
Then immediately return to the cleaner version when the drums drop.
That creates tension and release.
You could also automate BEAM during:
- Intros
- Pre-choruses
- Bridges
- Drum breaks
- Outros
- Melody transitions
This helps turn the plugin into part of your arrangement rather than simply another insert effect.
Use Parallel Processing
If BEAM is destroying too much of the original character of your sound, don’t immediately remove it.
Try parallel processing.
Keep your original signal relatively clean and blend the heavily processed BEAM signal underneath it.
You can accomplish this through your DAW’s routing system or, where appropriate, by controlling the plugin’s wet/dry balance.
A common starting point might be something like:
70–90% original character
10–30% creative processing
There isn’t a magic percentage.
Just bring the processed sound up until you notice its character, then decide whether you actually need more.
For R&B especially, a little texture can go a long way.
Resample Your BEAM Processing
Here’s where things can get really interesting.
Don’t assume BEAM has to remain active as a plugin.
You can process a sound, record or bounce the result to audio, and then manipulate that new audio file.
For example:
Piano → BEAM → Bounce to audio → Chop → Reverse → Pitch → Rearrange
Now BEAM isn’t simply an effect.
It has become part of your sampling workflow.
This approach can be extremely useful for Hip Hop production because you can create your own source material and then treat it like a sample.
Try creating a four- or eight-bar musical idea, running it through BEAM, bouncing it, and then chopping the processed audio into a completely new melody.
You may end up with something you never would have played manually.
Don’t Overprocess Everything
Creative effects plugins can become addictive.
Once you find something interesting, it’s tempting to put it on every track.
Try not to.
If your chords, melodies, vocals, percussion, drums, and transitions are all heavily processed, the production can quickly lose focus.
Instead, choose a few elements that deserve special treatment.
For example:
Main chords: subtle BEAM processing
Lead melody: mostly clean
Vocal chop: heavy BEAM processing
Drums: clean and punchy
Transition FX: aggressive BEAM processing
Now the unusual textures have something clean to contrast against.
That contrast makes the processing feel more intentional.
A Simple BEAM 2.0 Hip Hop & R&B Workflow
If you’re wondering exactly where to begin, try this exercise.
Create an eight-bar chord progression using a Rhodes, piano, guitar, or soft synth.
Then:
- Duplicate the instrument.
- Place BEAM 2.0 on the duplicate.
- Browse presets until you find something inspiring.
- Adjust the processing so the notes still complement the original.
- Lower the processed layer underneath the clean version.
- Add drums and bass.
- Mute the processed layer during part of the verse.
- Bring it back during the hook.
- Bounce a heavily processed version to audio.
- Chop pieces of that audio into transition effects.
With one musical idea, you’ve now created:
- Your main harmony
- A texture layer
- Arrangement variation
- Transition effects
- Potential sample material
That’s where BEAM 2.0 becomes much more than a normal effects plugin.
BEAM 2.0 Sound Design Experiment
Here’s another exercise worth trying.
Open your DAW and create one MIDI track.
Load the simplest synth patch you can find.
Even a basic saw, sine, or soft pad will work.
Play one chord.
Now load BEAM 2.0.
Give yourself 15 minutes to transform that sound without changing the original synth patch.
Experiment with different processing combinations and record anything interesting.
At the end, bounce your favorite version.
You now have an original sound that can become the starting point for your next beat.
Doing exercises like this regularly is also a great way to improve your sound-design instincts.
Who Is BEAM 2.0 Best For?
BEAM 2.0 makes the most sense for producers who enjoy experimentation.
If you want every plugin to perform one traditional studio task, BEAM may initially feel different from the processors you’re used to.
But if you enjoy:
- Manipulating samples
- Designing unusual textures
- Creating atmospheric melodies
- Resampling
- Processing vocals
- Building transitions
- Turning presets into original sounds
BEAM 2.0 can become a very interesting creative tool.
It can be especially valuable for Hip Hop and R&B producers because those genres often benefit from taking relatively simple musical ideas and giving them a distinctive sonic identity.
Final Thoughts: How To Use Lunacy BEAM 2.0
Learning how to use Lunacy BEAM 2.0 is less about memorizing every parameter and more about learning how to experiment.
Start with presets.
Figure out what they’re doing.
Change individual processing stages.
Blend BEAM with your original signal.
Automate effects during transitions.
Resample the results.
Most importantly, don’t feel like every experiment needs to work.
That’s part of the appeal of a plugin like BEAM.
Sometimes you’ll create something terrible.
Then you’ll move one control, change one effect, or resample the result—and suddenly you’ve created the sound that inspires an entire beat.
For Hip Hop, R&B, and Trap Soul producers, that experimentation can be especially valuable.
Instead of searching through another hundred presets trying to find the perfect sound, take a sound that’s almost right and use BEAM 2.0 to make it your own.