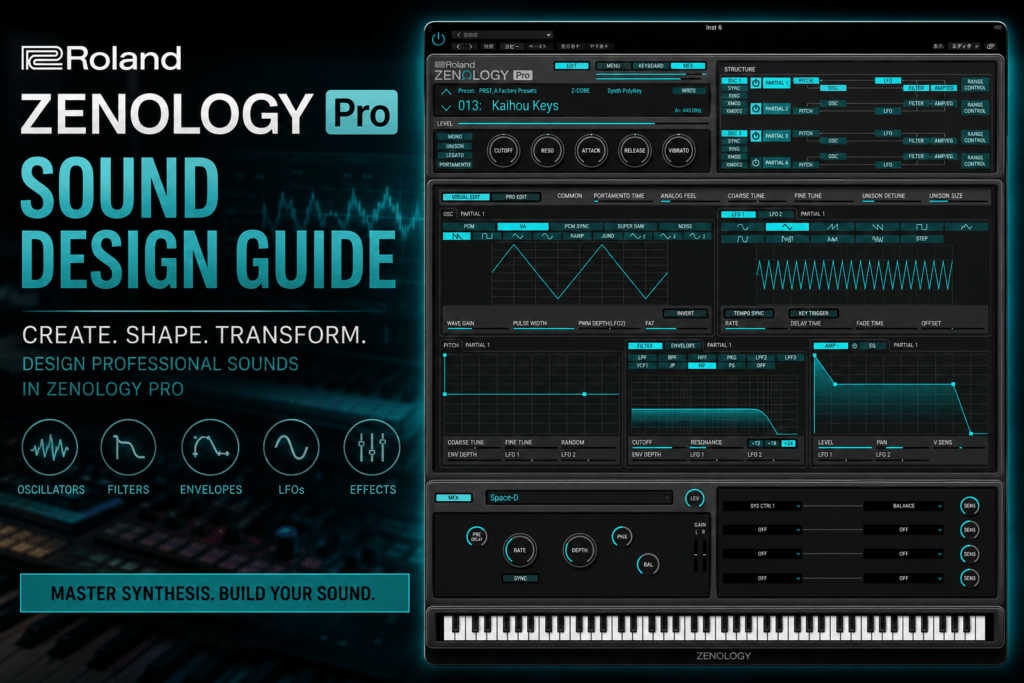
 Roland ZENOLOGY Pro Sound Design Guide: Create Your Own Synth Sounds
Roland ZENOLOGY Pro gives producers access to thousands of sounds, but browsing presets is only the beginning of what this synthesizer can do.
Once you start digging beneath the presets, you’ll discover a powerful sound-design environment built around Roland’s ZEN-Core Synthesis System.
And you don’t have to be an experienced synthesizer programmer to use it.
In this Roland ZENOLOGY Pro sound design guide, we’ll break down the fundamentals of creating and customizing sounds, including oscillators, filters, envelopes, LFOs, effects, layering, and modulation.
More importantly, we’ll look at these features from a producer’s perspective.
Instead of simply learning what every knob does, you’ll learn how to use ZENOLOGY Pro to create sounds that can actually fit into Hip Hop, R&B, Trap Soul, Pop, Lo-Fi, and other modern productions.
What Makes ZENOLOGY Pro Good for Sound Design?
ZENOLOGY Pro is based around Roland’s ZEN-Core synthesis architecture.
One of its biggest strengths is flexibility.
You can create everything from simple analog-style synth sounds to complex layered patches containing movement, texture, and effects.
Depending on the sound you’re designing, ZENOLOGY Pro can be used to create:
- Warm pads
- Deep synth basses
- Plucks
- Bells
- Leads
- Keys
- Atmospheric textures
- Poly synths
- Arpeggiated sounds
- Experimental effects
That makes ZENOLOGY Pro particularly useful for producers who don’t want a synthesizer dedicated to only one type of sound.
You can use the same instrument to create the chords, bass, melody, and atmospheric elements of a track.
Understanding the ZENOLOGY Pro Signal Flow
Before designing sounds, it helps to understand the basic journey your sound takes through a synthesizer.
A simplified version looks something like this:
Oscillator → Filter → Amplifier → Effects
The oscillator creates the basic sound.
The filter shapes its frequency content.
The amplifier controls how the volume behaves.
Effects add additional character, width, space, and movement.
ZENOLOGY Pro can become considerably more sophisticated than this, but understanding that basic path gives you a foundation for everything else.
Let’s break it down.
1. Start With the Oscillator
The oscillator is where your sound begins.
Different waveforms have different tonal characteristics, which makes waveform selection one of the first important decisions you’ll make.
Sine Wave
A sine wave is extremely smooth and contains very little harmonic complexity.
It’s particularly useful for:
- Sub bass
- Soft tones
- Layering
- Creating clean low-frequency foundations
If you’re designing a deep R&B or Trap Soul bass, a sine-style foundation can be an excellent starting point.
Triangle Wave
Triangle waves are still relatively smooth but contain more harmonic information than sine waves.
They can work well for:
- Soft bass
- Mellow leads
- Subtle synth layers
- Warm tones
Saw Wave
Saw waves are much brighter and richer.
They’re excellent for:
- Pads
- Leads
- Brass-like synths
- Supersaws
- Bright basses
- Poly synths
If you’re trying to create a lush synth pad, saw waves are often a great place to begin.
Square and Pulse Waves
Square and pulse-style waveforms have a hollow, distinctive character.
They can work well for:
- Retro leads
- Bass
- Plucks
- Synth keys
- Vintage-inspired sounds
The best way to understand these waveforms isn’t to memorize descriptions.
Load them and listen.
Play the same chord using different waveforms and you’ll immediately begin recognizing their character.
2. Use Multiple Partials to Build Bigger Sounds
One of the important concepts to understand in ZENOLOGY Pro is the use of partials.
Think of a partial as an individual component of your overall patch.
Instead of relying on one oscillator to create the entire sound, you can combine multiple elements.
For example, you might create a pad using:
Partial 1: Saw wave
Partial 2: Another saw wave slightly detuned
Partial 3: Softer waveform for body
Partial 4: Higher texture for air
Together, those components create something much richer than a single oscillator.
But there’s an important rule:
More layers don’t automatically make a better sound.
Start simple.
Create something useful with one or two partials before adding additional complexity.
3. Shape the Tone With Filters
After creating your basic waveform, the filter becomes one of your most powerful sound-design tools.
The filter allows you to remove or emphasize different areas of the frequency spectrum.
For modern production, you’ll probably spend a lot of time working with low-pass filters.
A low-pass filter allows lower frequencies through while reducing frequencies above the cutoff point.
Lower the cutoff and your sound becomes darker.
Raise it and your sound becomes brighter.
This simple control can completely change the mood of a patch.
Creating Dark R&B Sounds
Suppose you’ve created a bright saw-based pad.
Lower the filter cutoff.
Suddenly the sound becomes warmer and less aggressive.
Add some attack and release, and now you’re moving toward the kind of atmospheric texture that can work beautifully behind R&B chords.
Resonance
Resonance emphasizes frequencies around the cutoff point.
A small amount can add character and definition.
Larger amounts can produce much more obvious filter effects.
For subtle Hip Hop and R&B sounds, you often don’t need extreme resonance.
Use your ears.
4. Understand Envelopes
Envelopes determine how different aspects of your sound change over time.
One of the most important is the amplitude envelope, commonly represented as:
Attack → Decay → Sustain → Release
Or ADSR.
Understanding ADSR dramatically improves your ability to design sounds intentionally.
Attack
Attack controls how quickly the sound reaches full volume.
Short attack = immediate sound.
Long attack = gradual fade-in.
Pads usually benefit from slower attacks.
Plucks typically use fast attacks.
Decay
Decay controls how quickly the sound falls from its initial peak toward the sustain level.
This becomes particularly important when creating plucks, keys, bells, and percussive sounds.
Sustain
Sustain determines the level maintained while you’re holding the note.
Higher sustain works well for sounds that need to remain consistent while held.
Lower sustain can help create more percussive sounds.
Release
Release controls how long the sound continues after you release the key.
Pads often use longer release times.
Bass and pluck sounds generally need shorter releases.
5. Use Filter Envelopes for Movement
Envelopes don’t only control volume.
They can also control your filter.
This is where sound design starts becoming much more interesting.
Instead of keeping the filter cutoff at one fixed position, you can make the filter open or close automatically whenever you play a note.
That’s how you can create sounds that have a distinct:
Wah
Snap
Sweep
or pluck characteristic.
For example, a pluck can begin bright and quickly become darker.
Rather than manually moving the cutoff knob every time you play a note, the filter envelope creates that movement automatically.
6. Add Movement With LFOs
An LFO — or Low Frequency Oscillator — is used to automatically modulate parameters over time.
Think of it as an invisible hand turning a knob for you.
An LFO can control parameters such as:
- Pitch
- Filter cutoff
- Volume
- Panning
- Other modulation destinations
This allows you to create movement inside sounds that would otherwise remain static.
LFO to Pitch
Modulating pitch slightly can create vibrato.
Keep the amount subtle for natural movement.
LFO to Filter
Modulating the filter can create rhythmic or evolving tonal changes.
This works especially well for pads and atmospheric sounds.
LFO to Volume
Volume modulation can create pulsing or tremolo-style effects.
Used rhythmically, this can create interesting movement underneath a beat.
7. Detuning for Width
Detuning is one of the easiest ways to make synth sounds feel larger.
Try using two similar oscillators or partials.
Keep one at the original tuning.
Slightly detune the other.
The small pitch difference creates movement and width.
This technique is particularly useful for:
- Pads
- Poly synths
- Leads
- Supersaw-style sounds
Be careful, though.
Too much detuning can make chords sound out of tune.
Subtlety usually wins.
8. Use Effects as Part of the Sound Design
Don’t think of effects as something you add only after designing the patch.
Effects can be part of the sound itself.
ZENOLOGY Pro provides effects that can dramatically transform relatively simple patches.
Chorus
Chorus can make sounds wider and richer.
It’s especially useful for:
- Pads
- Keys
- Poly synths
- Vintage-inspired sounds
Reverb
Reverb adds space.
For atmospheric R&B sounds, reverb can transform a basic synth into something much more cinematic.
But don’t automatically turn the reverb all the way up.
Too much can push your sound too far into the background.
Delay
Delay can create rhythm and movement.
Try using delay on:
- Plucks
- Bells
- Leads
- Sparse melodies
Sometimes the repeats become almost as important as the original notes.
Saturation and Distortion
These effects can introduce additional harmonics and character.
Use subtle saturation to give digital sounds more weight.
Push distortion harder when you intentionally want something aggressive.
How to Design a Warm R&B Pad
Let’s put everything together.
Start with a saw waveform.
Add a second saw-based partial and detune it slightly.
Now lower the filter cutoff to remove some of the brightness.
Next, adjust your amplitude envelope.
Try:
Attack: Medium to slow
Decay: Moderate
Sustain: High
Release: Long
Add chorus for width.
Then add reverb for atmosphere.
If the sound still feels static, use a slow LFO to subtly modulate the filter.
Now play some minor 7th or 9th chords.
You should have a lush starting point for an R&B pad.
How to Design a Dark Trap Soul Pluck
Start with a saw, square, or similar harmonically rich waveform.
Use a fast attack.
Reduce the sustain.
Use a short decay.
Keep the release relatively short.
Then use a filter envelope so the sound begins bright but quickly becomes darker.
Add a small amount of reverb.
Next, add a tempo-synced delay.
The result can become a great starting point for sparse Trap Soul melodies.
Try playing only a few notes rather than creating an overly complicated melody.
The space between notes lets the delay become part of the performance.
How to Design a Deep Synth Bass
Start simple.
Choose a sine or triangle-style waveform for the low-frequency foundation.
Keep the attack fast.
Use a relatively short release so notes don’t overlap too much.
If you need additional character, add another partial using a waveform with more harmonics.
Keep that layer quieter than the fundamental bass.
Then use a low-pass filter to control the brightness.
The goal isn’t necessarily to create the biggest bass possible.
You want a bass that works with your kick and leaves enough space for the rest of the production.
How to Create Atmospheric Textures
Atmospheric sounds are especially useful in R&B, Hip Hop, and Trap Soul because they can fill empty space without introducing another obvious melody.
Start with a pad.
Use a slow attack and long release.
Lower the filter cutoff.
Add modulation using a slow LFO.
Then experiment with chorus, delay, and reverb.
Play higher notes or simple chord tones.
Turn the layer down.
The texture should almost disappear into the background.
When you mute it, however, you should notice that something is missing.
That’s usually a good sign that the texture is doing its job.
Turn Presets Into Your Own Sounds
You don’t always need to start from an initialized patch.
One of the fastest ways to learn ZENOLOGY Pro sound design is to reverse-engineer presets.
Find a sound you like.
Then investigate it.
Ask yourself:
What waveform is being used?
How many partials are active?
What is the filter doing?
What does the amplitude envelope look like?
Are LFOs creating movement?
Which effects are contributing to the sound?
Then start changing things.
Turn individual partials off.
Remove the effects.
Change the filter.
Modify the envelope.
You’ll begin understanding how the patch was constructed.
This is one of the best sound-design lessons you can give yourself.
Create Variations Instead of Starting Over
Once you’ve designed a good sound, don’t immediately move on.
Create variations.
For example, turn your pad into:
Version 1: Warm pad
Version 2: Dark pad
Version 3: Wide pad
Version 4: Atmospheric pad
You might create those variations simply by changing filters, envelopes, effects, and modulation.
This is how you can gradually build a personal collection of sounds.
Sound Design Should Serve the Beat
It’s easy to get carried away when designing sounds.
You can spend an hour creating an incredibly complex patch that sounds amazing by itself.
Then put it into the beat and discover that it doesn’t fit.
Always evaluate sounds in context.
Ask:
Does this sound support the chords?
Is it fighting with the vocals?
Does it occupy too much low end?
Is the reverb taking up too much space?
Does it complement the other instruments?
A simple patch that fits the record is more valuable than a complicated patch that doesn’t.
A Simple ZENOLOGY Pro Sound Design Formula
When you don’t know where to start, use this sequence:
Waveform → Envelope → Filter → Modulation → Effects
First, choose the raw character.
Then decide how the sound behaves over time.
Shape its brightness with the filter.
Add movement with modulation.
Finally, add effects.
You don’t have to follow this sequence every time, but it provides a repeatable starting point.
A 20-Minute ZENOLOGY Pro Sound Design Exercise
Here’s an exercise that can dramatically improve your understanding of the synth.
Give yourself 20 minutes.
Create four sounds:
Sound 1 — Bass
Use a simple waveform and focus on low-end control.
Sound 2 — Pluck
Focus on short envelopes and filter movement.
Sound 3 — Pad
Focus on layering, detuning, and longer envelopes.
Sound 4 — Lead
Focus on waveform character, vibrato, delay, and expression.
Don’t worry about making perfect presets.
The goal is to connect the controls you see on the screen with the sounds you hear.
Do this regularly and synthesis will start feeling much less mysterious.
Final Thoughts: Learning ZENOLOGY Pro Sound Design
The depth of ZENOLOGY Pro can make sound design look more complicated than it actually needs to be.
Start with the fundamentals.
Learn what your waveforms sound like.
Understand ADSR envelopes.
Learn how filters change the tone.
Experiment with LFOs.
Use multiple partials when the sound actually needs them.
And treat effects as part of your sound-design process rather than an afterthought.
Most importantly, design sounds while you’re making music.
If you’re working on an R&B beat and need a warm pad, build a warm pad.
If your Trap Soul track needs a dark pluck, build a dark pluck.
If your Hip Hop beat needs a deep bass, build the bass.
That approach gives every sound-design decision a purpose.
Over time, you’ll stop seeing ZENOLOGY Pro as a massive collection of presets and start seeing it for what it really is:
A synthesizer capable of creating your own sonic identity.