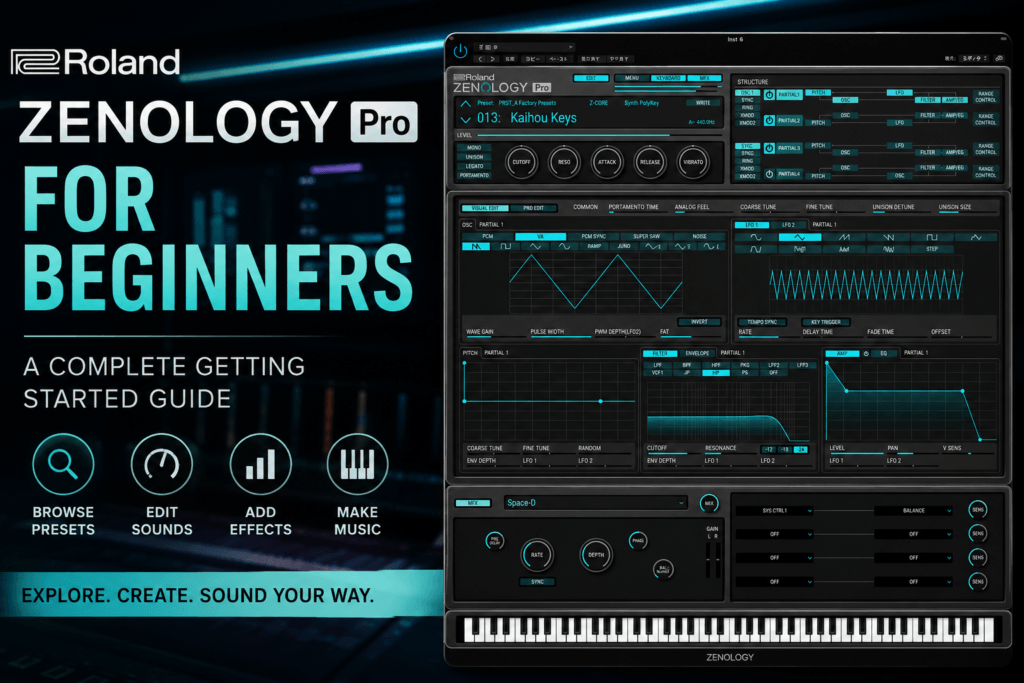
 Roland ZENOLOGY Pro for Beginners: A Complete Getting Started Guide
If you’re new to Roland ZENOLOGY Pro, opening it for the first time can be a little intimidating. There are thousands of sounds, multiple synthesis sections, effects, expansions, and enough parameters to keep a producer busy for a very long time.
But here’s the good news: you don’t need to understand everything inside ZENOLOGY Pro to start making music with it.
In fact, one of ZENOLOGY Pro’s biggest strengths is that beginners can start by browsing its massive preset library and gradually learn how to shape sounds as they become more comfortable with synthesis.
For Hip Hop, R&B, Trap Soul, Pop, Lo-Fi, and other modern styles, ZENOLOGY Pro can become an incredibly versatile instrument.
In this Roland ZENOLOGY Pro for beginners guide, we’ll walk through what the plugin does, how to find sounds, how to customize presets, and how you can start using ZENOLOGY Pro in your own productions.
What Is Roland ZENOLOGY Pro?
Roland ZENOLOGY Pro is a software synthesizer built around Roland’s ZEN-Core Synthesis System.
Instead of recreating only one classic synthesizer, ZENOLOGY Pro gives producers access to a broad sound-design environment capable of producing everything from vintage-inspired synth sounds to modern digital textures.
Depending on your setup and available content, you can use it for sounds such as:
- Synth basses
- Pads
- Leads
- Plucks
- Keys
- Bells
- Strings
- Brass
- Synth textures
- Arpeggios
- Electronic drums
- Sound effects
That’s what makes ZENOLOGY Pro particularly interesting for producers.
You could use it for the main chords of an R&B track, then load another instance for a bass, another for a lead melody, and another for atmospheric textures.
Rather than being a one-trick synth, it can serve as one of the main sound sources in your production setup.
ZENOLOGY vs. ZENOLOGY Pro
One thing that can confuse beginners is the difference between ZENOLOGY and ZENOLOGY Pro.
ZENOLOGY is designed to give you access to the ZEN-Core sound ecosystem with straightforward sound selection and editing.
ZENOLOGY Pro takes things considerably further.
The Pro version exposes deeper synthesis and editing controls, making it much more useful when you want to go beyond simply selecting presets.
For a beginner, that doesn’t mean you need to immediately dive into every synthesis parameter.
Think of ZENOLOGY Pro as having two levels.
Level 1: Preset player
Find a great sound and make music.
Level 2: Sound-design synthesizer
Take that sound apart and customize it.
Start with Level 1.
The second level will naturally become more useful as you learn.
Understanding the ZENOLOGY Pro Interface
When you first open ZENOLOGY Pro, don’t worry about memorizing the entire interface.
Instead, focus on a few areas.
Sound Browser
This is where beginners should spend most of their time initially.
ZENOLOGY Pro includes a large collection of sounds, so learning how to efficiently browse presets is more important than immediately learning advanced synthesis.
Instead of randomly clicking through hundreds of patches, start thinking about the role you need to fill.
For example:
“I need a warm pad behind these chords.”
That’s much better than:
“Let’s see what sounds cool.”
The first approach gives your browsing a purpose.
Tone Editing
Once you’ve found a preset you like, you can begin changing it.
This is where ZENOLOGY Pro starts becoming much more powerful.
You don’t necessarily have to build sounds from scratch. You can take an existing sound that’s already close to what you want and modify it.
For beginners, this is one of the best ways to learn synthesis.
Effects
Effects are a huge part of a synthesizer’s final character.
A relatively simple synth patch can sound completely different after adding effects such as chorus, delay, distortion, or reverb.
As a beginner, effects are also one of the easiest ways to start personalizing presets.
Start With Presets — Seriously
There’s sometimes a misconception that “real” producers have to create every synth patch from scratch.
They don’t.
Presets are starting points.
If you’re producing a song, your primary goal is to find a sound that supports the music.
Suppose you’re creating an R&B beat and need a warm electric-style key sound.
Instead of spending 30 minutes building something from an initialized patch, find a preset that’s already close.
Then modify it.
Maybe you:
- Reduce the brightness.
- Shorten the release.
- Add chorus.
- Increase the reverb.
- Adjust the filter.
- Layer another sound underneath it.
Now the preset has become part of your production rather than simply something you loaded and left untouched.
How to Find Sounds Faster in ZENOLOGY Pro
One of the biggest beginner mistakes with large plugins is preset paralysis.
You play one sound.
Then another.
Then another.
Twenty minutes later, you still haven’t recorded anything.
Try giving yourself a simple rule:
Know what type of sound you’re searching for before opening the browser.
For example, your beat might need:
Chords → warm pad
Bass → deep synth bass
Melody → bell or pluck
Texture → atmospheric pad
Now you’re searching with intention.
Once you find something that’s roughly 80% of the way there, stop browsing and start tweaking.
That habit alone can dramatically improve your workflow.
Your First Five Controls to Learn
ZENOLOGY Pro offers plenty of editing possibilities, but beginners should focus on controls that create obvious audible differences.
1. Filter Cutoff
If you learn only one synth control at first, learn the filter cutoff.
Lowering the cutoff generally removes higher-frequency content and makes a sound darker.
This is extremely useful for Hip Hop and R&B.
If a preset sounds too bright or aggressive, try lowering the cutoff.
A bright synth patch can quickly become a darker, moodier sound that sits behind vocals more naturally.
2. Resonance
Resonance emphasizes frequencies around the filter cutoff point.
Small amounts can add character.
More extreme settings can produce dramatic, almost whistling filter effects.
For beginners, use it sparingly until you understand how it interacts with the cutoff.
3. Attack
Attack controls how quickly the sound reaches its full level after you press a key.
Fast attack:
Press key → sound immediately.
Slower attack:
Press key → sound gradually fades in.
Increasing attack is an easy way to transform certain sounds into softer pads and atmospheric layers.
4. Release
Release determines how long the sound continues after you release the key.
Short release produces tighter notes.
Long release creates more sustained, atmospheric sounds.
This parameter is especially useful for pads, bells, keys, and ambient sounds.
5. Effects
Once you’ve adjusted the basic character of your patch, experiment with effects.
For beginners, concentrate on:
- Reverb
- Delay
- Chorus
- Saturation or distortion
You can create surprisingly different sounds just by changing the effects processing.
Using ZENOLOGY Pro for Hip Hop
ZENOLOGY Pro works extremely well as a source of melodic sounds for Hip Hop production.
Try using it for:
- Dark pads
- Synth bass
- Bells
- Plucks
- Atmospheric textures
- Vintage keys
- Synth leads
One effective approach is to keep the primary musical idea relatively simple.
For example:
Layer 1: Main chord progression
Layer 2: Simple melody
Layer 3: Bass
Layer 4: Atmospheric texture
You don’t necessarily need four different plugins for those layers.
ZENOLOGY Pro can potentially handle all four.
Using ZENOLOGY Pro for R&B
R&B is where ZENOLOGY Pro can really shine because the genre relies heavily on interesting harmony and texture.
Start with a warm keyboard or pad sound.
Play extended chords such as:
- Minor 7ths
- Major 7ths
- Minor 9ths
- Major 9ths
- 11th chords
- Sus chords
Then create a second ZENOLOGY Pro layer using a softer pad.
Lower the pad’s filter cutoff and volume so it sits underneath your main chords.
Now add a simple bell, pluck, or lead playing a sparse melody.
You can quickly build a lush R&B arrangement without overcrowding the production.
Creating a Simple R&B Sound From a Preset
Here’s a beginner-friendly exercise.
Start by loading a pad or poly synth preset.
Play your chord progression.
Then:
- Lower the filter cutoff slightly.
- Increase the attack.
- Increase the release.
- Add some chorus.
- Add reverb.
- Reduce the overall brightness until the sound sits behind your main instruments.
You’ve just performed basic sound design.
You didn’t need to understand oscillators, modulation matrices, or complicated synthesis techniques.
You simply listened to the sound and changed it based on what the track needed.
That’s the mindset I recommend for learning ZENOLOGY Pro.
Don’t Ignore Layering
Layering is another powerful technique.
Suppose you have a beautiful pad, but it doesn’t have enough definition.
Instead of completely changing the pad, load another instance of ZENOLOGY Pro.
Find a brighter key or pluck.
Play the same MIDI chords through both sounds.
Then turn the second layer down.
The brighter sound provides definition while the pad provides width and atmosphere.
This technique works extremely well for modern R&B and Trap Soul.
Just remember that layering isn’t about making every sound louder.
It’s about giving each layer a purpose.
Use Automation to Make Sounds Move
Once you’re comfortable selecting and editing presets, start experimenting with automation in your DAW.
One of the easiest parameters to automate is filter cutoff.
For example, you could start your intro with the filter closed so the synth sounds dark and distant.
As the song approaches the hook, gradually open the filter.
Suddenly the same sound becomes brighter and more energetic.
You can also automate things like:
- Reverb
- Delay
- Volume
- Panning
- Effect parameters
These subtle changes can help an arrangement feel more dynamic without adding additional instruments.
Don’t Try to Learn Everything at Once
ZENOLOGY Pro is deep.
That’s a benefit, but it can also become a distraction.
You don’t need to master the entire ZEN-Core synthesis architecture before making good music.
Instead, learn in stages.
Stage 1 — Preset Selection
Learn the browser and discover which categories work best for your music.
Stage 2 — Basic Editing
Learn cutoff, resonance, attack, release, and effects.
Stage 3 — Layering
Learn how different patches complement each other.
Stage 4 — Deeper Synthesis
Begin exploring oscillators, envelopes, LFOs, modulation, and more advanced sound-design features.
Stage 5 — Build Your Own Sounds
Eventually, start creating patches from scratch.
By that point, you’ll understand why you’re making certain decisions rather than simply turning knobs randomly.
A Simple Beginner ZENOLOGY Pro Workflow
Here’s a practical workflow you can use during your next production session.
Start with your chord progression.
Open ZENOLOGY Pro and decide what kind of sound you need.
Find a preset that’s close.
Then modify only three things:
Filter → Envelope → Effects
Record the part.
Move on.
If you need another layer, open another instance and repeat the process.
The goal isn’t to create the greatest synth patch you’ve ever heard.
The goal is to finish the record.
You can always come back later and refine the sounds.
Beginner Mistakes to Avoid
Browsing Presets Forever
Give yourself a time limit.
Find something close and start producing.
Using Sounds That Are Too Big
A preset may sound incredible by itself but terrible in a full arrangement.
Sometimes reducing reverb, release, bass, or brightness makes a sound much more useful.
Adding Too Many Layers
If five synths are playing essentially the same thing, ask yourself whether all five are necessary.
Often they’re not.
Overprocessing Presets
Many presets already contain effects.
Before adding another reverb, delay, chorus, compressor, or saturation plugin, listen to what’s already happening inside ZENOLOGY Pro.
Trying to Become a Synth Expert Before Making Music
Learn synthesis through production.
Make a beat.
Encounter a problem.
Learn the control that solves that problem.
Repeat.
That approach gives the technical concepts context.
A Beginner Exercise: Make an Entire Beat With ZENOLOGY Pro
Here’s one of the best ways to become comfortable with the plugin.
Challenge yourself to create the melodic portion of an entire beat using only ZENOLOGY Pro.
Use one instance for:
Chords
Another for:
Bass
Another for:
Melody
And another for:
Texture
Your drums can come from your normal drum source.
The point isn’t to prove that ZENOLOGY Pro is the only synth you’ll ever need.
The exercise forces you to explore different categories and learn how sounds work together.
By the end of the beat, you’ll probably understand the plugin significantly better than you would after watching hours of tutorials.
Is Roland ZENOLOGY Pro Good for Beginners?
Yes — especially if you approach it correctly.
ZENOLOGY Pro is powerful enough for advanced sound designers, but beginners don’t need to use all of that power immediately.
Its large sound library means you can start producing almost immediately while gradually learning synthesis through preset editing.
That’s actually one of the qualities I like most about instruments like this.
They can grow with you.
At first, ZENOLOGY Pro might simply be where you find a great pad.
Later, you might be adjusting filters and envelopes.
Eventually, you could be designing completely original patches.
You don’t have to make that jump overnight.
Final Thoughts
Roland ZENOLOGY Pro can look complicated, but learning it doesn’t have to be complicated.
Start with the sounds.
Learn how to find the right preset quickly.
Then master a handful of controls:
Cutoff. Attack. Release. Effects.
Once those become second nature, dig deeper into the synthesis engine.
For Hip Hop and R&B producers in particular, ZENOLOGY Pro gives you a huge palette for creating warm chords, dark pads, deep basses, atmospheric textures, bells, plucks, leads, and plenty more.
Most importantly, don’t spend weeks studying ZENOLOGY Pro before actually using it.
Open it. Pick a sound. Make a beat.
Then learn one new feature every time you use it.
That’s one of the fastest ways to turn a complicated synthesizer into an instrument you actually understand.