 Lo-fi production isn’t really about making your music sound bad.
It’s about making it sound imperfect in the right ways.
Warm keys, slightly degraded textures, subtle movement, washed-out ambience, dusty drums, and chords that feel like they could have been sampled from an old record are all part of the aesthetic.
That’s exactly where LANDR Retro becomes interesting.
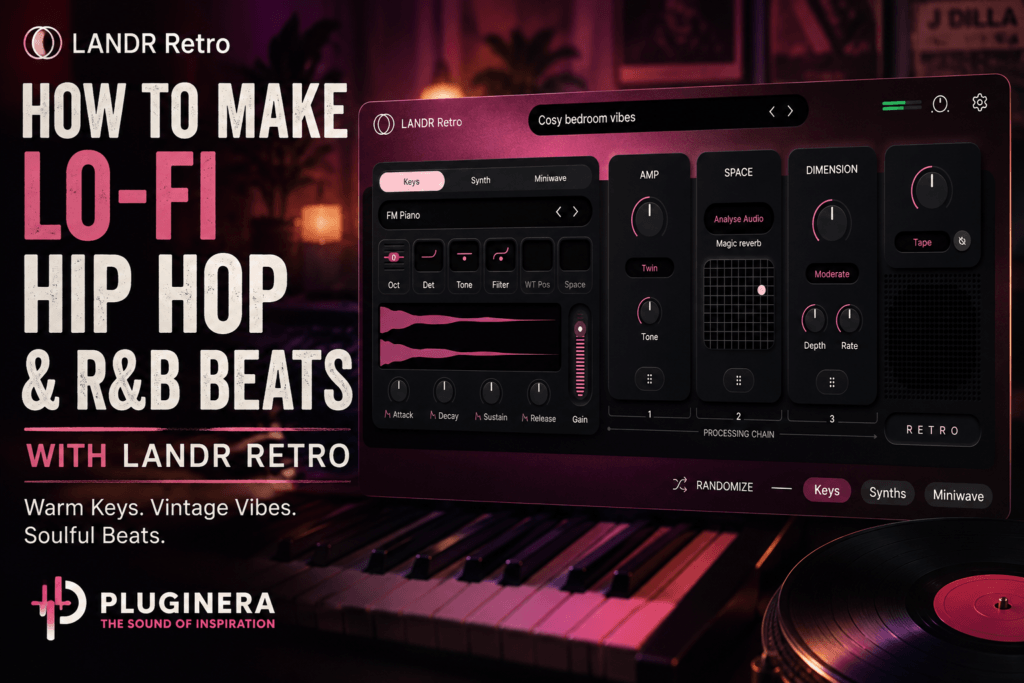
Rather than starting with a perfectly clean instrument and building an entire lo-fi processing chain afterward, Retro gives you sampled keys, synth textures, Mini-wave layers, vintage character, ambience, stereo processing, and saturation inside one instrument.
For Hip Hop and R&B producers, that makes LANDR Retro especially useful for building the musical foundation of a beat.
In this tutorial, we’re going to build a complete lo-fi Hip Hop/R&B idea with LANDR Retro—from the first chord to the final arrangement.
Step 1: Start With the Right Tempo
Before touching Retro, establish the overall feel of the beat.
For this style, I’d start somewhere around:
72–88 BPM
If you want something closer to mellow R&B, try 76–82 BPM.
For more traditional lo-fi Hip Hop, 82–88 BPM can work nicely.
For this example, let’s use:
80 BPM
Now we need a key.
Let’s go with:
D minor
That gives us plenty of opportunities for emotional minor chords while still allowing some warmer major-7 colors.
Step 2: Build a Lo-Fi R&B Chord Progression
This is arguably the most important part.
You don’t need an extremely complicated progression, but basic triads can sometimes sound too clean or predictable for this style.
Instead, use 7ths and 9ths.
Try:
Dm9 – Bbmaj7 – Gm9 – A7
In D minor, that gives us a progression with plenty of soul and tension.
You could voice the chords approximately like this:
Dm9
D – F – A – C – E
Bbmaj7
Bb – D – F – A
Gm9
G – Bb – D – F – A
A7
A – C# – E – G
Don’t feel like you need to play every note.
In fact, spreading the notes between your hands often sounds better.
Try playing the root and fifth lower down while keeping the 7th and 9th extensions in the upper register.
The goal isn’t complexity.
The goal is color.
Step 3: Start With LANDR Retro’s Keys Layer
Now open LANDR Retro.
Start with the Keys section.
This should be the main harmonic foundation of the beat.
Look for something resembling an electric piano, FM piano, mellow acoustic keyboard, or another warm key-based sound.
Don’t worry about finding the “perfect” preset.
Find something with the right general character.
Then shape it.
For lo-fi R&B, I’d generally lean toward:
Attack: relatively quick
Decay: moderate
Sustain: medium-high
Release: moderate
Tone: slightly dark
We don’t want a super-bright piano jumping out of the speakers.
The keys should feel warm and relaxed.
Play your Dm9 progression.
Already, you should have the beginnings of the beat.
Step 4: Add the Synth Layer
Here’s where LANDR Retro becomes more interesting than simply loading another electric-piano plugin.
Bring in the Synth layer underneath your keys.
But don’t make it equally loud.
The synth isn’t supposed to replace the keyboard.
It’s there to provide atmosphere.
Try starting around:
Keys: 100%
Synth: 20–35%
Then adjust by ear.
Give the synth a slightly slower attack and longer release than the keys.
When you play Dm9, you’ll hear the keyboard immediately, while the synth gradually fills the space behind it.
That creates a much more expensive-sounding texture from one MIDI performance.
Step 5: Add Mini-Wave Texture
Now introduce LANDR Retro’s Mini-wave layer.
This is where restraint becomes important.
You don’t necessarily want listeners to identify three separate instruments.
Ideally, everything should merge into one interesting sound.
Start with the Mini-wave layer very low.
Something around:
10–20%
could be enough.
Listen to what happens when you mute it.
If the patch suddenly feels flatter or less interesting, you’ve probably found the sweet spot.
That’s what we’re looking for.
The Mini-wave layer should provide something you feel more than consciously hear.
Step 6: Make It Sound Old
Now we get to the fun part.
LANDR Retro provides several character modes for degrading and coloring the sound, including:
Vinyl
Digit
Bitcrush
Tape
For this particular beat, I’d start with:
Tape
Tape can help soften the digital cleanliness of the instrument while introducing more vintage character.
Don’t automatically turn the effect all the way up.
Start subtly.
You want:
“This sounds warm.”
Not:
“I just put a tape effect on this.”
That distinction matters.
Step 7: Try Vinyl for More Obvious Lo-Fi Character
If Tape isn’t dirty enough, switch over to Vinyl.
This can work especially well if you’re chasing the feeling of sampled Hip Hop.
Again, don’t overdo it.
One of the biggest mistakes producers make with lo-fi music is assuming everything needs to sound completely destroyed.
It doesn’t.
The chord progression still needs clarity.
The drums still need punch.
The bass still needs weight.
The vintage processing should create character without eliminating definition.
Step 8: Use Bitcrush for More Experimental Beats
Bitcrush can take you somewhere completely different.
Instead of warm analog nostalgia, you can create something more digital and degraded.
This can work especially well for:
Alternative R&B, experimental Hip Hop, glitchy lo-fi, underground beats, and more unconventional Trap Soul.
Try Bitcrush on a duplicate Retro part rather than your main chords.
For example:
Keep your primary chords relatively warm.
Create another Retro instance playing a simple two- or three-note melody.
Apply Bitcrush heavily.
Filter it.
Push it backward in the mix.
Now you have an unusual texture floating around the main progression.
Step 9: Add Space
Next, let’s create ambience.
LANDR Retro includes its Space effect for adding reverb and atmosphere.
This is where it’s very easy to go too far.
You want enough reverb to create depth without washing away the chord progression.
For R&B, I’d lean toward a larger, smoother space.
For Hip Hop, I’d generally keep things slightly drier.
There’s also another production trick worth trying:
Add more Space to the Synth layer than the Keys layer.
That helps establish depth.
Your keys remain closer to the listener.
The synth sits farther behind them.
Now the sound has a front and a back.
Step 10: Add Dimension
Next comes Dimension.
This can help increase stereo width and movement.
But don’t automatically make your entire Retro patch extremely wide.
Bass frequencies and lower keyboard notes usually benefit from remaining relatively centered.
Instead, use Dimension to make the atmospheric portion of the sound feel wider.
You want the center of the beat available for:
Kick
Snare
Bass/808
Lead vocal
The melodic atmosphere can surround those elements.
Step 11: Add Amp Character
LANDR Retro’s Amp section gives you another opportunity to introduce saturation and tone.
For this beat, I’d keep it subtle.
Add just enough drive to make the keys feel slightly more textured.
Then compare it with the effect bypassed.
This is important.
If the processed version is simply louder, you may automatically think it sounds better.
Level-match the two versions as closely as possible.
Then decide whether the added character is actually improving the sound.
Step 12: Humanize the Chords
Now we need to make the MIDI performance less perfect.
Perfectly quantized chords can work in some genres.
Lo-fi usually benefits from a little looseness.
Try moving certain chords slightly ahead or behind the grid.
Also vary the velocities.
Instead of:
100 – 100 – 100 – 100
try something like:
82 – 71 – 89 – 76
You don’t need those exact numbers.
The idea is simply to avoid every chord being struck with identical force.
If you’re comfortable playing the progression live, even better.
Record it.
Keep some of the imperfections.
That’s part of the feel.
Step 13: Bounce LANDR Retro to Audio
Here’s one of my favorite ways to use an instrument like LANDR Retro.
Once you have your progression:
Bounce it to audio.
Now temporarily forget that you created it.
Treat it like a sample you found.
This completely changes your production mindset.
Instead of continuing to edit MIDI notes, you start thinking like a sampler.
Step 14: Chop Your Own LANDR Retro Sample
Take the bounced audio and slice it into sections.
Maybe you recorded:
Dm9 | Bbmaj7 | Gm9 | A7
Try rearranging it:
Gm9 | Dm9 | Bbmaj7 | A7
Or chop individual beats within the progression.
You can also:
Reverse certain chops.
Pitch the entire sample down.
Pitch it up.
Duplicate sections.
Remove parts.
Create stutters.
Filter certain chops.
Stretch the audio.
Now your original chord progression begins sounding much less like something played directly from a virtual instrument.
You’re effectively sampling yourself.
For Hip Hop producers, this may be one of the best ways to use LANDR Retro.
Step 15: Pitch the Sample Down
Here’s another trick.
Take the bounced Retro progression and pitch it down:
-2 semitones
or even:
-5 semitones
Listen to how the character changes.
Pitching processed audio downward can create additional darkness and weight.
You may discover that you prefer the pitched version to the original.
If you do this, remember that you’ve changed the musical key.
Build your bass and other melodic elements around the new pitch.
Step 16: Add Dusty Drums
Now it’s time for drums.
For this style, don’t reach immediately for the hardest trap drums in your collection.
Look for:
Soft kick
Dusty snare
Loose clap
Closed hi-hat
Percussion
Shaker
Start simple.
Try:
Kick: Beats 1 and around 3
Snare: Beats 2 and 4
Hi-hat: Straight eighth notes with velocity variation
Then introduce swing.
The drums should feel relaxed.
If everything lands perfectly on the grid, move a few hats or percussion notes slightly late.
That little bit of movement can make a huge difference.
Step 17: Add Bass
For lo-fi Hip Hop, try a warm bass sound.
For modern R&B or Trap Soul, you can use a softer 808.
Follow the chord roots initially:
D – Bb – G – A
But don’t feel obligated to hit every root immediately when the chord changes.
Leave gaps.
Bass doesn’t have to play constantly.
Space gives the groove room to breathe.
For R&B especially, try approaching certain roots from another scale tone.
That can make the bass feel more like an actual musical performance rather than simply following the MIDI chords.
Step 18: Add a LANDR Retro Counter Melody
Instead of loading another synthesizer, open a second instance of LANDR Retro.
This time, create something much simpler.
Try a three-note motif.
Because we’re working around D minor, you could start with:
F – E – D
Play it high.
Leave plenty of space between phrases.
Then choose a different Retro texture.
If your chords use Tape character, try Digit or Bitcrush on the melody.
That gives the two parts related aesthetics without making them identical.
Step 19: Create Ear Candy
Now add little moments that prevent the loop from becoming repetitive.
Take pieces of your LANDR Retro audio and manipulate them.
For example:
Reverse the last chord before the hook.
Pitch one chord down an octave.
Add a filtered chop every eight bars.
Create a reverb tail before a transition.
Mute the sample briefly before the snare.
Reverse a melodic note.
Add a heavily degraded Retro texture in the background.
These tiny details become especially important in minimalist music.
Step 20: Arrange Beyond the 8-Bar Loop
Now comes the part that separates a beat idea from a finished production.
Let’s arrange it.
Intro — 8 Bars
LANDR Retro chords only.
Filter them heavily.
Maybe add vinyl-style character.
No drums yet.
Verse 1 — 16 Bars
Bring in:
Retro chords
Kick
Snare
Hi-hat
Bass
Keep the counter melody out initially.
Let the track breathe.
Hook — 8 Bars
Now open everything up.
Add:
Full Retro chords
Synth layer
Counter melody
Wider Dimension
Additional percussion
Stronger bass movement
The hook should feel noticeably bigger than the verse.
Verse 2 — 16 Bars
Remove something.
Maybe take out the Synth layer.
Change the sample chops.
Simplify the hi-hats.
Introduce a different Retro texture.
You don’t need a completely new beat.
You need controlled variation.
Bridge — 8 Bars
Strip things back dramatically.
Try:
LANDR Retro keys
Heavy Space
No drums
Filtered bass
Then introduce a reversed Retro sample leading into the final hook.
Final Hook — 8–16 Bars
Bring everything back.
This should be the fullest section.
Add a new percussion layer or subtle melodic variation so it doesn’t simply repeat the first hook.
Step 21: Mix LANDR Retro Into the Beat
Once the arrangement is complete, start thinking about the mix.
Don’t automatically EQ LANDR Retro because you think you’re supposed to.
Listen first.
Then identify problems.
If the keys interfere with your bass, gently reduce unnecessary low frequencies.
If they’re fighting with the snare, investigate the midrange.
If the sound is too bright, adjust Retro’s Tone control before immediately adding another EQ plugin.
This is important because many tonal problems can be solved inside the instrument itself.
Step 22: Leave Room for Vocals
If you’re producing R&B or making beats intended for artists, resist the urge to fill every frequency with melodies.
Your beat might sound amazing instrumentally but become impossible to sing over.
LANDR Retro can create fairly rich textures.
That means you don’t need seven additional melodic instruments.
Sometimes:
Retro chords + bass + drums + one counter melody
is enough.
Leave the center of the production relatively open.
That’s where the artist goes.
A Complete LANDR Retro Lo-Fi Beat Recipe
If you want a quick starting template, try this:
Tempo: 80 BPM
Key: D minor
Progression: Dm9 – Bbmaj7 – Gm9 – A7
LANDR Retro Keys: Warm electric piano
Synth: 25%
Mini-wave: 15%
Character: Tape
Space: Moderate
Dimension: Moderate
Amp: Light saturation
Drums: Dusty kick + snare + swung hats
Bass: Warm sub or mellow 808
Counter Melody: Second Retro instance
Arrangement: Intro → Verse → Hook → Verse → Bridge → Hook
Then bounce the main Retro progression to audio and experiment with chopping it.
Hip Hop vs. R&B: How I’d Use LANDR Retro Differently
The same plugin can work very differently depending on the genre.
For lo-fi Hip Hop, I’d lean harder into resampling.
Play the chords, degrade them, bounce them to audio, pitch them, chop them, and treat LANDR Retro like your personal record collection.
For R&B, I’d keep more of the original performance intact.
Use warm keys as the foundation, blend a subtle synth underneath, widen the atmosphere with Dimension, add Space, and allow the extended chords to carry the production.
For Trap Soul, combine both approaches.
Use Retro for dark atmospheric chords, add an 808 underneath, keep the drums sparse, and use chopped Retro textures as ear candy.
That’s where this instrument can become surprisingly versatile.
Final Thoughts: LANDR Retro Is More Than a Lo-Fi Preset Machine
LANDR Retro makes it easy to create vintage textures quickly, but I wouldn’t limit it to simply scrolling through presets until something sounds “lo-fi.”
Its real strength is the workflow.
Start with the Keys layer.
Build your chords.
Blend in Synth.
Introduce Mini-wave texture.
Add Tape, Vinyl, Digit, or Bitcrush character.
Shape the ambience.
Then take it one step further:
Bounce everything to audio and sample yourself.
That’s where LANDR Retro becomes particularly interesting for Hip Hop producers.
You’re no longer simply playing a virtual instrument.
You’re using it to generate source material.
And for R&B producers, its combination of warm keys, atmospheric layers, stereo dimension, and vintage character makes it an easy starting point for soulful chord-driven productions.
You don’t need dozens of sounds.
You need one good musical idea with the right texture.
LANDR Retro gives you plenty of ways to find it.
Check Out LANDR Retro
If you want to experiment with LANDR Retro in your own Hip Hop, R&B, Trap Soul, or lo-fi productions, you can check the latest pricing and availability through Plugin Boutique.
[Check LANDR Retro on Plugin Boutique]
Disclosure: This article may contain affiliate links. If you purchase through one of these links, Pluginera may earn a commission at no additional cost to you.
Related Reading
LANDR Retro Review (2026): Is This Lo-Fi Instrument Worth It?
If you’re still deciding whether Retro belongs in your plugin collection, read our full review for a closer look at its three-layer sound engine, vintage processing, effects, workflow, pros, and cons.