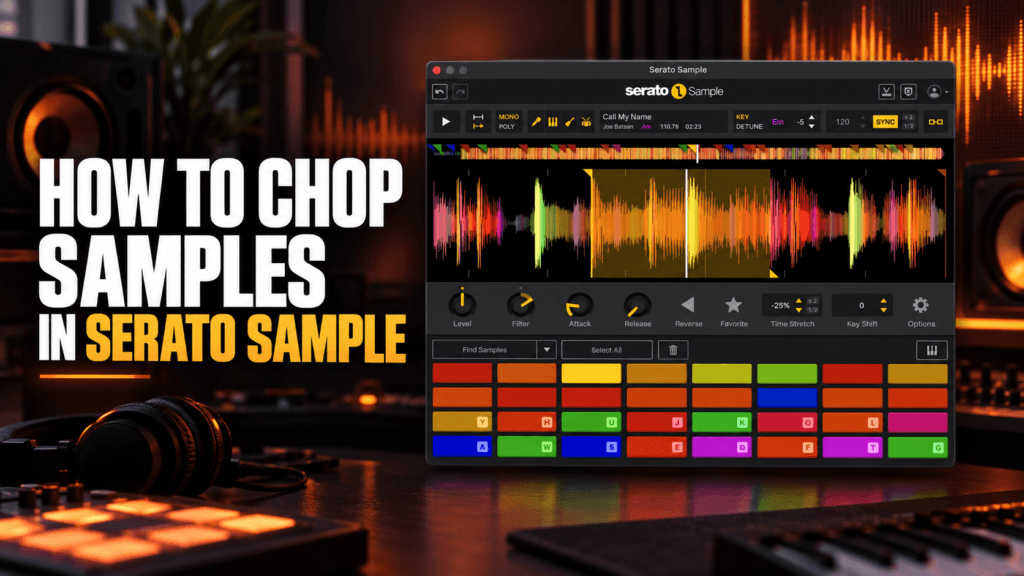
 How to Chop Samples in Serato Sample: Step-by-Step Guide
Learning how to chop samples in Serato Sample is one of the fastest ways to transform an existing recording into something completely new.
Instead of spending several minutes slicing audio manually, you can load a sample, let Serato find potential cue points, and begin performing a new pattern almost immediately. You can then adjust the chops, change their pitch, remove unwanted stems, and reshape the sample until it fits your beat.
The automatic features make Serato Sample accessible for beginners, but you are never locked into the decisions made by the software. You can still place every chop manually and control how each one behaves.
In this guide, I’ll walk you through the entire process—from loading your first sample to recording a finished pattern in your DAW.
What Does It Mean to Chop a Sample?
Chopping a sample means dividing a longer piece of audio into smaller playable sections.
Those sections could include:
- Individual drum hits
- Vocal phrases
- Chord stabs
- Bass notes
- Instrumental melodies
- One-bar musical phrases
- Small pieces of texture or ambience
Each section is assigned to a pad or MIDI note. You can then play those sections in a different order to create a new musical idea.
For example, you could take a four-bar soul sample, divide it into eight smaller pieces, and rearrange those pieces into a completely different melody. The source material stays the same, but the timing, rhythm, and musical context change.
That process is at the heart of traditional hip-hop sampling.
Why Use Serato Sample for Chopping?
You can manually slice audio in almost any modern DAW, but Serato Sample makes the process considerably faster.
The plugin can analyze the sample, estimate its tempo and musical key, synchronize it with your project, and automatically place cue points throughout the recording.
You can then trigger those cue points using:
- A MIDI keyboard
- A pad controller
- Your computer keyboard
- The pads inside the plugin
- Your DAW’s piano roll
Serato Sample also includes pitch shifting, time stretching, filtering, reverse playback, keyboard mode, and stem separation.
That combination lets you move from searching for a sample to performing a new idea without constantly switching between different audio-editing tools.
Step 1: Load Serato Sample in Your DAW
Start by opening Serato Sample as an instrument plugin inside your DAW.
Create a new instrument track, load Serato Sample, and drag your audio file into the plugin. Depending on your DAW, you may also be able to browse to the file and load it from your computer.
Once the file is loaded, Serato Sample will analyze the audio and display its waveform.
You should also see information such as:
- The original tempo
- The detected musical key
- The length of the recording
- The current playback position
Play the sample from beginning to end before creating any chops.
This first listen matters. You want to understand the natural movement of the recording before cutting it into smaller pieces.
Listen for moments such as:
- Clean chord changes
- Vocal phrases
- Drum breaks
- Bass notes
- Instrumental accents
- Empty spaces
- Strong downbeats
- Interesting textures
The waveform can help you navigate the recording, but your ears should make the final decisions.
Step 2: Set the Correct Tempo
Before chopping the sample, make sure Serato has detected its tempo correctly.
Compare the original sample tempo with your DAW’s project tempo. If the detected BPM appears to be twice or half the correct value, use the 2x or 1/2 controls to correct it.
For example, a laid-back 72 BPM sample could be detected as 144 BPM. Both values may follow the same pulse, but choosing the correct tempo makes the beatgrid easier to understand.
After confirming the sample’s BPM, activate Sync if you want Serato Sample to follow the tempo of your DAW.
This allows you to:
- Speed up or slow down the sample
- Match samples recorded at different tempos
- Change your beat’s BPM without rebuilding the chops
- Keep longer phrases aligned with the project
Do not assume the automatic analysis is always perfect. Older recordings, live performances, and samples without a consistent drummer may drift away from the beatgrid.
If the timing feels wrong, trust what you hear and adjust accordingly.
Step 3: Check the Sample’s Musical Key
Serato Sample also analyzes the source and displays its estimated musical key.
Knowing the key helps when you begin adding:
- Bass
- Chords
- Melodies
- Vocal layers
- Additional samples
If your beat is already in a different key, you can pitch the entire sample up or down until it fits the project.
You can also leave the global pitch unchanged and adjust individual chops later. That approach can create new melodic movement using pieces of the same recording.
Key detection is a useful starting point, but it should not replace your ears. If the sample clashes with the other instruments, adjust it until the entire beat sounds musical.
Step 4: Create Automatic Chops With Find Samples
The quickest way to chop samples in Serato Sample is to use Find Samples, the default Autoset mode.
Find Samples analyzes the recording and places cue points in areas that may work well for sampling. Each cue is assigned to one of the plugin’s pads.
Press the Autoset button and play the resulting chops.
If you do not like the first selection, press Autoset again. Serato will generate another set of cue points.
You do not have to accept all the automatic choices. Think of Find Samples as a discovery tool. It can uncover small phrases or textures you might have overlooked while listening to the full recording.
When you find a chop you like, mark it as a favorite. Favorited cues are protected when you run Autoset again, allowing you to keep the best selections while replacing the weaker ones.
This is an efficient way to build a custom collection of chops:
- Run Find Samples.
- Play every cue.
- Favorite the strongest cues.
- Run Find Samples again.
- Repeat until the pads contain useful material.
Step 5: Use the Slicer for Even Chops
If you want predictable, evenly spaced chops, choose the Set Slicer Autoset mode.
The Slicer creates consecutive cue points beginning at the current playhead position. You can then choose the length of each slice.
This method works especially well when:
- The sample has a steady rhythm
- You want one chop per beat
- You want equal half-bar or one-bar sections
- You plan to recreate the original rhythm before rearranging it
- You want tightly organized chops for a pad controller
For a simple starting point, place the playhead at the beginning of a musical phrase and divide the phrase into equal sections.
Try starting with one chop per beat. Once you understand how the phrase is divided, experiment with smaller subdivisions.
Smaller chops offer more control, but they can also make the performance feel mechanical. Longer chops preserve more of the sample’s natural groove.
The best length depends on the source and the beat you are trying to create.
Step 6: Create Manual Chops
Automatic chopping is fast, but manual chopping gives you complete control.
Move the playhead to the exact location where you want a sample to begin. Select an empty pad or trigger its corresponding MIDI note to create a new cue at that position.
Repeat the process for every section you want to capture.
Manual chopping is useful when you want to isolate:
- A specific word from a vocal
- The attack of a chord
- A single bass note
- A clean drum hit
- A short instrumental phrase
- A section the automatic algorithm missed
Zoom into the waveform when placing precise cue points. You may need to move the starting position slightly to avoid clicks, cut-off transients, or unwanted audio from the previous phrase.
However, do not become so focused on visual precision that you remove the character of the performance. Some samples sound better when a little silence, breath, or room noise remains before the musical phrase.
Step 7: Adjust the Start and End of Each Chop
After creating your cues, listen carefully to the beginning and ending of each one.
Serato Sample provides separate handles for adjusting a cue’s start and end positions.
Move the start handle if:
- The transient is being cut off
- There is too much silence before the sound
- Part of the previous note is included
- The sample feels late when performed
Move the end handle if:
- The chop plays for too long
- The next phrase is bleeding into it
- You want a shorter rhythmic stab
- You want the full chord or vocal tail to ring out
The ideal end point depends on how you plan to perform the sample.
Short chops can create a tight, rhythmic feel. Longer chops usually sound smoother and preserve more of the recording’s original movement.
Step 8: Choose Hold or Trigger Mode
Serato Sample provides two main cue playback behaviors: Hold and Trigger.
Hold Mode
In Hold mode, the sample plays for as long as you hold the pad or MIDI key. Playback stops after you release it.
Use Hold mode when you want to:
- Control the exact length of each chop while performing
- Create short, staccato rhythms
- Stop a sample before it reaches the next phrase
- Play the chops like an instrument
Trigger Mode
In Trigger mode, pressing a pad starts playback and the cue continues playing until it reaches its assigned ending.
Use Trigger mode when you want to:
- Play complete phrases
- Let longer samples continue without holding the pad
- Trigger loops or sustained textures
- Create a more relaxed performance
Try both modes before recording. The same chops can produce completely different rhythms depending on how they respond to your fingers.
Step 9: Choose Mono or Poly Playback
You should also decide whether your chops will play in Mono or Poly mode.
In Mono mode, triggering a new chop stops the previous one. This is often the best choice for traditional sample chopping because it prevents multiple pieces of the source from overlapping.
Mono mode works well for:
- Chopped soul samples
- Vocal phrases
- Bass-heavy samples
- One continuous melody
- Tight MPC-style performances
In Poly mode, multiple chops can play simultaneously.
Poly mode works well for:
- Layering vocal harmonies
- Stacking chord fragments
- Combining textures
- Creating overlapping ambient phrases
- Performing multiple one-shot sounds
If your chopped pattern sounds crowded or muddy, check whether Poly mode is causing the cues to overlap. Switching to Mono may clean up the arrangement immediately.
Step 10: Shape Individual Chops
Once the cue points are in place, you can adjust each chop individually.
Serato Sample gives you control over parameters including:
- Level
- Filter
- Attack
- Release
- Reverse
- Key shift
- Time stretch
Level
Use the level control to balance quiet and loud chops. Avoid making every cue exactly the same volume if the natural dynamics contribute to the groove.
Filter
Filtering can remove unwanted low end, soften harsh high frequencies, or create variation between repeated chops.
For example, you might filter one version of a chord and leave another version open. Alternating between them creates movement without requiring another sample.
Attack
Increase the attack when a chop begins too sharply or produces a click. A slower attack can also turn a percussive sound into a softer texture.
Release
The release control determines how the sound fades after playback ends. A short release produces a tight cut, while a longer release makes the chop feel smoother.
Reverse
Reversing a cue can turn an ordinary chord, vocal, or cymbal into a transition. Reversed chops are especially useful before the beginning of a new section.
Key Shift
Individual cue pitch controls allow you to tune separate chops without changing the pitch of the entire sample.
Try pitching a duplicate chop up or down to create a response to the original phrase.
Time Stretch
Individual time-stretch controls can change the speed of a particular cue. This is useful when one phrase needs to be shorter, longer, or rhythmically different from the rest.
Step 11: Use Stems Before Chopping
Serato Sample can separate the source recording into four main elements:
- Vocals
- Melody
- Bass
- Drums
You can mute or isolate these parts before performing your chops.
For example:
- Remove the original drums before adding your own
- Remove the bass to avoid clashing with a new bass line
- Isolate a vocal phrase
- Keep the melody while removing vocals
- Sample only the drums from a larger recording
This does not mean you must automatically remove the original drums or bass. Sometimes those elements are an important part of the sample’s character.
Make the decision based on what the beat needs.
If the original drums give the sample energy, keep them and reinforce them with your own sounds. If they fight your new drum pattern, mute them or lower their stem level.
Step 12: Perform a New Pattern
Now that the sample is chopped and edited, stop looking at the waveform and begin playing.
Start with two or three cues instead of trying to use every available chop.
A simple pattern with strong timing is usually more effective than a complicated sequence with no memorable rhythm.
Try this basic process:
- Choose one chop as the beginning of the phrase.
- Choose a second chop that creates movement.
- Use a third chop as the answer or resolution.
- Leave space between some of the notes.
- Repeat the phrase with one small variation.
You can also use call and response.
Play one group of chops during the first half of the phrase, then answer it with a different group during the second half.
Do not be afraid to repeat a strong chop. Repetition helps the listener understand the musical idea.
Step 13: Record the Chops Into Your DAW
Once you find a pattern you like, record it as MIDI in your DAW.
Do not worry about playing it perfectly on the first attempt. Capture the feel first, then correct only the notes that are noticeably early or late.
Heavy quantization can remove the natural groove from a sample performance. If the pattern already feels good, use light quantization or leave it untouched.
After recording the first pattern, create variations for different sections of the beat.
You could use:
- A simplified pattern for the verse
- The full pattern for the chorus
- A filtered version for the intro
- Reversed chops before transitions
- A vocal-only variation for the bridge
- A one-chop breakdown before the drums return
This turns one sampled phrase into the foundation of a complete arrangement.
Tips for Chopping Samples in Serato Sample
Start With Fewer Chops
Having 32 available cue points does not mean you need to use all 32.
Four great chops are more valuable than 32 random ones.
Chop Musical Ideas, Not Just Grid Lines
The beatgrid is useful, but music does not always begin perfectly on a grid line. Listen for the natural start of the chord, word, or drum hit.
Leave Space in the Pattern
A sample does not need to play continuously. Silence can make the drums hit harder and give the listener time to absorb the phrase.
Use Longer Chops for R&B
Longer chops often preserve the smooth movement, ambience, and chord tails that work well in R&B and Trap Soul.
Use Shorter Chops for Rhythmic Hip-Hop Patterns
Short chops make it easier to create tight, syncopated patterns and dramatic stops.
Change One Element at a Time
If the pattern is not working, avoid changing the chops, pitch, tempo, playback mode, and filter all at once.
Change one element, listen, and decide whether it improved the idea.
Build Around the Sample
Once you have a strong chopped pattern, let it guide the rest of the production. Choose drums, bass, and additional instruments that support the sample instead of competing with it.
Common Serato Sample Chopping Mistakes
Accepting the First Automatic Chops
Autoset is a starting point, not the finished creative decision. Run it multiple times and edit the strongest results.
Using Every Chop
Too many different cues can make a pattern difficult to remember. Establish a clear musical phrase first.
Ignoring the Sample’s Key
A great bass sound can still ruin the beat if it is playing notes that clash with the sample.
Over-Quantizing the Performance
Perfect timing is not always better timing. Preserve some of the natural push and pull if it makes the groove feel good.
Cutting Every Cue Too Tightly
Removing every breath and bit of ambience can make the sample sound unnatural. Let some chops breathe.
Forgetting About the Original Bass
If your new bass line sounds muddy, the source may already contain low-frequency information. Try muting the Bass stem before reaching for an EQ.
Building Only a Four-Bar Loop
Once the main pattern works, create at least two variations. Those variations will make it easier to turn the loop into a full song.
Can You Chop Samples Manually in Serato Sample?
Yes. You do not have to use the automatic Find Samples feature.
You can position the playhead anywhere in the recording and assign that location to an empty cue pad. This gives you complete control over the beginning, ending, and behavior of every chop.
A useful workflow is to combine both methods.
Use Find Samples to discover interesting sections quickly, then manually adjust or replace the cue points until the pad layout fits your idea.
Is Serato Sample Good for Beginners?
Serato Sample is one of the easier ways for a beginner to start chopping samples because it handles much of the initial setup automatically.
You do not need to understand advanced audio editing before making your first pattern. Load a sample, run Find Samples, and begin playing the pads.
However, the plugin still gives experienced producers enough control to create their own cue points, manipulate individual chops, isolate stems, and design more complex arrangements.
The automation helps you begin. Your decisions determine whether the finished beat sounds original.
Final Thoughts
Learning how to chop samples in Serato Sample is not about allowing the software to make every creative decision for you.
Its automatic features remove the slowest parts of the setup process, giving you more time to listen, perform, and experiment. The best results usually come from combining that speed with intentional choices.
Let Serato suggest a few starting points. Keep the strongest moments. Move the cue points that feel wrong. Change the rhythm, pitch, playback behavior, and arrangement until the sample belongs inside your production.
You do not need the most complicated chopping technique to make a great beat. You need a few strong pieces, a memorable rhythm, and the patience to keep experimenting until the sample says something new.
Want to try the workflow yourself? [Check the current price of Serato Sample at Plugin Boutique.]
Nope. You’re ready. Let’s make something.