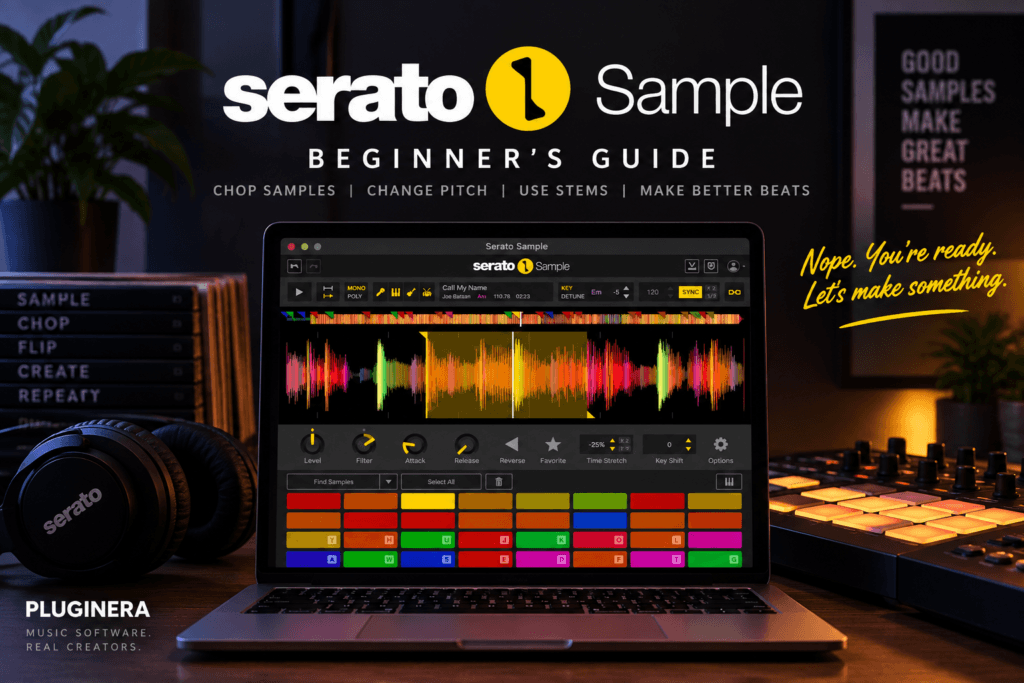
 Sampling has always been one of the foundations of modern music production.
But traditionally, sampling could involve a lot of work. You had to find the right section of a record, chop it manually, map those chops across pads or keys, adjust the tempo, tune everything, and then figure out how to turn those pieces into something new.
Serato Sample makes that process much faster.
Instead of spending half your session preparing a sample, you can load audio, find interesting sections, create chops, change the key, manipulate the tempo, and start building an idea almost immediately.
And you don’t need to be an expert at sampling to use it.
In this Serato Sample tutorial for beginners guide, I’ll walk you through how to use Serato Sample, from loading your first piece of audio to creating a completely new Hip Hop or R&B idea from it.
What Is Serato Sample?
Serato Sample is a sampling plugin designed to help producers quickly manipulate audio inside their DAW.
At its core, it lets you take an audio file and turn different sections of that file into playable samples.
You can use it for:
- Chopping samples
- Re-pitching audio
- Changing the playback speed
- Finding interesting sections of a sample
- Creating playable sample banks
- Manipulating loops
- Separating elements with stems
- Building entirely new melodies and arrangements from existing audio
What makes Serato Sample especially useful is how quickly you can move from finding a sample to actually making music with it.
Instead of getting stuck editing waveforms for twenty minutes, you can spend that time experimenting.
Step 1: Load Serato Sample In Your DAW
Start by creating an instrument track in your DAW and loading Serato Sample as an instrument plugin.
Depending on your DAW, the exact process will be slightly different, but the concept is the same.
Create a MIDI or instrument track, insert Serato Sample, and open the plugin interface.
You’ll initially have an empty sampler waiting for audio.
Now you’re ready to give it something to work with.
Step 2: Load A Sample
Drag an audio file directly into Serato Sample.
This could be:
- A drum break
- Piano loop
- Guitar recording
- Vocal phrase
- Soul sample
- Synth melody
- Percussion loop
- Field recording
- Your own previously recorded audio
Once the audio loads, Serato Sample analyzes the file.
One of the biggest advantages here is that Serato’s technology can help determine information such as the sample’s tempo and musical key.
That immediately makes manipulating the sample much easier.
Instead of guessing how your sample relates to your beat, you have a useful starting point.
Step 3: Find Interesting Chops
Now comes the fun part.
Instead of simply playing the entire sample from beginning to end, you can turn different sections into individual chops.
Serato Sample can help locate interesting parts of the audio automatically.
Those slices can then be assigned across MIDI notes or pads.
Play your MIDI keyboard or pad controller and listen to the different sections.
Don’t worry about creating a perfect pattern yet.
Just explore.
You might discover that a tiny half-second section sounds more interesting than the original loop.
That’s one of the beautiful things about sampling.
You’re not necessarily looking for the obvious part.
You’re looking for the part that inspires something new.
Step 4: Create Your Own Manual Chops
Automatic chopping is convenient, but you shouldn’t rely on it completely.
Sometimes your ear will hear something the software doesn’t.
Maybe there’s a chord right before a vocal phrase.
Maybe there’s a tiny guitar note buried between two beats.
Maybe the tail of a sound creates an interesting texture.
Create manual cue points around those sections.
This gives you more control over how the sample is divided.
A great exercise is to create several different types of chops:
Musical chops – individual chords or notes.
Rhythmic chops – sections with interesting timing or groove.
Texture chops – breaths, noise, reverb tails, vinyl sounds, or other unusual moments.
Once those are mapped across your controller, the original recording starts becoming a new instrument.
Step 5: Play The Sample Like An Instrument
This is where Serato Sample becomes much more than a simple loop player.
Instead of pressing play on the original sample, try performing the chops yourself.
Play them in a different order.
Repeat certain sections.
Skip others entirely.
Try something like:
Chop 1 → Chop 3 → Chop 2 → Chop 2
Then try:
Chop 4 → Chop 1 → Chop 5 → Chop 3
You’re essentially rearranging the musical DNA of the original recording.
If you’re making Hip Hop, this can create that classic chopped-sample feel.
For R&B or Trap Soul, you might use longer, smoother sections and leave more space between the chops.
The important thing is to stop thinking of the audio as a finished loop.
Think of it as raw material for a new performance.
Step 6: Change The Key Of The Sample
One of Serato Sample’s most useful features is the ability to manipulate pitch.
Let’s say you have a sample in C minor, but your beat is in E minor.
Instead of abandoning the sample, you can transpose it.
This can also be used creatively.
Try pitching a sample:
- Down 2 semitones
- Down 5 semitones
- Down an octave
- Up 3 semitones
- Up an octave
Pitching a sample downward can create a darker, heavier character that’s great for Hip Hop and Trap Soul.
Pitching upward can create brighter or more unusual textures.
Don’t think of pitch adjustment only as a corrective tool.
It’s also a sound-design tool.
Step 7: Experiment With Time-Stretching
Tempo can completely change how a sample feels.
A bright soul loop might sound nostalgic when slowed down.
A relaxed guitar phrase might become energetic when sped up.
Serato’s time-stretching technology allows you to manipulate the timing of your sample without being locked into its original tempo.
Try extreme settings occasionally.
Even if your final beat doesn’t use them, extreme processing can reveal textures you wouldn’t have discovered otherwise.
You might slow something dramatically, resample it, and then chop that new version again.
That’s where sampling starts becoming sound design.
Step 8: Experiment With Stems
Depending on your version and available features, Serato Sample’s stem-separation tools can open up even more possibilities.
Instead of treating a recording as one complete piece of audio, stems can help isolate different elements.
For example, you may be able to work more specifically with elements such as:
- Vocals
- Drums
- Bass
- Melodic material
This can completely change how you approach a sample.
Maybe you love the chords but don’t want the drums.
Maybe the vocal is interesting, but everything underneath it gets in the way.
Or maybe you only want the bass movement.
Removing or isolating elements gives you more freedom to rebuild the sample around your own production.
Step 9: Build A Simple Hip Hop Or R&B Beat
Now let’s actually use the sample.
Start with a simple four- or eight-bar MIDI performance using your chops.
Don’t add drums yet.
Listen to the sample pattern by itself.
Does it groove?
Does it feel repetitive?
Does one chop happen too often?
Make the sample interesting before adding more instruments.
Next, add drums.
For Hip Hop, you might start with:
- Kick
- Snare
- Hi-hat
- Percussion
For R&B or Trap Soul, leave a little more space.
You don’t necessarily need a complicated drum pattern.
Let the sample establish the mood.
Then add bass.
Instead of immediately reaching for another melodic instrument, listen to what the sample already provides.
Sometimes the best sampled beats are surprisingly simple.
A strong sample, drums, bass, and a few carefully chosen textures may be enough.
Step 10: Create Variation
This is where a lot of sampled beats get stuck.
You create a great four-bar loop…
…and listen to it for two hours.
Instead, create variations immediately.
Duplicate your original section and change something.
For example:
Verse: Main sample pattern
Pre-Chorus: Remove one chop
Chorus: Add an additional chop or longer section
Break: Filter or remove the sample
Second Verse: Use a different chop sequence
You can also create variation by muting individual elements.
Sometimes removing the sample for two beats creates more excitement than adding another instrument.
Arrangement is often about contrast, not complexity.
Beginner Mistakes To Avoid
Serato Sample makes sampling easy, but there are still a few traps beginners can fall into.
Using Every Chop
Just because you have sixteen chops doesn’t mean you need all sixteen.
Three great chops can create an entire beat.
Over-Chopping
You don’t always need tiny slices.
Longer sections can preserve the emotion and groove of the original performance.
Ignoring The Original Rhythm
Sometimes producers immediately force a sample onto the grid.
Before doing that, listen to the original groove.
Small timing imperfections may be exactly what makes the sample feel good.
Adding Too Many Instruments
If your sample already contains chords, melodies, and texture, adding another piano, synth, guitar, and pad may make the beat crowded.
Let the sample breathe.
Staying Too Close To The Original
Try changing the order, pitch, timing, and rhythm of your chops.
The goal isn’t simply to replay the original recording.
It’s to discover something new inside it.
A Simple Serato Sample Workflow
If you’re opening Serato Sample for the first time, don’t overcomplicate it.
Use this workflow:
- Load a sample.
- Listen to the entire recording.
- Find several interesting sections.
- Create chops.
- Play the chops on your keyboard or pads.
- Build a four-bar pattern.
- Experiment with pitch.
- Adjust the timing if necessary.
- Add drums.
- Add bass.
- Create two or three sample variations.
- Arrange the beat.
That’s enough to make an entire record.
You can explore the deeper features later.
Serato Sample For Hip Hop
Serato Sample feels especially natural for Hip Hop production because the workflow encourages experimentation.
Load an old recording, drum break, melody, or your own audio and start searching for moments that can be transformed.
Try pitching samples down.
Reverse sections.
Create short rhythmic chops.
Leave gaps between notes.
And don’t automatically quantize everything.
A slightly imperfect sample performance can give your beat character that disappears when everything sits perfectly on the grid.
Serato Sample For R&B And Trap Soul
For R&B and Trap Soul, try approaching sampling differently.
Instead of extremely short chops, experiment with longer musical phrases.
Look for:
- Emotional chord progressions
- Vocal textures
- Guitar phrases
- Ambient sections
- Reverb tails
- Soft keyboard passages
Pitching samples downward can create darker textures that work beautifully underneath modern R&B drums.
You can also remove drums from a sample using stem separation and build your own rhythm underneath the remaining musical material.
That gives you more control while preserving the character of the original recording.
Do You Need A MIDI Controller?
Need? Like, as in absolutely necessary? No.
You can quite frankly program MIDI notes directly inside your DAW.
But playing the chops on a MIDI keyboard or pad controller can make sampling feel much more immediate.
There’s something different about physically experimenting with chops instead of drawing every note into a piano roll.
You start reacting to the sound.
And sometimes those imperfect performances become the best part of the beat.
Is Serato Sample Good For Beginners?
Yes.
In fact, that’s one of its biggest strengths.
Serato Sample removes many of the technical barriers that traditionally made sampling intimidating.
You don’t need to understand complicated sampler routing before you can start experimenting.
Load audio.
Find something interesting.
Chop it.
Play it.
Manipulate it.
Make music.
As your sampling skills improve, you’ll naturally start discovering more creative ways to use those tools.
Final Thoughts
Learning how to use Serato Sample isn’t really about memorizing every button in the plugin.
It’s about learning how to listen differently.
A finished recording isn’t necessarily a finished recording anymore.
A chord can become a new instrument.
A vocal breath can become percussion.
A drum break can become a completely different groove.
A tiny section nobody would normally notice can become the foundation of an entire beat.
That’s what makes sampling exciting.
Serato Sample simply makes getting from “I hear something interesting” to “I have a beat” incredibly fast.
So load a sample, start chopping, and experiment.
Nope. You’re ready. Let’s make something.