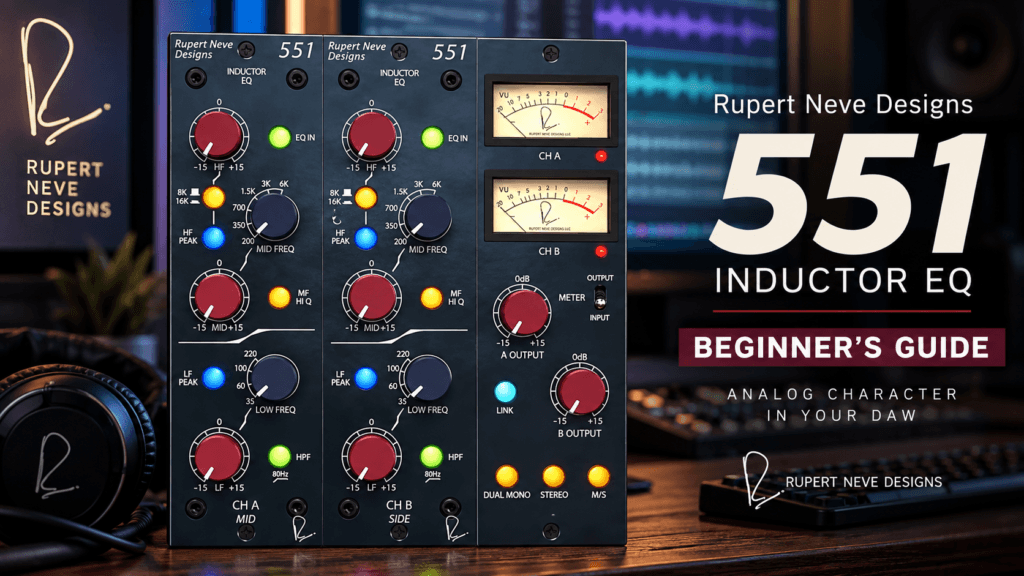
 The Rupert Neve Designs 551 Inductor EQ brings the sound and workflow of a classic three-band analog EQ directly into your DAW.
Unlike modern digital EQs that give you dozens of bands, spectrum analyzers, and extremely precise frequency control, the 551 takes a much simpler approach.
You get three main EQ bands, a high-pass filter, and carefully selected frequency choices.
And that simplicity is part of the appeal.
The 551 isn’t necessarily the EQ you reach for when you need to surgically remove a tiny resonance. Instead, it’s designed for musical tone shaping—adding weight to a kick, bringing a vocal forward, opening up the top end of a mix, or simply giving an instrument more character.
In this beginner’s guide, we’ll walk through how the 551 Inductor EQ plugin works and how you can start using it in your own mixes.
What Is The 551 Inductor EQ?
The 551 Inductor EQ plugin is Rupert Neve Designs’ software recreation of its hardware 551 500 Series Inductor EQ.
The original hardware was released in 2014 and uses EQ circuitry originally developed for the company’s Shelford Channel. Its three bands take inspiration from several classic Rupert Neve EQ designs.
The plugin models elements of the hardware signal path including its custom-wound inductors, transformers, and Class-A gain blocks.
Those components are an important part of the 551’s identity.
Instead of functioning purely as a transparent frequency-shaping tool, the 551 is designed to bring some of the tonal character associated with classic analog Neve equipment into your DAW.
The result is an EQ geared toward broad, musical decisions rather than endless surgical tweaking.
Understanding The 551 Inductor EQ
If you’re accustomed to something like a modern parametric EQ, the 551 may initially feel limited.
That’s intentional.
The EQ gives you three main frequency sections:
- Low Frequency
- Mid Frequency
- High Frequency
There’s also an 80 Hz high-pass filter.
Rather than letting you type in practically any frequency imaginable, the 551 provides selected frequency points.
This changes the way you work.
Instead of staring at a spectrum analyzer trying to locate the “perfect” frequency, you’re encouraged to listen and make broader tonal decisions.
Does the kick need more weight?
Does the vocal need more presence?
Does the synth need more air?
Those are exactly the kinds of questions the 551 is built around.
Step 1: Start With The Source
Before touching the EQ, listen to the sound in the context of your mix.
This is important.
Don’t automatically start boosting and cutting frequencies simply because you’ve inserted an EQ.
Ask yourself:
What am I trying to change?
Maybe your piano sounds muddy when the bass enters.
Maybe the vocal feels buried.
Maybe the kick needs more weight.
Or maybe your synth needs a little more brightness.
Identify the problem—or the tonal goal—before reaching for the controls.
This prevents you from EQing simply because an EQ happens to be on the channel.
Step 2: Use The High-Pass Filter When Necessary
The 551 includes a fixed 80 Hz high-pass filter with a 12 dB-per-octave slope.
A high-pass filter removes frequencies below its cutoff point while allowing higher frequencies to pass.
This can be useful for sources that don’t need much deep low-frequency information.
For example, you might experiment with the high-pass filter on:
- Vocals
- Guitars
- Pianos
- Percussion
- Some synthesizers
But don’t fall into the trap of automatically high-passing everything except your kick and bass.
If the low-frequency information contributes positively to the sound, there may be no reason to remove it.
Use the filter because the mix needs it—not because you’ve been told every track needs a high-pass filter.
Step 3: Shape The Low Frequencies
The low-frequency section is one of the most interesting parts of the 551.
It can operate as either a shelf or peak EQ, giving you two different ways to shape the bottom end.
A shelf affects frequencies broadly above or below a selected point, while a peak focuses the adjustment more around the selected frequency.
The 551’s low band can be useful for adding:
- Weight to kick drums
- Depth to bass
- Body to synths
- Warmth to instruments
- Low-end fullness to a mix
One of the best ways to learn this section is simply to exaggerate it temporarily.
Select a frequency and boost it significantly.
Listen to what changes.
Then reduce the boost until it sounds natural in the mix.
This “boost and listen” technique can help beginners develop their ears much faster than memorizing frequency charts.
Step 4: Use The Midrange To Bring Sounds Forward
The midrange is where a huge amount of musical information lives.
Vocals, guitars, keyboards, snares, synths, and many other instruments compete for space here.
The 551’s midrange section was inspired by classic 1073-style EQ circuitry and is designed to help shape presence and character.
Try using the midrange when a sound needs to:
- Come forward in the mix
- Gain more definition
- Lose some boxiness
- Cut through other instruments
- Develop more character
Here’s an important mixing lesson:
Don’t automatically boost a sound because you can’t hear it.
Sometimes another instrument is masking it.
For example, if your vocal and piano are fighting for the same midrange space, slightly reducing an overlapping frequency in the piano may help the vocal become clearer without boosting the vocal at all.
Think about EQ as creating relationships between instruments—not simply changing individual sounds.
Step 5: Shape The High Frequencies
The high-frequency section is where you can add brightness, clarity, and openness.
The 551 provides options that allow the high band to behave differently depending on how you configure it, including frequency choices at 8 kHz and 16 kHz.
Small boosts here can help give vocals, percussion, keyboards, and entire mixes a more open character.
But be careful.
More high end doesn’t automatically mean better.
Too much can make a mix harsh, thin, or fatiguing.
Start with small adjustments and listen to the result with the rest of the mix playing.
Step 6: Make Small Moves First
One of the easiest mistakes beginners make with EQ is assuming every adjustment needs to be dramatic.
It doesn’t.
Try starting with boosts or cuts around 1–3 dB.
Then bypass the EQ.
Ask yourself:
Did the sound actually improve?
If you’re not sure, level-match the processed and unprocessed signals as closely as possible.
Louder signals often sound “better” simply because they’re louder.
Your goal is to determine whether the EQ decision improved the tone—not whether it increased the volume.
Step 7: EQ In Context
This might be the most important lesson in this entire guide.
Mix with the song playing.
Solo can be useful when you’re hunting down a specific problem, but an instrument doesn’t need to sound perfect by itself.
It needs to work with everything else.
A piano might sound slightly thin when soloed but sit perfectly between the bass and vocal.
A kick might sound strange by itself but fit beautifully with the bass.
The mix is the final judge.
Use solo as a tool—not as the environment where you make every decision.
Using The 551 For Corrective vs Tonal EQ
It’s useful to understand the difference between corrective EQ and tonal EQ.
Corrective EQ fixes problems.
That might include:
- Resonances
- Mud
- Harsh frequencies
- Unwanted low-frequency rumble
Tonal EQ changes the overall character of a sound.
That might include:
- Adding warmth
- Increasing presence
- Adding brightness
- Giving a kick more weight
- Making a vocal feel more forward
The 551 can handle both kinds of work, but its design makes it especially attractive for tonal EQ.
For extremely surgical work, you may still want a modern parametric or dynamic EQ before or after it.
There’s nothing wrong with using multiple EQs when they serve different purposes.
A Simple 551 Inductor EQ Workflow
If you’re opening the plugin for the first time, try this workflow:
1. Listen first.
Determine what you want to change.
2. Check the low end.
Decide whether the 80 Hz high-pass filter is actually necessary.
3. Shape the low frequencies.
Add or remove weight depending on the source.
4. Adjust the midrange.
Listen for body, congestion, presence, and definition.
5. Shape the highs.
Add brightness or openness only when the sound needs it.
6. Bypass the plugin.
Compare your processed signal with the original.
7. Listen in context.
Make your final decision while the entire mix is playing.
This workflow keeps you focused on listening rather than endlessly turning knobs.
What About Mid/Side Processing?
The plugin version of the 551 adds something you won’t find on the original hardware: true Mid/Side processing.
Mid/Side processing allows you to treat information in the center of the stereo image differently from information toward the sides.
This opens up more advanced possibilities.
For example, you might eventually use M/S EQ to shape the center of a stereo bus differently from the wider elements.
But if you’re new to EQ, don’t feel like you need to start here.
Learn the basic three-band EQ first.
Once you understand how the 551 affects frequency and tone, Mid/Side processing becomes much easier to use intentionally.
Is The 551 Inductor EQ Good For Beginners?
It can be.
Modern EQ plugins sometimes give beginners too much information.
You see the entire frequency spectrum moving in real time, which can tempt you to start mixing with your eyes.
The 551 takes away much of that visual complexity.
You have fewer choices.
That forces you to listen.
And learning to recognize changes in low end, midrange, presence, and high-frequency content is ultimately much more valuable than memorizing where a frequency appears on a graph.
Final Thoughts
Instead of giving you unlimited bands and microscopic control, it gives you a deliberately curated set of tools for shaping tone.
That’s exactly why it can be so useful.
Use the low band to shape weight and body.
Use the midrange to control presence and character.
Use the highs to add brightness and openness.
And most importantly:
Listen before you EQ.
You don’t need to change every sound just because you have an EQ available.
Sometimes the best EQ decision is leaving the sound alone.
But when a track needs a little more weight, presence, sweetness, or analog-style character, the 551 Inductor EQ gives you a straightforward way to shape it without getting lost in dozens of controls.
Nope. You’re ready. Let’s make something.