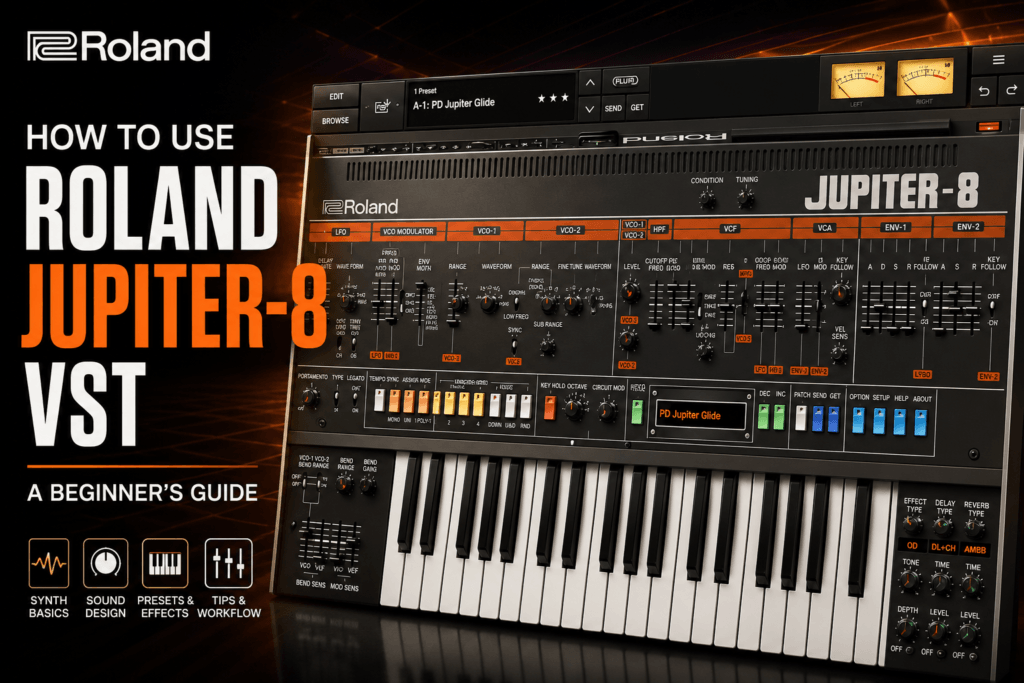
 How To Use Roland JUPITER-8 VST: A Beginner’s Guide
The Roland JUPITER-8 VST gives producers access to the sound and workflow of one of the most famous analog synthesizers ever made—without needing to track down an extremely expensive vintage keyboard.
But opening the plugin for the first time can be intimidating.
There are oscillators, filters, envelopes, LFOs, modulation controls, an arpeggiator, effects, and enough sliders to make a beginner wonder where to even start.
The good news is that the JUPITER-8 is actually a fairly straightforward synthesizer once you understand its basic signal flow.
In this guide, we’ll break down how to use the Roland JUPITER-8 VST, from loading presets and understanding the oscillators to designing pads, basses, leads, and sounds for Hip Hop and R&B.
By the end, you should have a much better idea of what the major controls do—and, more importantly, how to use them when you’re actually making music.
What Is the Roland JUPITER-8 VST?
The Roland JUPITER-8 Software Synthesizer is Roland’s official software recreation of the legendary JUPITER-8 analog polysynth originally introduced in 1981.
Roland uses its Analog Circuit Behavior (ACB) technology to model the behavior of the original instrument’s circuitry.
Instead of simply giving you samples of an old JUPITER-8, the plugin behaves like a programmable synthesizer.
That means you can manipulate its:
- Oscillators
- Filters
- Envelopes
- LFO
- Modulation
- Arpeggiator
- Effects
- Circuit behavior
This gives you considerably more control than a sample-based vintage synth library.
And although the plugin is capable of producing classic ’80s sounds, you certainly aren’t limited to making ’80s music.
The JUPITER-8 can be an excellent instrument for Hip Hop, R&B, Trap Soul, Pop, Synthwave, Neo-Soul, Funk, and cinematic production.
Understanding the JUPITER-8 Signal Flow
Before touching individual controls, understand one basic concept.
Most sounds in the JUPITER-8 follow a signal path that looks something like this:
Oscillators → Filter → Amplifier → Effects
The oscillators create the raw sound.
The filter shapes its tone.
The amplifier controls its volume.
Envelopes and modulation then change those elements over time.
If you remember that basic structure, the huge interface starts making considerably more sense.
You don’t need to understand every slider before making music.
Start with the oscillators, filter, and envelopes.
Those three areas alone can create a massive range of sounds.
Step 1: Start With a Preset
One of the easiest ways to learn the Roland JUPITER-8 is by exploring its presets.
Instead of immediately trying to build sounds from scratch, load a patch that’s relatively close to what you’re looking for.
For example, you might search for:
Pad → chords and atmospheric layers
Bass → low-end parts
Lead → melodies and countermelodies
Strings → lush chord layers
Brass → punchy harmonic sounds
Arps → rhythmic melodic patterns
Play the preset before changing anything.
Then start moving one control at a time.
This is one of the fastest ways to understand synthesis because you can immediately hear how each parameter affects a professionally designed sound.
Try This
Load a pad preset.
Play a minor seventh chord.
Now slowly lower the VCF Cutoff.
You’ll hear the sound become darker.
Raise the cutoff again.
The sound becomes brighter.
You’ve just learned one of the most important controls on the entire synthesizer.
Step 2: Understand VCO-1
The JUPITER-8 starts generating sound with its oscillators.
You’ll see these labeled as VCO-1 and VCO-2.
VCO stands for:
Voltage Controlled Oscillator
On the original analog hardware, these circuits physically generated the waveforms.
In the software version, Roland models their behavior.
VCO-1 gives you several waveform options.
Different waveforms have different tonal characteristics.
Saw Wave
The saw wave is bright and harmonically rich.
It’s excellent for:
- Pads
- Strings
- Brass
- Leads
- Synth basses
If you want that big vintage polysynth character, the saw wave is an excellent starting point.
Square/Pulse Wave
Pulse-style waves tend to sound more hollow and focused.
They’re useful for:
- Bass
- Leads
- Retro keys
- Plucks
- Funky synth sounds
Pulse width modulation can also add movement to these sounds.
Triangle Wave
Triangle waves are smoother and contain fewer upper harmonics.
They’re useful when you want softer sounds or additional low-end reinforcement.
Step 3: Bring In VCO-2
Things become much more interesting when you introduce the second oscillator.
VCO-2 lets you layer another waveform with VCO-1.
One of the easiest techniques is using similar waveforms and slightly detuning them.
For example:
VCO-1: Saw
VCO-2: Saw
Then slightly change the tuning of VCO-2.
The two oscillators interact and create subtle movement.
Suddenly your basic saw wave sounds wider and more analog.
This is an excellent starting point for R&B pads and synth strings.
You can also place the oscillators in different octave ranges.
Try having VCO-1 play the main pitch while VCO-2 plays an octave lower.
Now the patch becomes thicker.
For bass sounds, that can be particularly useful.
Step 4: Use the Mixer to Balance the Oscillators
Once you’ve created your two oscillator sources, you’ll need to decide how much of each one you want to hear.
You don’t always need both oscillators at equal volume.
For example, you might use:
VCO-1: Main sound
VCO-2: Quieter supporting layer
This lets you add thickness without completely changing the character of the patch.
Think of the oscillators almost like layering two instruments in your DAW.
One can dominate while the other provides additional texture.
Step 5: Learn the VCF Filter
If you only learn one sound-design section beyond the oscillators, make it the VCF.
VCF stands for:
Voltage Controlled Filter
The filter determines how much high-frequency content passes through the sound.
The most important control is Cutoff Frequency.
Lower Cutoff
The sound becomes:
- Darker
- Warmer
- Softer
- More distant
Higher Cutoff
The sound becomes:
- Brighter
- Sharper
- More aggressive
- More present
This makes the filter one of the best tools for fitting synth sounds into your beat.
If your pad is competing with vocals, keys, or melodies, don’t immediately reach for an EQ.
Try lowering the JUPITER’s filter first.
You may solve the problem directly at the sound source.
Step 6: Experiment With Resonance
Next to the cutoff you’ll find Resonance.
Resonance emphasizes frequencies around the filter’s cutoff point.
Small amounts can add character.
Higher settings can produce much more obvious synth-like tones.
For R&B pads, you may only need subtle resonance.
For leads, effects, and more experimental patches, you can push it considerably harder.
Try adjusting resonance while sweeping the cutoff.
You’ll quickly hear how the two controls interact.
Step 7: Shape the Sound With the Amp Envelope
Now we need to control how the sound behaves when you press and release a key.
This is where the envelope becomes important.
You’ll commonly see four controls:
A – Attack
D – Decay
S – Sustain
R – Release
Together they’re known as an ADSR envelope.
Understanding ADSR will dramatically improve your ability to design synth sounds.
Attack
Attack determines how quickly the sound reaches full volume after you press a key.
Short attack:
Immediate sound
Useful for basses, plucks, and leads.
Long attack:
Gradual fade-in
Excellent for pads and strings.
Decay
Decay determines how quickly the sound falls from its initial peak toward the sustain level.
Sustain
Sustain determines the level maintained while you’re holding the key.
Release
Release determines how long the sound continues after you release the key.
Longer release times are especially useful for atmospheric R&B pads.
Step 8: Build a Simple R&B Pad
Now let’s combine what we’ve learned.
Initialize a patch or choose something relatively basic.
Try this general starting point:
VCO-1: Saw wave
VCO-2: Saw wave
VCO-2 Fine Tune: Slight detune
Filter Cutoff: Around halfway or slightly below
Resonance: Low
Attack: Medium/slow
Sustain: High
Release: Medium/long
Then add some chorus and reverb.
Play a minor ninth chord.
You should immediately hear the foundation of a lush analog R&B pad.
From there, adjust the filter until the sound sits behind your main instrument.
That’s an important distinction.
A pad doesn’t always need to sound spectacular by itself.
It needs to sound good inside the arrangement.
Step 9: Build a Dark Trap Soul Pad
For something darker, start with the previous pad and modify it.
Lower the filter cutoff considerably.
Increase the attack slightly.
Increase the release.
Reduce some of the high-frequency content.
Add reverb.
You can also experiment with detuning the oscillators slightly more.
Play something like:
Bm9 – Gmaj7 – Em9 – F#m7
and listen to how the slower envelope allows the chords to blend together.
Add an 808 and sparse drums underneath it and you’re already moving toward a modern Trap Soul atmosphere.
Step 10: Build an Analog Bass
The JUPITER-8 can also produce excellent bass sounds.
Start with a saw or pulse waveform.
Keep the amp attack short.
Keep the release relatively short.
Lower the filter cutoff.
Add enough resonance to give the sound character without removing too much low end.
You can also use VCO-2 an octave below VCO-1 for additional weight.
For a tighter Hip Hop bass:
Attack: Fast
Decay: Short/medium
Sustain: Medium/high
Release: Short
Then adjust the filter until the bass has enough presence to cut through the drums.
You don’t necessarily need a huge effect chain.
Let the oscillators and filter do most of the work.
Step 11: Build a Lead Sound
Lead sounds generally need more presence.
Start with one or two oscillators.
Try a saw or pulse waveform.
Open the filter more than you would for a pad.
Add some resonance.
Keep the attack relatively fast.
Then add a small amount of delay.
You can also use portamento for sliding notes.
This can be particularly effective for R&B countermelodies.
Instead of playing a complicated melody, try a simple three- or four-note phrase with expressive pitch movement.
The sound itself can provide much of the personality.
Step 12: Use the LFO for Movement
The LFO is another important section.
LFO stands for:
Low Frequency Oscillator
Unlike the main oscillators, you generally aren’t listening to the LFO directly.
Instead, you’re using it to move another parameter automatically.
For example, an LFO can modulate pitch to create vibrato.
It can also contribute movement to other parameters.
The two most important concepts are:
Rate: How fast the modulation happens.
Depth: How much modulation happens.
Use small amounts first.
Subtle modulation can make a static patch feel alive.
Too much can turn your lush R&B pad into a spaceship alarm.
Although sometimes that’s exactly what you need.
Step 13: Experiment With Cross Modulation
Once you’re comfortable with basic synthesis, explore Cross Mod.
Cross modulation lets one oscillator influence another, producing additional harmonic complexity.
Small amounts can introduce character.
Larger amounts can create aggressive, metallic, or experimental tones.
This isn’t necessarily something you’ll use on every beat.
But it’s excellent when you want to move beyond traditional analog sounds.
Step 14: Try Oscillator Sync
Oscillator sync is another classic synthesizer technique.
Sync forces one oscillator’s cycle to reset based on another oscillator.
The result can produce sharp, harmonically rich sounds that work especially well for leads.
If your normal saw lead sounds too predictable, oscillator sync can give it a completely different personality.
Step 15: Use the Arpeggiator
The JUPITER-8’s arpeggiator is one of the easiest ways to generate rhythmic melodic ideas.
Instead of playing individual notes, hold a chord.
The arpeggiator cycles through the notes automatically.
Try holding:
Cmaj9
or:
Am9
Then experiment with different arpeggiator modes and octave ranges.
You can create:
- Intros
- Background melodies
- Synthwave sequences
- R&B textures
- Hip Hop countermelodies
- Transitions
For modern production, try processing the arpeggio with delay and reverb.
Then lower it significantly in the mix.
It can create subtle rhythmic movement behind the main instruments.
Step 16: Add Effects
Once the basic patch sounds good, you can enhance it with the JUPITER-8’s built-in effects.
The plugin provides options including effects such as chorus, delay, reverb, flanging, and overdrive.
Chorus
Excellent for widening:
- Pads
- Strings
- Keys
Delay
Great for:
- Leads
- Arpeggios
- Plucks
- Countermelodies
Reverb
Useful for adding depth and atmosphere.
Be careful with huge amounts of reverb on every patch, though.
A beautiful preset can quickly become a muddy mix.
Overdrive
Useful when you want additional harmonic content or aggression.
Try it on basses and leads.
Step 17: Use Circuit Mod for More Analog Character
One advantage of Roland’s software version is Circuit Mod.
The idea is to alter aspects of the modeled circuit behavior and introduce additional variation.
You don’t necessarily need extreme settings.
Try subtle amounts.
The goal isn’t always to make the synth obviously unstable.
Sometimes you simply want the sound to feel a little less mathematically perfect.
That can work beautifully for vintage-inspired Hip Hop and R&B.
Step 18: Experiment With the Condition Control
The Condition parameter provides another way to change the personality of the modeled instrument.
Think of it as experimenting with how the virtual synthesizer’s components behave as a system.
This can introduce subtle tonal differences that make patches feel more organic.
Again, don’t assume more is better.
Make your patch first.
Then adjust Condition and listen to what happens.
Choose the setting that works best for the track.
Step 19: Automate the JUPITER-8 Inside Your DAW
One of the biggest advantages software has over vintage hardware is automation.
You can automate JUPITER-8 parameters throughout your arrangement.
Filter cutoff is an obvious example.
Imagine your beat begins with a dark pad.
During the intro, automate the filter so it slowly opens.
When the drums drop, the synth reaches full brightness.
During the verse, close it slightly.
During the chorus, open it again.
One sound now changes throughout the arrangement.
This is an excellent technique for making beats feel dynamic without constantly adding new instruments.
Step 20: Use the JUPITER-8 to Finish Beats, Not Just Browse Presets
Here’s one of the biggest traps with powerful synth plugins:
Preset surfing.
You load a sound.
Then another.
Then another.
Thirty minutes later, you’ve heard 70 presets and haven’t recorded anything.
Try giving yourself a rule.
Once you find a sound that’s 80% right, stop browsing.
Modify it.
Adjust:
- Cutoff
- Envelope
- Oscillator balance
- Detuning
- Effects
Then record the part.
This turns the JUPITER-8 from another plugin in your collection into an actual production instrument.
A Simple JUPITER-8 Workflow for Beatmakers
When you’re making a beat, you don’t need to design every sound from scratch.
Try this workflow:
1. Decide what role the synth needs to fill.
Pad? Bass? Lead? Arp? Texture?
2. Find a preset that’s close.
Don’t look for perfection.
3. Adjust the filter.
Make the sound brighter or darker depending on its role.
4. Adjust the envelope.
Determine whether the sound should be immediate, plucky, smooth, or atmospheric.
5. Adjust the oscillators.
Change waveform, octave, tuning, or balance if necessary.
6. Add movement.
Use LFO, modulation, or the arpeggiator.
7. Add effects.
Chorus, delay, reverb, or drive.
8. Record the part.
Don’t keep browsing.
9. Automate something during the arrangement.
Filter cutoff is usually an excellent starting point.
That’s it.
You don’t need to understand every parameter before the JUPITER-8 becomes useful.
Best Uses for the Roland JUPITER-8 in Hip Hop & R&B
For modern producers, I would particularly focus on using the JUPITER-8 for:
Atmospheric Pads
Excellent behind electric pianos and chord progressions.
Analog Strings
Great for making choruses feel wider and more emotional.
Synth Bass
Useful when you want something different from the typical 808.
Countermelodies
Simple JUPITER leads can add personality without dominating the beat.
Arpeggios
Great for subtle movement behind otherwise minimal arrangements.
Textures
Heavy filtering and effects can transform traditional synth patches into background atmosphere.
Intro Sounds
Filtered JUPITER patches are perfect for creating intros that gradually transition into the main beat.
Don’t Try to Use Every Feature
This might be the most important beginner tip in this entire guide.
You don’t need to use everything.
A great JUPITER-8 patch might simply be:
Two saw waves.
Slight detuning.
Low-pass filter.
Slow attack.
Long release.
Chorus.
Reverb.
That’s enough.
Complexity doesn’t automatically make a sound better.
The JUPITER-8 became legendary partly because relatively simple synthesis techniques could produce extremely musical results.
Is the Roland JUPITER-8 VST Easy to Learn?
Once you understand subtractive synthesis, yes.
The interface looks complicated because most of the controls are visible simultaneously.
But that can actually become an advantage.
You aren’t constantly opening menus and switching between pages.
You can see the synth’s architecture.
For beginners, concentrate on five things first:
- VCO-1
- VCO-2
- Filter cutoff
- ADSR envelope
- Effects
Once those make sense, move into LFO modulation, oscillator sync, cross modulation, Circuit Mod, and more advanced techniques.
Final Thoughts: How To Use Roland JUPITER-8 VST
Learning how to use the Roland JUPITER-8 VST doesn’t require memorizing every control on the interface.
Start with the basic signal flow:
Oscillators → Filter → Amplifier → Effects
Then learn how the envelope and modulation sections change that sound over time.
Once you understand those fundamentals, the JUPITER-8 becomes surprisingly intuitive.
For Hip Hop and R&B producers, start by creating pads, strings, basses, leads, and arpeggios.
Those sounds immediately translate into real-world beatmaking.
Most importantly, don’t spend all your time chasing presets.
Find a sound that’s close, shape it for your track, record your part, and keep building the beat.
That’s where the Roland JUPITER-8 becomes more than an emulation of a legendary synthesizer.
It becomes an instrument you actually know how to use.
Check the latest price and availability for the Roland JUPITER-8 at Plugin Boutique.
Disclosure: This article may contain affiliate links. If you purchase through one of these links, we may earn a commission at no additional cost to you.