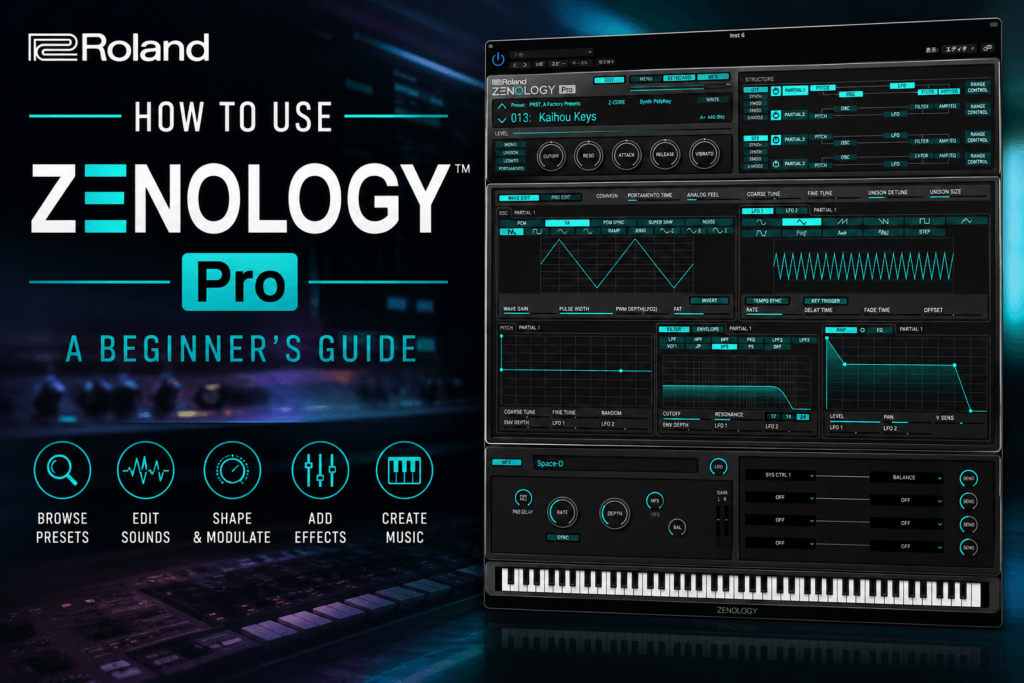
 Roland ZENOLOGY Pro is a powerful software synthesizer that gives producers access to a huge range of sounds inspired by Roland’s history of synthesizers and modern ZEN-Core technology.
But when you first open ZENOLOGY Pro, the number of presets, parameters, effects, oscillators, filters, and synthesis options can feel like a lot to take in.
The good news is that you don’t need to understand every control before you can start making music with it.
In this guide, I’ll show you how to use Roland ZENOLOGY Pro, from browsing presets and shaping sounds to creating your own patches and using the synth inside a beat.
What Is Roland ZENOLOGY Pro?
ZENOLOGY Pro is Roland’s software synthesizer built around the company’s ZEN-Core Synthesis System.
Rather than being limited to one particular style of synthesis, ZENOLOGY Pro combines multiple sound-generation techniques into a flexible synth engine.
That makes it capable of producing everything from:
- Analog-style pads
- Synth basses
- Plucks
- Bells
- Leads
- Keys
- Brass
- Strings
- Atmospheric textures
- Modern electronic sounds
For Hip Hop and R&B producers in particular, this makes ZENOLOGY Pro useful because one instrument can cover a huge portion of the sounds needed to build a complete beat.
You can start with presets when you want to work quickly and gradually move deeper into sound design as you learn the synth.
How To Load Roland ZENOLOGY Pro
After installing ZENOLOGY Pro, open your DAW and create a new instrument or MIDI track.
Load ZENOLOGY Pro as your software instrument.
The exact process will depend on your DAW, but once the plugin is loaded, connect or select your MIDI keyboard and play a few notes.
You should immediately hear the currently selected sound.
Before diving into sound design, spend a little time getting comfortable with the preset browser.
Step 1: Learn the ZENOLOGY Pro Preset Browser
One of the easiest ways to start using ZENOLOGY Pro is through its preset library.
Instead of randomly scrolling through hundreds of sounds, try searching by the role you need the instrument to play in your beat.
For example, you might look for:
- Bass
- Bell
- Brass
- Keys
- Lead
- Pad
- Pluck
- Strings
- Synth
This is a much better workflow than simply clicking presets until something sounds good.
If your beat needs atmosphere, start with pads.
If your progression needs more character, search through keys or synth sounds.
If your chorus needs another melodic layer, try leads, bells, or plucks.
Producer Tip: Choose sounds based on their job in the arrangement rather than how impressive they sound by themselves.
Step 2: Start With a Preset and Modify It
You don’t have to build every sound from scratch.
In fact, one of the best ways to learn ZENOLOGY Pro is to find a preset you like and begin changing it.
Start with simple adjustments.
Try changing:
- Filter cutoff
- Resonance
- Attack
- Decay
- Sustain
- Release
- Effects
- Oscillator levels
Listen carefully to what happens after every adjustment.
This teaches you how the synth works while still allowing you to make music.
For example, imagine you’ve found a bright synth pad that works with your chord progression but feels too aggressive.
Instead of looking for another preset, try lowering the filter cutoff.
Then increase the attack slightly.
Add a longer release.
Within a few adjustments, that bright pad can become a darker, smoother texture that sits much better behind an R&B progression.
Step 3: Understand ZENOLOGY Pro’s Partial Structure
One of the most important concepts to understand when learning how to use Roland ZENOLOGY Pro is its partial-based architecture.
A ZENOLOGY Pro tone can contain multiple partials.
Think of each partial as another layer contributing to the final sound.
For example, you could create a patch using:
Partial 1: Warm synth waveform
Partial 2: Brighter layer
Partial 3: Bell-like texture
Partial 4: Additional atmospheric layer
These layers can work together to create a much richer sound than a single oscillator by itself.
You don’t always need all of them.
Sometimes one or two partials are enough.
But understanding this architecture opens up a lot of possibilities for creating layered sounds.
Step 4: Choose Your Oscillator or Waveform
The oscillator is essentially where your sound begins.
Different waveforms create different starting characteristics.
A saw-style waveform can be a great starting point for:
- Pads
- Leads
- Basses
- Synth brass
Smoother waveforms can work well for:
- Sub basses
- Soft keys
- Mellow leads
More complex PCM-based material can give you access to sounds with characteristics that are difficult to create using simple waveforms alone.
Don’t worry about memorizing everything immediately.
Instead, load a basic patch and experiment with different waveform options while holding the same note or chord.
You’ll quickly begin hearing how much the source material affects the final sound.
Step 5: Shape the Sound With the Filter
After choosing your sound source, the filter is one of the most important tools for shaping its character.
The cutoff frequency determines how much of the frequency spectrum passes through the filter.
Lowering the cutoff can make a sound:
- Darker
- Warmer
- Softer
- More distant
Opening the filter can make it:
- Brighter
- More aggressive
- More present
- More energetic
This is particularly useful when producing Hip Hop and R&B.
For example, a dark filtered pad can sit behind a vocal without taking over the mix, while opening the filter during a chorus can make the production feel bigger.
Use Resonance Carefully
Resonance emphasizes frequencies around the filter cutoff point.
A small amount can add character.
Higher settings can create much more dramatic or synthetic sounds.
Try automating cutoff and resonance throughout your arrangement instead of keeping the sound completely static.
Step 6: Use the Amp Envelope
The amplifier envelope controls how the volume of your sound changes over time.
You’ll commonly work with four stages:
Attack
Attack determines how quickly the sound reaches full volume.
Short attack = immediate sound.
Long attack = gradual fade-in.
Pads often benefit from slower attack settings, while plucks usually need much faster attacks.
Decay
Decay determines how quickly the sound moves from its initial peak toward the sustain level.
Sustain
Sustain determines the level maintained while you’re holding the key.
Release
Release controls how long the sound continues after you release the key.
Longer releases are excellent for atmospheric pads and ambient textures.
Short releases work better for tighter rhythmic sounds.
Understanding ADSR envelopes is one of the biggest steps toward becoming comfortable designing your own synth sounds.
Step 7: Add Movement With LFOs
Once your basic sound is working, you can use modulation to make it feel more alive.
An LFO—low-frequency oscillator—can repeatedly change another parameter over time.
You can use LFO modulation for things like:
- Vibrato
- Tremolo
- Filter movement
- Pulsing sounds
- Slowly evolving pads
For example, applying subtle LFO modulation to filter cutoff can prevent a pad from sounding completely static.
The key word here is subtle.
You don’t always need dramatic modulation.
Sometimes a small amount of movement is enough to make a sound feel much more organic.
Step 8: Use ZENOLOGY Pro’s Effects
Effects can dramatically change the character of a patch.
Depending on the sound you’re creating, experiment with processing such as:
- Reverb
- Delay
- Chorus
- Distortion
- Modulation effects
- EQ
- Compression
For R&B sounds, reverb and delay can create depth and atmosphere.
For synthwave-inspired sounds, chorus can help produce a wider vintage character.
For aggressive Hip Hop basses or leads, saturation or distortion can add more presence.
Just remember that effects should enhance the sound rather than automatically being added because they’re available.
How To Create a Simple ZENOLOGY Pro Pad
Let’s put these concepts together.
Start with a simple initialized sound or basic synth patch.
Choose a warm waveform as your main sound source.
Add another partial with a slightly different waveform and lower its volume so it supports rather than dominates the first layer.
Next, lower the filter cutoff until the sound becomes smoother.
Increase the attack so the sound fades in gradually.
Increase the release so chords continue naturally after you let go of the keys.
Then add subtle modulation to create movement.
Finally, add chorus and reverb.
Now play a few seventh or ninth chords.
You should have a warm, evolving pad that can work beautifully underneath an R&B or Trap Soul progression.
How To Create a Simple ZENOLOGY Pro Bass
You can use a similar process for bass.
Start with a basic waveform containing strong low-frequency content.
Keep the attack fast.
Lower the filter cutoff to remove unnecessary brightness.
Keep the release relatively controlled so bass notes don’t overlap excessively.
Then experiment with subtle saturation or distortion if you want more harmonics.
For Hip Hop production, pay close attention to how the bass interacts with your kick.
The biggest bass sound isn’t necessarily the best bass sound.
You want something that supports the beat.
Using ZENOLOGY Pro for Hip Hop and R&B
ZENOLOGY Pro becomes especially useful when you think about it as a collection of different roles within your production.
A single beat could contain:
Chords: Electric piano or warm synth keys
Atmosphere: Dark analog-style pad
Bass: Deep synth bass
Counter Melody: Bell or pluck
Lead: Expressive synth lead
Texture: Filtered atmospheric patch
Instead of stacking several huge sounds together, give each sound its own purpose.
This creates space in your arrangement and makes mixing easier later.
Layering Sounds in ZENOLOGY Pro
Layering is one of the easiest ways to make ZENOLOGY Pro patches sound larger.
But bigger isn’t always better.
If you have a warm pad, you might layer it with a brighter texture at a much lower volume.
If you have a digital bell, you could layer it with a soft synth tone to give it more body.
Ask yourself what the original sound is missing.
If it needs brightness, add a brighter layer.
If it needs body, add something warmer.
If it needs movement, add a subtle evolving texture.
This produces much more intentional layers than simply stacking sounds.
Automate ZENOLOGY Pro in Your Arrangement
One of the easiest ways to make a beat sound more dynamic is to automate synthesizer parameters.
Try automating the filter cutoff.
During the verse, keep the sound darker.
As the pre-chorus approaches, gradually open the filter.
When the chorus arrives, let the sound become brighter and more present.
You can also automate:
- Effect amounts
- Reverb
- Delay
- Resonance
- Modulation
- Volume
These small changes can help turn an 8-bar loop into an actual arrangement.
A Simple ZENOLOGY Pro Workflow
When I’m working with a synth like ZENOLOGY Pro, I like to keep the process simple.
1. Decide what the beat needs
Don’t browse sounds without a purpose.
Decide whether you’re looking for chords, bass, atmosphere, a melody, or texture.
2. Find a starting preset
Choose something that already has the general character you’re looking for.
3. Adjust the filter
Make it brighter or darker depending on where it needs to sit in the production.
4. Adjust the envelope
Change the attack and release to fit the rhythm of your track.
5. Modify the effects
Reduce effects that are excessive and add processing only where necessary.
6. Add modulation
Introduce subtle movement if the sound feels static.
7. Save your version
If you’ve transformed the preset into something you like, save it.
Over time, you’ll build your own collection of sounds specifically suited to your production style.
Don’t Get Stuck Browsing Presets
One potential problem with having access to a huge sound library is spending too much time searching.
You load a sound.
Then another.
Then another.
Twenty minutes later, you’re still browsing instead of making the beat.
Give yourself a limit.
Once you find a sound that’s roughly 80% of what you’re looking for, stop browsing and start modifying it.
That final 20% can often be created with filtering, envelopes, effects, EQ, or layering.
Learn ZENOLOGY Pro by Reverse Engineering Presets
Here’s another great way to learn the synth.
Load a preset you love.
Then investigate how it was created.
Ask yourself:
How many partials are being used?
What waveforms are creating the sound?
What is the filter doing?
How is the envelope shaped?
Are LFOs creating movement?
Which effects are active?
Then disable different components one at a time.
You’ll begin understanding exactly what each part contributes to the finished patch.
This can teach you sound design much faster than simply reading about synthesis controls.
ZENOLOGY Pro Sound Design Practice
If you want to become comfortable with ZENOLOGY Pro, try recreating several basic sound categories.
Start with:
- Synth bass
- Pluck
- Pad
- Lead
- Bell
- Synth keys
Don’t worry about creating groundbreaking patches.
The goal is understanding how oscillators, filters, envelopes, modulation, and effects work together.
Once you can intentionally create these basic sounds, more complicated patches become much easier to understand.
Is ZENOLOGY Pro Good for Beginners?
ZENOLOGY Pro can look intimidating because there’s a lot happening beneath the surface.
But beginners don’t need to learn everything at once.
Start with three things:
Presets → Filters → Envelopes
Once you’re comfortable with those, move into:
Partials → Modulation → Effects
Then begin creating sounds from scratch.
This approach allows you to actually make music while gradually learning synthesis.
Final Thoughts
Learning how to use Roland ZENOLOGY Pro doesn’t mean memorizing every parameter inside the plugin.
Start by learning how to find good presets.
Then learn how to reshape those presets using filters, envelopes, effects, and modulation.
After that, explore partials and begin building your own sounds.
ZENOLOGY Pro becomes much less intimidating once you realize that most sound design comes down to a few fundamental ideas: choose a sound source, shape its tone, control how it evolves over time, add movement, and apply effects.
And you don’t have to become an expert sound designer before using it in your music.
Start with a preset.
Change one parameter.
Listen to what happens.
Then change another.
Before long, you’ll stop simply browsing ZENOLOGY Pro sounds and start creating sounds that fit your own productions.
Frequently Asked Questions
What is Roland ZENOLOGY Pro used for?
Roland ZENOLOGY Pro is a software synthesizer that can be used to create and play sounds including pads, basses, leads, keys, plucks, bells, atmospheric textures, and many other electronic instruments.
Is Roland ZENOLOGY Pro good for Hip Hop and R&B?
Yes. Its large sound palette makes it particularly useful for Hip Hop, R&B, Trap Soul, Pop, and other styles that combine synthesizers, keys, pads, basses, and atmospheric sounds.
Do I need to know sound design to use ZENOLOGY Pro?
No. You can begin with presets and gradually learn to modify them. Adjusting filter cutoff, envelopes, effects, and modulation is a good starting point.
Can you create your own sounds in ZENOLOGY Pro?
Yes. ZENOLOGY Pro provides deeper editing controls that allow you to modify existing patches and design your own sounds.
What’s the easiest way to learn ZENOLOGY Pro?
Start by modifying presets. Change one parameter at a time and listen carefully to how it affects the sound. Once you’re comfortable with filters and envelopes, begin exploring partials, modulation, and more advanced sound-design features.