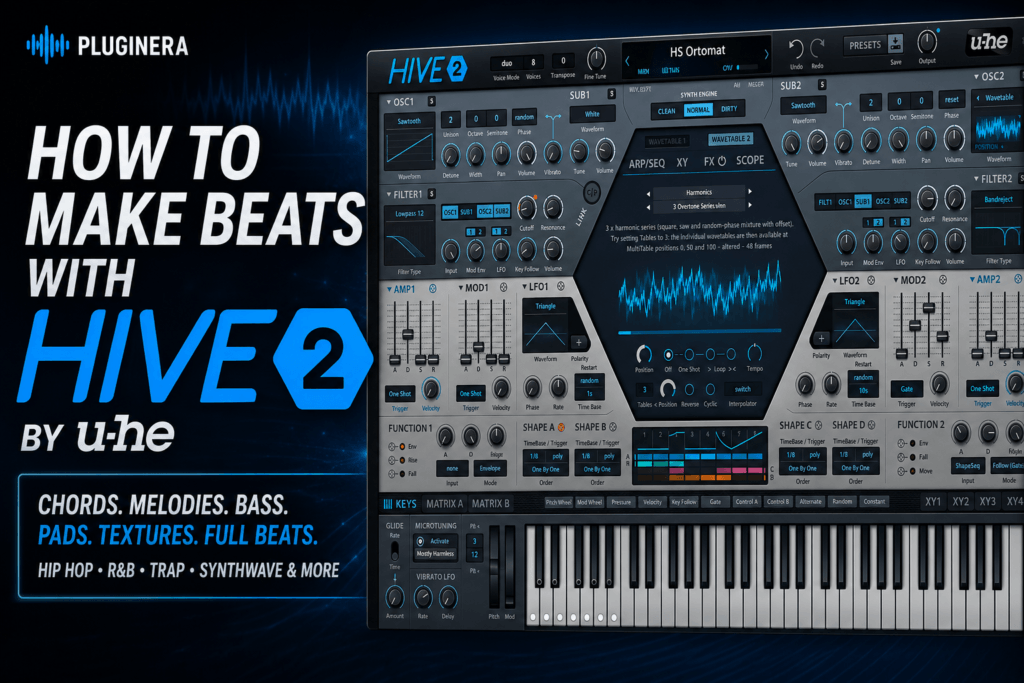
 Modern beat production often comes down to finding sounds that are inspiring enough to start an idea but flexible enough to shape into something uniquely yours.
That’s one of the areas where u-he Hive 2 really shines.
Hive 2 combines wavetable synthesis, traditional subtractive synthesis, powerful modulation, sequencing, unison, filters, and effects inside a synth designed around a relatively fast workflow. That makes it useful for everything from Hip Hop and Trap to R&B, Trap Soul, Pop, and Synthwave.
And you don’t need to be an expert sound designer to use it.
You can start with a preset, make a few strategic adjustments, and have a sound ready for your beat within minutes.
In this guide, we’ll walk through how to make beats with u-he Hive 2, including choosing sounds, building chords, creating melodies, designing basses, adding movement, layering sounds, and arranging everything into a finished production.
Why Use Hive 2 for Beat Making?
Hive 2 can handle several different roles inside the same production.
Instead of loading a separate plugin for every musical element, you could potentially use Hive 2 for your:
- Chords
- Pads
- Plucks
- Leads
- Bells
- Arpeggios
- Bass
- Atmospheric textures
- Sound effects
That versatility makes Hive particularly useful when you’re trying to establish a consistent sonic character across a beat.
You also get three different synth engine characters — Clean, Normal, and Dirty — allowing you to change the personality of your patches before reaching for additional processing.
The wavetable capabilities take things even further by allowing sounds to evolve instead of remaining completely static.
That’s particularly valuable for modern R&B and Trap production, where relatively simple musical ideas can become much more interesting through texture and movement.
Step 1: Start With the Vibe
Before browsing presets, decide what kind of beat you’re making.
This sounds obvious, but it’s easy to lose 20 minutes cycling through impressive sounds that have absolutely nothing to do with the track.
Give yourself a target.
For example:
Trap Soul
70–90 BPM
Minor key
Dark pad
Filtered pluck
Subtle lead
Deep 808
Modern R&B
75–100 BPM
Minor or major seventh chords
Warm keys
Atmospheric pad
Soft pluck
Textured bass
Melodic Trap
120–150 BPM
Minor key
Bell or pluck
Atmospheric texture
Simple counter melody
808
Synthwave/R&B
80–110 BPM
Seventh and ninth chords
Wide analog-style pad
Arpeggiated synth
Synth bass
Large lead
Once you establish the direction, browsing Hive becomes much easier.
Step 2: Find Your Main Hive 2 Sound
Start with the instrument that will establish the identity of the beat.
For an R&B track, that might be a pad.
For Trap, it could be a pluck.
For Synthwave, it might be a huge polyphonic synth.
Don’t worry about finding the perfect preset.
Find something that’s 80% of the way there.
Then modify it.
This is one of the most important habits you can develop when working with synth presets.
A preset was designed to sound impressive by itself.
Your goal is to make it work inside your beat.
Step 3: Build the Chord Progression
Let’s build an R&B/Trap Soul example.
We’ll use E minor.
Try:
Em9 – Cmaj7 – Am7 – Bm7
The notes are:
Em9
E – G – B – D – F#
Cmaj7
C – E – G – B
Am7
A – C – E – G
Bm7
B – D – F# – A
Play each chord for one or two bars.
Don’t worry about rhythm yet.
We’re establishing the harmonic foundation first.
Use Better Voicings
Instead of playing every chord in root position, spread the notes across the keyboard.
For example, rather than:
E – G – B – D – F#
try something like:
E – B – D – F# – G
Or remove the root entirely if your bass will handle it:
B – D – F# – G
These wider voicings can immediately make Hive’s pads and keys sound more sophisticated.
They also create additional space for your bass.
Step 4: Turn the Chords Into an Atmospheric Pad
Now start shaping your Hive patch.
If your pad feels too bright, lower the filter cutoff.
If it’s too aggressive, reduce the oscillator level, unison, or high-frequency content.
If it feels too static, introduce subtle modulation.
You can modulate parameters such as:
- Wavetable position
- Filter cutoff
- Panning
- Oscillator parameters
- Volume
- Effects
The key word here is subtle.
You don’t necessarily want the listener thinking:
“Wow, that filter is moving!”
You want them to feel like the sound is alive.
Step 5: Create a Pluck or Bell Melody
Once the chords are working, load another instance of Hive 2.
This time, look for a:
Pluck, bell, mallet, key, or short synth sound.
Your melody doesn’t need many notes.
In fact, simple melodies usually leave more room for an artist.
Using our E minor progression, start with notes from:
E – F# – G – A – B – C – D
Try a three-note idea such as:
B – G – F#
Then change the rhythm.
You could play:
B — G — F#
and leave plenty of empty space afterward.
Repeat the phrase but change the final note:
B — G — E
Now you’ve created variation without writing an entirely different melody.
Use Octaves for Variation
Hive sounds can change dramatically when moved between octaves.
Try duplicating your melody and moving selected notes an octave higher.
You could also play the melody normally for the first four bars and move the final phrase up an octave during bars 5–8.
That’s a simple way to create progression without adding another instrument.
Step 6: Add Wavetable Movement
This is where Hive 2 can separate itself from a basic preset synth.
Try slowly modulating the wavetable position.
The waveform will change over time, creating subtle timbral movement.
For atmospheric music, use slow modulation.
For rhythmic Trap or electronic production, experiment with faster modulation synchronized to the tempo.
The goal isn’t necessarily to create an obvious effect.
You’re adding motion to repetition.
That’s extremely valuable in beat production.
A melody might repeat for eight bars, but if the sound itself changes slightly, the listener doesn’t perceive it as being quite as repetitive.
Step 7: Create a Counter Melody
At this point, you should have:
Chords + Main Melody
Don’t immediately add another complicated melody.
Instead, listen for empty spaces.
Your counter melody should answer the main melody.
If your main melody plays:
Bar 1: B – G – F#
leave space and let the counter melody answer:
Bar 2: D – E
This creates musical conversation.
Hive’s softer leads, airy plucks, and atmospheric sounds work particularly well for this.
Keep the counter melody quieter than the main melody.
It should support the production rather than compete for attention.
Step 8: Create a Bass Sound With Hive 2
You don’t always need an 808.
For R&B, Pop, Synthwave, and certain styles of Hip Hop, a synth bass can work beautifully.
Initialize a patch or find a simple bass preset.
Start with a relatively simple waveform.
Saw and square-based sounds can work well, but you’ll probably want to filter some of the upper harmonics.
Keep the bass relatively centered.
You usually don’t need massive stereo unison on your lowest frequencies.
Follow the root notes of our progression:
E – C – A – B
Then experiment with passing notes.
For example:
E → B → C
or:
A → B
Small transitions between chord roots can make a bassline feel much more musical.
Step 9: Add the Drums
For a modern R&B/Trap Soul beat, you might start with:
Kick
Keep it relatively sparse and allow it to interact with the bass.
Snare/Clap
Establish the backbeat.
Hi-Hats
Start simple before adding rolls.
Percussion
Use sparingly to create additional groove.
808
If you’re using an 808 instead of Hive for the bass, tune it to the key of the song.
The important thing is that the drums should complement the Hive instrumentation rather than fight against it.
Step 10: Make Space for the 808
Hive can produce enormous sounds.
That’s great when auditioning presets.
It’s not always great for mixing.
Pads, plucks, and leads can contain much more low-frequency information than you realize.
High-pass unnecessary low frequencies from your melodic sounds when appropriate.
You don’t need to completely gut them.
Just create enough separation so your kick and bass can dominate the bottom of the mix.
This becomes particularly important with large Hive pads.
Step 11: Use Hive’s Arpeggiator and Sequencer
Hive 2’s sequencing capabilities can become an instant idea generator.
Take your chord progression and experiment with turning it into a repeating sequence.
Instead of:
Em9
being played as one sustained chord, you might turn its notes into a rhythmic pattern.
For example:
E – B – D – G – B – F#
Now repeat the pattern as the chords change.
This can work extremely well for:
- Synthwave
- Trap
- R&B
- Pop
- Electronic Hip Hop
Once you find an interesting sequence, build the rest of the production around it.
Step 12: Use the Shape Sequencer for Movement
The Shape Sequencer gives you another way to introduce rhythmic modulation.
Instead of manually drawing automation throughout your DAW, you can create repeating modulation patterns inside Hive.
You could use this to manipulate things like:
Filter cutoff
Create rhythmic filtering.
Wavetable position
Change the character of the oscillator throughout the pattern.
Volume
Create pulsing or gated sounds.
Panning
Introduce stereo movement.
The possibilities become considerably deeper once you start combining these modulation targets.
Step 13: Layer Hive 2 Without Making the Beat Muddy
Because Hive sounds can be large, resist the temptation to stack endless patches.
A strong beat might only need:
Hive 1: Pad
Hive 2: Pluck
Hive 3: Counter melody
Hive 4: Texture
That’s enough.
Every new sound should have a specific job.
Ask yourself:
What is this sound adding?
If you can’t answer that question, mute it.
If the beat sounds better without it, delete it.
Step 14: Create Width Strategically
Hive’s unison capabilities can create enormous stereo sounds.
Use that power strategically.
Your pad might be very wide.
Your main pluck could be moderately wide.
Your bass should usually remain relatively centered.
Your counter melody could sit slightly to one side.
This creates a mix where different instruments occupy different areas of the stereo field.
Don’t make everything huge.
If everything is wide, nothing feels wide.
Step 15: Add Effects
Hive includes built-in effects that can help transform relatively basic patches.
For beat production, some of the most useful effects are generally:
Reverb
Great for pads, bells, leads, and atmospheric sounds.
Delay
Excellent for creating space around melodies.
Chorus
Useful for widening pads and vintage-style sounds.
Distortion
Can add character to basses and aggressive leads.
Compression
Useful for controlling dynamics and increasing consistency.
Don’t automatically use every effect.
Think about the role of the sound.
A background pad can tolerate a lot of reverb.
A busy pluck might become muddy with the same amount.
Step 16: Turn an 8-Bar Hive Loop Into a Full Beat
This is where a lot of beatmakers get stuck.
You have:
- Chords
- Melody
- Counter melody
- Bass
- Drums
And everything sounds great for eight bars.
Now what?
Start removing things.
A simple arrangement might look like this:
Intro — 8 Bars
Pad
Filtered melody
Atmosphere
Verse — 16 Bars
Pad
Drums
Bass
Main melody
Pre-Chorus — 8 Bars
Remove kick
Introduce counter melody
Open Hive filter gradually
Chorus — 16 Bars
Full drums
Bass/808
Pad
Main melody
Counter melody
Verse 2 — 16 Bars
Simplify instrumentation again.
Bridge — 8 Bars
Remove drums or drastically change them.
Introduce a different Hive texture.
Final Chorus — 16 Bars
Bring everything back.
This is how you transform a loop into a production.
Step 17: Automate Hive During the Arrangement
Don’t let every Hive patch remain identical from beginning to end.
Automation can make the same sound perform several different roles.
For example, during the intro:
Filter cutoff: 40%
During the verse:
Filter cutoff: 60%
During the chorus:
Filter cutoff: 85%
Now the synth becomes brighter as the arrangement grows.
You can also automate:
- Reverb
- Delay
- Wavetable position
- Volume
- Effects
- Modulation depth
Small changes can make different sections feel noticeably different.
Example Hive 2 Hip Hop/R&B Beat Recipe
Here’s a simple starting template you can try.
Tempo: 84 BPM
Key: E Minor
Chord Progression:
Em9 – Cmaj7 – Am7 – Bm7
Hive 2 Instance #1
Dark atmospheric pad
Hive 2 Instance #2
Short digital pluck
Hive 2 Instance #3
Airy lead for counter melody
Bass
808 following E – C – A – B
Drums
Punchy kick
Dry clap/snare
Closed hi-hats
Occasional hat rolls
Sparse percussion
Then add subtle modulation to the pad and pluck.
That alone can give you the foundation for a modern R&B, Trap Soul, or melodic Hip Hop beat.
Should You Design Sounds or Use Presets?
Both.
Preset browsing isn’t cheating.
Neither is sound design automatically better.
The goal is to make music.
A productive Hive workflow is:
Find → Tweak → Produce
Find a preset that’s close.
Tweak the filter, envelope, effects, wavetable position, or modulation.
Then get back to making the beat.
As you become more comfortable with Hive 2, start designing more sounds from scratch.
Eventually, you’ll understand why your favorite presets sound the way they do.
Final Thoughts: Making Beats With u-he Hive 2
u-he Hive 2 is an excellent synth for beatmakers because it doesn’t force you to choose between speed and depth.
You can browse presets and have an idea going within minutes.
Or you can dive into its oscillators, wavetables, filters, modulation system, Shape Sequencer, arpeggiator, unison, and effects to create something completely different.
For Hip Hop and R&B producers, I wouldn’t approach Hive 2 as a synth that always needs to sound huge.
Some of its best uses can be subtle.
A dark pad behind your chords.
A slightly evolving pluck.
A strange atmospheric texture appearing every eight bars.
A soft counter melody drenched in reverb.
Those details can turn a basic loop into something that feels much more polished and alive.
And when you do need something huge, Hive can handle that too.
The best approach is simple:
Start with the musical idea, use Hive 2 to establish the atmosphere, and then let the production grow around it.
That makes Hive 2 more than a sound-design tool.