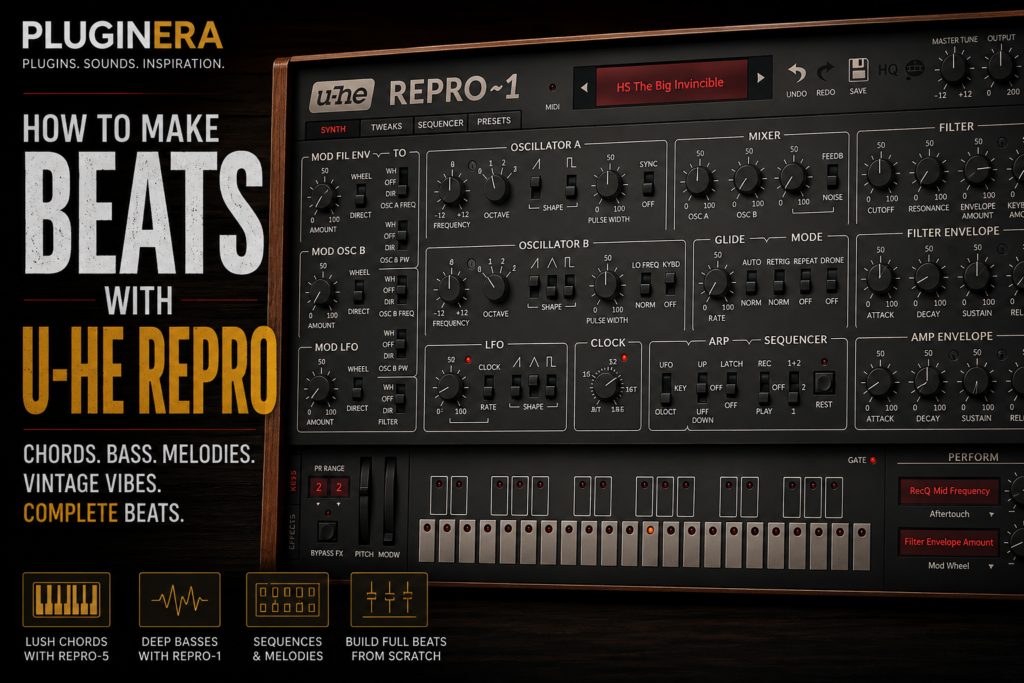
 How to Make Beats with u-he Repro: A Complete Guide for Hip Hop & R&B Producers
Some synthesizers are designed to give you thousands of sounds as quickly as possible. Others are designed to make you want to play, tweak, experiment, and create.
u-he Repro falls firmly into the second category.
With Repro-1 handling monophonic basses, leads, sequences, and melodic sounds and Repro-5 providing polyphonic chords, pads, and keys, the Repro package gives beatmakers an excellent foundation for building entire productions around vintage analog-style sounds.
And you don’t have to make retro music to take advantage of it.
Repro can fit beautifully into modern hip hop, R&B, Trap Soul, boom bap, synthwave, alternative R&B, and sample-based production.
In this guide, I’ll show you how to make beats with u-he Repro, from choosing sounds and creating chord progressions to adding bass, melodies, drums, effects, arrangement, and mixing.
Why Use u-he Repro for Beatmaking?
The biggest reason is simple:
Character.
Modern producers have access to an almost unlimited number of sounds. The problem isn’t finding another piano, pad, bass, or synth preset.
The challenge is finding sounds that make your beat feel distinctive.
That’s where Repro can shine.
Instead of producing ultra-clean digital sounds, Repro is designed around the personality of vintage analog synthesis.
That makes it particularly useful when you want:
- Warm chords
- Dark analog pads
- Thick basses
- Vintage leads
- Retro synth textures
- Atmospheric melodies
- Analog-style sequences
- Original sounds for sampling
You can also build surprisingly complete beats using little more than Repro and your drum samples.
Understand Repro-1 vs. Repro-5
Before making the beat, it’s important to understand what each instrument brings to the table.
Repro-1
Repro-1 is the monophonic side of the package.
That means it’s primarily designed to play one note at a time.
It’s excellent for:
- Bass
- Leads
- Plucks
- Sequences
- Arpeggios
- Synth effects
- Counter melodies
For beatmaking, I particularly like the idea of using Repro-1 for the bass and secondary melodic elements.
Repro-5
Repro-5 gives you polyphony, so this is where you’ll probably want to start when creating chords.
Use it for:
- Chord progressions
- Pads
- Keys
- Poly synths
- Vintage brass
- Atmospheric layers
- Sample-style textures
One simple workflow is:
Repro-5 = Harmony
Repro-1 = Bass and melody
Once you start thinking about the two instruments this way, building beats with Repro becomes much easier.
Step 1: Decide What Kind of Beat You’re Making
Don’t start by browsing presets for 30 minutes.
Decide on a direction first.
For this example, let’s create a dark, atmospheric R&B/Trap Soul beat.
Try:
Tempo: 78 BPM
Key: F# minor
We’re looking for something moody, spacious, and melodic without making the instrumental overly busy.
The main elements will be:
- Repro-5 chords
- Repro-5 texture
- Repro-1 bass
- Repro-1 counter melody
- Drums
- Ear candy and transitions
That’s enough to create a complete beat.
Step 2: Build the Chords with Repro-5
Start by opening Repro-5.
Look for a warm polyphonic sound.
You could start with a pad, keys patch, poly synth, or another relatively simple analog sound.
Don’t worry if the preset initially sounds too bright.
We’re going to shape it.
Try this progression:
F#m9 → Dmaj7 → Amaj9 → Eadd9
You don’t need to play huge voicings.
In fact, leaving some space between notes can make the progression sound much better.
Try keeping your left hand relatively simple while using extensions in the upper register.
For example, instead of thinking:
“I need to play the biggest F#m9 chord possible.”
Think:
“What are the few notes that establish the mood?”
This is particularly important when producing for vocalists.
The beat should leave room for the artist.
Step 3: Make the Chords Darker
The initial patch may sound too clean or bright.
This is where Repro’s synthesis controls become part of the production process.
Start experimenting with the filter cutoff.
Pull it back until the chords become warmer.
Then experiment with:
Attack
Increase it slightly if you want the chords to fade in rather than hit immediately.
Release
Increase the release to allow chords to blend into one another.
Resonance
Use it carefully to introduce additional character around the filter cutoff.
Modulation
A small amount of movement can make sustained chords feel much more alive.
The goal isn’t necessarily to create an elaborate synth patch.
It’s to make the sound fit the beat.
Step 4: Create Movement in the Chords
One of the easiest ways to make a four-bar chord progression feel more interesting is to introduce subtle movement.
You might automate the filter.
For example:
Bars 1–4
Keep the filter relatively dark.
Bars 5–8
Gradually open the filter.
Now the same chord progression feels like it’s developing.
You could also automate:
- Reverb
- Delay
- Modulation
- Filter resonance
- Effects
- Volume
These small changes become extremely useful later when arranging the beat.
Instead of adding another instrument every eight bars, you can change the character of an existing instrument.
Step 5: Add a Repro-1 Bass
Now load Repro-1.
Look for a bass patch with enough low-end weight without being excessively distorted.
Follow the roots of the progression:
F# → D → A → E
But don’t simply hold each root note for an entire measure.
Give the bass some rhythm.
For example:
F# — F# — C#
D — A
A — E — A
E — B — E
Experiment with octaves and passing notes.
The bass should interact with the kick rather than compete with it.
And because Repro-1 is monophonic, it’s naturally well suited to this kind of bassline.
Step 6: Create a Counter Melody
Now let’s give the beat an identity.
Open another instance of Repro-1.
This time, look for:
- A lead
- Pluck
- Bell-like synth
- Thin analog lead
- Short synth
- Atmospheric sound
The biggest mistake here is doing too much.
Your chord progression already contains a lot of harmonic information.
The counter melody should be simple.
Try starting with just three or four notes from F# minor.
For example:
C# – E – F# – A
You don’t have to use all four.
Try a phrase like:
C# → E → F#
Then leave space.
Repeat the idea with a slight variation.
Space Is Part of the Melody
This deserves special attention.
When producers struggle with melodies, the instinct is often to keep adding notes.
Try the opposite.
Play a phrase.
Stop.
Let the chords breathe.
Then answer the phrase.
This creates a call-and-response relationship.
For example:
Bar 1: Short melody
Bar 2: Space
Bar 3: Variation
Bar 4: Space
That can sound considerably more musical than playing notes throughout all four bars.
It also leaves space for vocals.
Step 7: Add Drums
Now that the musical foundation exists, start building the drums.
For this style of beat, I’d begin with:
- Kick
- Snare or clap
- Closed hi-hat
- Open hi-hat
- Percussion
- 808 if needed
But there’s an important decision to make.
Repro Bass or 808?
You don’t automatically need both.
If your Repro-1 bass already provides enough low-end energy, adding a huge 808 underneath it may muddy the mix.
You have three options.
Option 1: Repro Bass Only
Great for vintage R&B, synthwave, alternative hip hop, and more musical productions.
Option 2: 808 Only
Remove the synth bass and let the 808 provide the low end.
This can make the production sound more contemporary.
Option 3: Repro Bass + 808
This can work, but you’ll need to carefully separate their roles.
You might high-pass some of the deepest frequencies from the Repro bass while allowing the 808 to dominate the sub frequencies.
Don’t layer them just because you can.
Step 8: Build the Drum Groove Around the Music
Avoid creating drums completely independently from the melodic elements.
Listen to the rhythm of the chords and bass.
Then make the drums respond to them.
For a 78 BPM Trap Soul beat, you could start with a relatively sparse kick pattern.
Let the snare establish the backbeat.
Then use the hi-hats to create momentum.
Once the basic groove works, introduce small details:
- Hat rolls
- Velocity changes
- Open hats
- Percussion
- Ghost hits
- Kick variations
The groove should feel good before you start adding complexity.
Step 9: Turn Repro Into Your Own Sample Generator
This is one of my favorite ways to use Repro.
Instead of leaving everything as MIDI, bounce your Repro progression to audio.
Now treat it like a sample.
You can:
- Chop it
- Reverse it
- Pitch it down
- Pitch it up
- Stretch it
- Filter it
- Rearrange sections
- Add saturation
- Add vinyl effects
- Create stutters
- Reverse individual notes
This can completely change the personality of the beat.
For example, take the Repro-5 chord progression and pitch the audio down an octave.
Blend that quietly underneath the original.
Suddenly you’ve created a much darker texture.
Step 10: Create a Second Repro-5 Texture
At this point, don’t add another major melody.
Add texture.
Load another Repro-5 patch and look for something atmospheric.
A pad works well.
Play long notes based on the chord progression.
You don’t even need complete chords.
Try holding one note across multiple chords.
For example, C# works within several chords in our progression.
Holding that note creates harmonic continuity while everything underneath changes.
Keep this layer quiet.
You should almost feel it more than consciously hear it.
Step 11: Arrange the Beat
Now comes one of the most important parts:
Stop looping.
Once your eight-bar idea sounds good, immediately copy it across the timeline.
Create something like:
Intro — 8 Bars
Repro-5 chords only.
Filter them heavily.
Maybe introduce some ambience or a reversed Repro sound.
Hook — 8 Bars
Bring in:
- Full drums
- Chords
- Bass/808
- Counter melody
- Texture
This is the biggest section.
Verse 1 — 16 Bars
Remove the counter melody.
Simplify the drums.
Keep:
- Chords
- Bass
- Basic drums
After eight bars, introduce another element.
Pre-Hook — 4 Bars
Remove the kick.
Automate the Repro filter.
Add a reverse effect.
Build tension.
Hook — 8 Bars
Bring everything back.
Verse 2 — 16 Bars
Create a variation.
Maybe use the resampled version of the Repro chords instead of the original MIDI performance.
Bridge — 8 Bars
Strip the drums away.
Let Repro become the focus.
Final Hook — 8–16 Bars
Bring everything back with additional energy.
Outro — 4–8 Bars
Return to the filtered chords.
That’s already a complete song structure.
Step 12: Use Repro for Transitions
Repro can also help solve one of the most common arrangement problems:
How do I move from one section to another?
Take your main Repro sound and create transition effects from it.
For example, bounce a chord to audio.
Reverse it.
Place the reversed chord immediately before the hook.
Now you have a transition effect that actually belongs to the musical world of your beat.
You can also:
- Automate filter cutoff
- Increase reverb before transitions
- Automate delay feedback
- Remove bass before the hook
- Pitch sounds down
- Create one-bar synth fills
- Change octaves
Transitions don’t always require risers and impact samples.
Sometimes manipulating your existing instruments creates a much more cohesive arrangement.
Step 13: Mix the Repro Chords
Once the arrangement is finished, start mixing.
For the main Repro-5 chords, listen for unnecessary low frequencies.
If the chord sound contains significant bass information, it may compete with your 808, bass, and kick.
Use EQ to remove what you don’t need.
Don’t automatically high-pass everything at an arbitrary frequency.
Listen.
Raise the cutoff until you hear the sound becoming noticeably thinner, then back off slightly.
You can also look for muddy buildup in the lower mids.
Again, don’t remove frequencies simply because someone told you that a particular frequency is “muddy.”
Make decisions based on the actual sound.
Step 14: Create Depth
Not every Repro instrument should feel like it’s sitting in the same location.
Think in terms of front, middle, and back.
Front
Repro-1 lead or important melodic element.
Keep it clearer and relatively present.
Middle
Main Repro-5 chords.
Give them some ambience without pushing them completely into the background.
Back
Pads and atmospheric textures.
More reverb, less brightness, and lower volume can help push them behind the primary elements.
Now your production has depth instead of sounding like several synth presets stacked on top of each other.
Step 15: Use Stereo Width Carefully
Pads and atmospheric Repro-5 sounds can often benefit from width.
Bass usually shouldn’t be excessively wide.
This gives you another way to separate the instruments.
You could have:
Repro-1 Bass: Center
Kick: Center
Snare: Mostly center
Repro-5 Chords: Moderately wide
Repro-5 Pad: Wide
Repro-1 Lead: Center or slightly offset
That creates space without relying entirely on EQ.
Step 16: Add Automation Before Adding More Sounds
When the beat starts feeling repetitive, don’t immediately open another plugin.
Ask:
Can I make one of the existing Repro sounds evolve?
Automate the filter.
Change the octave.
Increase the reverb.
Mute the bass.
Change the sequence.
Introduce distortion.
Remove an oscillator.
Bounce the sound and reverse it.
A great arrangement can make five instruments feel like fifteen.
A Complete u-he Repro Beat Recipe
If you want a straightforward starting template, try this:
Tempo: 78 BPM
Key: F# Minor
Repro-5: Warm analog chords
Progression: F#m9 – Dmaj7 – Amaj9 – Eadd9
Repro-1: Analog bass
Repro-1: Sparse lead/counter melody
Repro-5: Atmospheric pad
Drums: Kick, snare, hats, percussion
Low End: Repro bass or 808
Effects: Reverb, delay, saturation
Arrangement: Intro → Hook → Verse → Pre-Hook → Hook → Verse → Bridge → Final Hook → Outro
That’s more than enough to create a professional-sounding production.
Don’t Try to Use Every Feature
Repro is capable of deep sound design, but you don’t have to become a synthesis expert before making music with it.
Start simple.
Choose a preset that’s close to what you need.
Then learn what happens when you adjust:
Filter → Envelope → Oscillators → Modulation → Effects
That’s enough to begin dramatically changing sounds.
Over time, you’ll naturally start designing more patches from scratch.
The Secret: Commit to Audio
One of the best habits you can develop when working with Repro is committing sounds to audio.
Once you have a good eight-bar Repro progression, bounce it.
Keep the original MIDI track muted somewhere if you want the ability to return to it.
Then start manipulating the audio.
This changes your mindset.
Instead of thinking:
“What preset should I choose?”
You start thinking:
“What can I turn this sound into?”
That’s a much more creative question.
And it’s especially powerful for hip hop production.
Final Thoughts: Making Beats with u-he Repro
u-he Repro can be much more than a vintage synth emulation.
For beatmakers, it can become an entire sound source.
Repro-5 can provide your chords, pads, and atmospheric layers.
Repro-1 can handle basses, leads, sequences, and counter melodies.
And once you start bouncing those sounds to audio and manipulating them like samples, Repro becomes even more versatile.
The key is not trying to make your beat impressive by stacking dozens of sounds.
Start with a strong progression.
Choose a great Repro-5 patch.
Add a complementary bass.
Create one memorable melodic idea.
Program drums that support the music.
Then arrange the beat into a complete track.
That’s where Repro’s analog character can really come alive.
For hip hop, R&B, Trap Soul, synthwave, and sample-inspired production, it’s an excellent synth package for creating warm, distinctive sounds that don’t feel like the same presets everyone else is using.