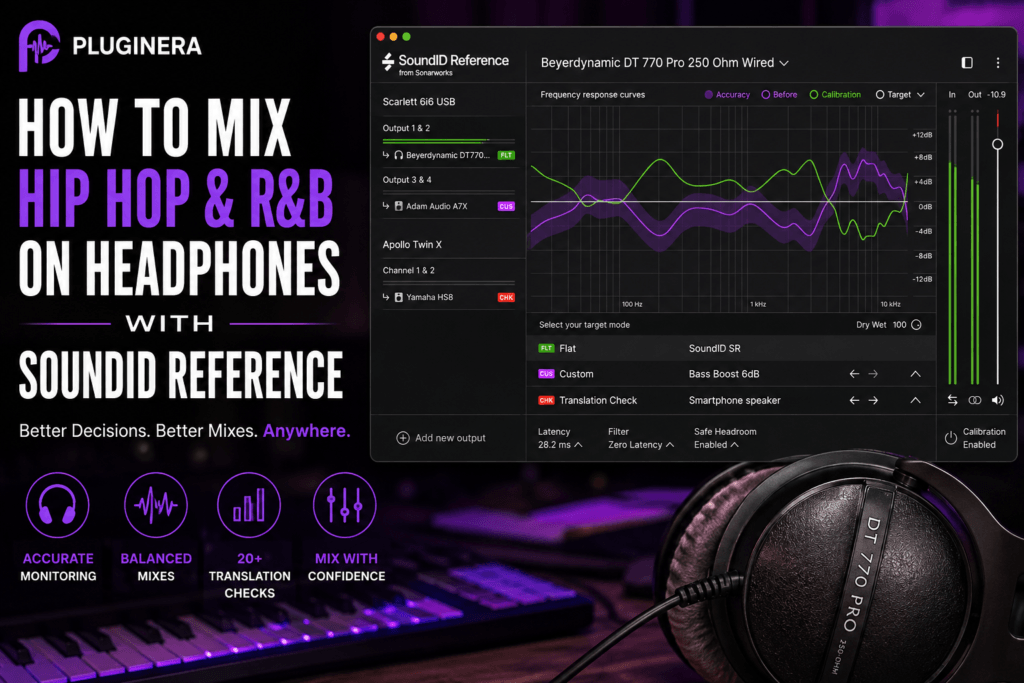
 How to Mix Hip Hop & R&B on Headphones with SoundID Reference
Mixing Hip Hop and R&B on headphones can absolutely work.
The challenge isn’t necessarily the headphones themselves. It’s knowing whether you can trust what you’re hearing.
Your headphones may exaggerate the bass, making you turn your 808 down too far. They might have a bright top end that causes you to make your hi-hats and vocals too dark. And because headphones remove the acoustics of a physical room, reverb, stereo width, and low-end balance can also be difficult to judge.
That’s where Sonarworks SoundID Reference for Headphones can become an extremely useful mixing tool.
SoundID Reference uses calibration profiles designed to compensate for the frequency response of supported headphones, giving you a flatter monitoring reference. Sonarworks currently supports hundreds of headphone models, making it possible to build a more consistent mixing environment without relying entirely on studio monitors.
In this guide, we’ll walk through how to mix Hip Hop and R&B on headphones with SoundID Reference, including 808s, drums, vocals, melodies, reverbs, stereo width, and final translation checks.
Why Mixing Hip Hop & R&B on Headphones Can Be Difficult
Hip Hop and R&B are particularly demanding genres when it comes to monitoring.
Think about what’s happening in a modern production:
- Deep 808s
- Sub-bass
- Punchy kicks
- Bright hi-hats
- Layered vocals
- Wide synths
- Atmospheric pads
- Reverbs and delays
- Saturated drums
- Samples with complicated frequency content
The difference between a professional-sounding mix and an amateur one can come down to surprisingly small balance decisions.
And your headphones influence those decisions.
For example, imagine your headphones naturally exaggerate frequencies around 80–120 Hz.
You load an 808.
It sounds huge.
So you turn it down.
The beat sounds perfectly balanced in your headphones.
Then you play it in your car.
Suddenly:
Where did the 808 go?
You weren’t necessarily mixing the 808 incorrectly.
You were compensating for what your headphones were telling you.
SoundID Reference attempts to reduce that problem.
Step 1: Load Your Headphone Calibration Profile
Before touching your mix, open SoundID Reference and select your exact headphone model.
This part matters.
Don’t simply choose something from the same manufacturer.
If you’re using Beyerdynamic DT 770 Pro 250 Ohm headphones, for example, select the profile corresponding to that particular model.
Once loaded, SoundID Reference applies its calibration curve.
Switch calibration on and off.
Depending on your headphones, the difference could be substantial.
You might hear:
- Less bass
- More midrange
- Less treble
- More treble
- Reduced resonances
- A different overall tonal balance
Don’t immediately start correcting your mix.
First, you need to learn your new monitoring environment.
Step 2: Listen to Professional Reference Tracks
This is one of the most important steps.
Before mixing your own beat, spend 10–20 minutes listening to professionally mixed records through SoundID Reference.
Choose songs you know extremely well.
For Hip Hop and R&B, you might reference artists whose production style is similar to what you’re creating.
Listen specifically to:
- Kick level
- 808 level
- Vocal level
- Snare brightness
- Hi-hat brightness
- Bass extension
- Stereo width
- Reverb
- Overall tonal balance
Don’t worry about analyzing everything scientifically.
You’re teaching your ears:
“This is what a finished record sounds like through my calibrated headphones.”
Over time, this becomes incredibly valuable.
Step 3: Set Your Levels Before Processing
Before reaching for EQ or compression, get the basic volume balance right.
This is where many mixes improve dramatically.
Start with the most important elements:
Kick → 808/Bass → Snare → Vocal → Main Melody
Then bring everything else around them.
For a Hip Hop beat, you might start with:
- Kick
- 808
- Snare/clap
- Hi-hats
- Main sample or melody
- Secondary instruments
- Effects
For vocal R&B, you may want to establish the relationship between the lead vocal, drums, bass, and main musical element first.
Don’t worry about exact numbers.
Mix by relationship.
Ask:
Does the kick feel powerful without dominating?
Can I clearly hear the 808 underneath the kick?
Does the vocal sit above the production without sounding disconnected from it?
SoundID Reference gives you a more neutral environment for answering those questions.
Step 4: Get the Kick and 808 Relationship Right
This is probably the most important section of this entire guide for Hip Hop producers.
Your kick and 808 occupy overlapping low-frequency territory.
If you can’t accurately hear that area, you’re essentially mixing blind.
Start by soloing the kick and 808 together.
Listen to their relationship.
You want both elements to have a purpose.
The kick provides the impact.
The 808 provides the weight and sustain.
Depending on the production, their frequency ranges may overlap significantly.
EQ the Kick and 808 Only When Necessary
Don’t automatically high-pass or carve frequencies because a tutorial told you to.
Listen first.
If the kick and 808 already work together, leave them alone.
If they’re fighting, determine why.
Perhaps the kick has significant energy around 60 Hz while your 808 fundamental is also centered near that area.
You could slightly reduce that frequency in one element.
Alternatively, you might choose a different kick.
Sound selection often solves problems more effectively than aggressive EQ.
Use Harmonics to Help the 808 Translate
Extremely deep 808s can disappear on small playback systems.
One solution is saturation.
Adding subtle harmonic distortion generates frequencies above the fundamental, helping listeners perceive the bass even when their speakers can’t reproduce the deepest frequencies.
Don’t destroy the 808.
A little saturation can go a long way.
Then use SoundID Reference’s Translation Check to see how the bass behaves on smaller simulated playback systems.
Step 5: Mix Your Drums for Punch
Once your kick and bass relationship is working, build the rest of the drums around them.
Your snare or clap usually needs to remain clearly audible without becoming painfully bright.
Hi-hats should add energy without dominating the top end.
Percussion should contribute movement without cluttering the groove.
Listen for frequency buildup between:
200–500 Hz
This area can become congested when kicks, snares, samples, percussion, keys, and vocals all contribute energy.
But don’t automatically cut it from everything.
Instead, identify which elements actually need that frequency range.
Don’t Over-Brighten Your Hi-Hats
This is a common Hip Hop mixing mistake.
Producers want crisp drums, so they continuously boost the top end.
Eventually the beat becomes exhausting.
Calibration can be especially helpful here if your headphones have an unusual treble response.
Listen to professional references.
Notice that commercially released hi-hats aren’t necessarily incredibly loud.
They’re simply positioned correctly.
Step 6: Create Space for the Vocal
If you’re mixing a complete R&B or Hip Hop song, the vocal should usually be one of the primary elements.
A common mistake is trying to make the vocal fit by simply turning it louder.
Instead, create frequency space.
The vocal competes heavily with:
- Piano
- Electric piano
- Synth leads
- Guitars
- Samples
- Pads
- Strings
These instruments often occupy the same midrange frequencies responsible for vocal intelligibility.
Try slightly reducing competing frequencies in the instruments instead of endlessly boosting the vocal.
Even a subtle EQ adjustment can create meaningful separation.
Step 7: EQ the Vocal in Context
Avoid spending too much time EQing vocals in solo.
A vocal can sound amazing alone and terrible inside the song.
Listen to it against the instrumental.
You’re generally evaluating several things:
Low-End Rumble
Remove unnecessary low-frequency information if it’s interfering with the mix.
Don’t blindly use the same high-pass frequency for every singer.
Listen.
Mud
If the vocal sounds cloudy or congested, investigate the lower mids.
Presence
The midrange and upper-midrange help determine how clearly the vocal cuts through the production.
Harshness
Be careful with aggressive boosts in the upper mids.
Air
A subtle high-frequency lift can make an R&B vocal feel polished and expensive, but too much can exaggerate sibilance.
Because SoundID Reference helps compensate for your headphones’ frequency response, these decisions can become easier to evaluate.
Step 8: Compress for Control — Not Just Loudness
Compression is extremely important in modern R&B vocals.
But compression shouldn’t automatically mean crushing the vocal.
The goal is usually consistency.
You want quieter words to remain audible while louder phrases don’t suddenly jump out of the mix.
Listen to how the vocal moves against the instrumental.
If you’re constantly adjusting the vocal fader because individual words disappear, compression may help.
For more aggressive Hip Hop vocals, you may want a firmer, more forward sound.
For smooth R&B, you may prefer compression that maintains more natural movement.
The exact settings depend on the performance.
Step 9: Be Careful With Reverb on Headphones
Headphones can make reverb deceptive.
Because the sound is being delivered directly to your ears without room acoustics, spacious effects can feel extremely immersive.
That can encourage you to use too much.
Start conservatively.
For modern R&B, try combining:
- Short room or plate reverb
- Longer atmospheric reverb
- Quarter-note delay
- Eighth-note delay
- Dotted or ping-pong delays
Instead of making one reverb extremely loud, use multiple subtle layers.
Use Pre-Delay to Keep Vocals Forward
Pre-delay creates a small gap between the dry vocal and the beginning of the reverb.
This can help maintain vocal clarity while still creating depth.
For example, instead of immediately increasing the reverb level when you want more space, experiment with the pre-delay.
You may get a larger-sounding vocal without pushing it backward in the mix.
Step 10: Build Depth With Three Layers
One useful way to think about an R&B mix is:
Front
Lead vocals, snare, kick, important melodic elements.
Middle
Keys, guitars, background vocals, secondary melodies.
Back
Pads, atmospheric textures, long reverbs, delays and effects.
Not everything needs to sound equally close.
Creating depth makes the production feel larger without simply making everything louder.
SoundID Reference doesn’t create this depth for you.
But a consistent monitoring environment makes these subtle relationships easier to judge.
Step 11: Check Stereo Width Carefully
Headphones can exaggerate stereo separation.
A sound panned completely left comes entirely from the left headphone driver.
That’s different from speakers, where both ears hear both speakers to some degree.
As a result, extremely wide mixes can sound incredible through headphones but strange through speakers.
Keep foundational elements relatively centered:
- Kick
- 808
- Bass
- Lead vocal
- Snare in many productions
Use supporting elements to create width:
- Background vocals
- Pads
- Guitars
- Percussion
- Reverbs
- Delays
- Doubles
- Synth textures
And regularly check your mix in mono.
Step 12: Use SoundID Translation Check
Once the mix is approaching completion, Translation Check becomes particularly useful.
Try several.
You aren’t asking:
“Does my mix sound amazing everywhere?”
You’re asking:
“Do the important parts of my mix survive everywhere?”
That’s a major difference.
Smartphone Check
Listen for:
- Vocal clarity
- Snare
- Hi-hats
- Main melody
- Upper harmonics of the bass
Your deepest sub frequencies won’t translate perfectly through tiny speakers.
That’s expected.
But the song should still make musical sense.
Consumer Speaker Check
Ask:
- Is the bass overwhelming?
- Does the vocal disappear?
- Are the hi-hats harsh?
- Does the snare remain present?
- Is the melody still clear?
Make notes.
Don’t immediately react to every tiny difference.
Look for patterns.
Step 13: Check the Mix Without Calibration
This step is easy to overlook.
Periodically bypass SoundID Reference.
Listen to your headphones normally.
You should understand both monitoring perspectives.
Switch between:
Calibration ON
and
Calibration OFF
The goal isn’t to decide which sounds better.
You’re learning what your headphones are naturally doing compared with the calibrated reference.
Eventually you’ll begin recognizing those differences instinctively.
Step 14: Check the Mix in Mono
Mono remains one of the easiest ways to expose problems.
Switch your mix to mono and listen.
Can you still hear:
- Lead vocal?
- Kick?
- Snare?
- 808?
- Main melody?
- Important background elements?
Some stereo effects may become quieter.
That’s normal.
But if an important instrument almost completely disappears, you may have a phase or stereo-width issue worth investigating.
Step 15: Compare Against a Reference Track
Now bring your professional reference back into the session.
Level-match it as closely as possible.
This is important because louder music almost always seems more impressive.
Compare:
Low End
Is your 808 dramatically louder?
Is your mix thinner?
Midrange
Does your production feel congested?
Vocals
Is your lead vocal buried compared with the reference?
Treble
Are your hats dramatically brighter?
Stereo Image
Is your production significantly wider or narrower?
Reverb
Does your mix sound noticeably wetter?
Don’t try to copy the reference perfectly.
Use it as a reality check.
Step 16: Take a Break
This may be the most underrated mixing technique available.
Your ears adapt.
After listening to the same loop for two hours, almost anything can begin sounding normal.
Take 15–30 minutes away from the session.
Come back.
Hit play without touching anything.
The problems you struggled to hear earlier may suddenly become obvious.
Step 17: Do the Car Test Anyway
SoundID Reference can improve your headphone monitoring environment.
Translation Check can help identify problems.
Reference tracks can keep your tonal balance grounded.
But I’d still recommend doing a real-world playback test before finalizing an important mix.
Take it to:
- Your car
- Smartphone
- Bluetooth speaker
- Earbuds
- Another pair of headphones
You’re testing translation, not trying to make every system sound identical.
Your mix will sound different everywhere.
That’s normal.
The goal is for the important relationships to remain intact.
A Practical Hip Hop & R&B Headphone Mixing Workflow
Here’s how you can put everything together.
1. Enable SoundID Reference
Load the correct headphone calibration profile.
2. Play a Reference Track
Spend a few minutes resetting your ears.
3. Establish the Static Mix
Balance everything using volume and panning before heavy processing.
4. Fix Kick and 808
Make sure the low-end foundation works.
5. Balance the Drums
Get the snare, hats, and percussion sitting around the kick and bass.
6. Make Room for the Vocal
Use arrangement, volume, panning, and EQ to create space.
7. Process the Vocal
EQ, compression, de-essing, saturation, and other processing as needed.
8. Add Depth
Use reverbs and delays intentionally.
9. Check Stereo and Mono
Make sure width isn’t creating phase problems.
10. Use Translation Check
Look for major problems across different playback simulations.
11. Compare Against References
Pay attention to overall tonal balance.
12. Bypass Calibration
Understand how the mix behaves through your headphones naturally.
13. Take a Break
Reset your ears.
14. Perform Real-World Checks
Car, phone, earbuds, speakers.
15. Make Small Final Adjustments
If the same problem appears on several systems, fix it.
If something only sounds slightly different on one device, don’t necessarily chase it.
Biggest Mistakes to Avoid When Mixing on Headphones
Mixing Too Loud
This is probably the biggest one.
Loud playback makes bass and treble feel more exciting and can quickly fatigue your ears.
Mix at comfortable levels.
Occasionally turn the volume very low.
If the vocal, kick, snare, and primary melody remain balanced at low volume, that’s usually encouraging.
Boosting the Bass Because You Want to “Feel” It
Headphones don’t physically move air through your room like large speakers.
Trying to recreate that physical sensation by turning your 808 up can destroy your balance.
Judge the bass musically.
Making Everything Extremely Wide
Width is powerful because of contrast.
If everything is wide, nothing feels wide.
Keep your center strong and use stereo information around it.
Overusing Reverb
Headphones can make atmospheric effects seductive.
Keep checking your dry/wet relationships.
Mixing Without References
Professional reference tracks give you context.
Without them, your ears can gradually adapt to almost anything.
Assuming Calibration Automatically Creates a Good Mix
SoundID Reference doesn’t replace mixing ability.
Think of it like improving the windshield of your car.
A clearer windshield helps you see where you’re going.
You still have to drive.
Is SoundID Reference Good for Hip Hop & R&B Producers?
Yes.
808s, kicks, sub-bass, warm vocals, bright percussion, atmospheric effects, and layered instrumentation all require careful tonal decisions.
SoundID Reference gives you a more consistent baseline for making them.
For producers working in bedrooms or untreated rooms, the value becomes even more obvious.
A calibrated pair of good headphones can provide a controlled alternative to monitors interacting with problematic room acoustics.
Should You Mix Entirely on Headphones?
You can.
Plenty of professional work gets done on headphones.
But I wouldn’t interpret that as:
“Never listen anywhere else.”
The strongest approach is using multiple references.
Your calibrated headphones can be your primary environment.
Then check the mix through other systems.
The more you understand how your primary headphones translate, the fewer corrections you’ll eventually need.
That’s where SoundID Reference becomes especially powerful.
You’re not just calibrating headphones.
You’re building a repeatable monitoring environment.
Final Thoughts: Mixing Hip Hop & R&B with SoundID Reference
Mixing on headphones doesn’t have to mean guessing.
The biggest advantage of Sonarworks SoundID Reference for Headphones is that it gives you a more consistent reference point for making decisions.
And for Hip Hop and R&B, those decisions matter enormously.
A slightly inaccurate low-end balance can change the entire impact of an 808.
Poor upper-midrange judgment can make vocals harsh.
Too much high-frequency energy can make hi-hats exhausting.
Excessive stereo processing can make a mix collapse outside your headphones.
SoundID Reference can’t make those decisions for you.
What it can do is help you hear those decisions more clearly.
Start with calibration.
Learn the sound of professional records through that calibration.
Balance your kick and 808 carefully.
Create space for your vocals.
Keep your reverbs under control.
Check mono.
Use Translation Check.
Compare against references.
Then test the mix in the real world.
Do that consistently, and your headphones can become a genuinely reliable mixing environment rather than something you constantly second-guess.
Want to Try SoundID Reference?
If you primarily produce or mix Hip Hop and R&B on headphones, SoundID Reference is worth considering as part of your monitoring setup.
Check the latest price for Sonarworks SoundID Reference for Headphones at Plugin Boutique.
And if you want a deeper look at the software itself, read our Sonarworks SoundID Reference for Headphones Review to see its features, pros, cons, and whether it’s worth adding to your studio.
Disclosure: This article may contain affiliate links. If you purchase through one of these links, Pluginera may earn a commission at no additional cost to you.