 SoundID Reference for Beginners: How to Set It Up and Improve Your Mixes
If you’ve ever finished a mix that sounded great in your headphones but completely different in your car, you’re not alone.
Maybe the 808 suddenly became too loud.
Maybe the vocals sounded thin.
Maybe your hi-hats were painfully bright.
Or maybe the entire mix seemed to lose the balance you spent hours creating.
One reason this happens is that your headphones aren’t perfectly neutral.
Every headphone model has its own frequency response. Some emphasize bass. Others emphasize treble or certain areas of the midrange.
That means your headphones can influence the mixing decisions you make.
Sonarworks SoundID Reference for Headphones is designed to help solve this problem by applying a calibration profile to supported headphones, giving you a more consistent monitoring reference.
But if you’ve never used headphone calibration software before, SoundID Reference can initially look more complicated than it really is.
The good news?
You don’t need to understand complicated acoustics or mastering theory to start using it.
In this SoundID Reference for beginners guide, we’ll explain what SoundID Reference does, how to set it up, how to use it while mixing, and some common mistakes to avoid.
What Is SoundID Reference?
SoundID Reference is monitoring calibration software from Sonarworks.
Its purpose is simple:
Help you hear your music through a more neutral monitoring environment.
Headphones have their own tonal characteristics.
One pair might have elevated bass.
Another might have recessed mids.
Another might have a noticeable treble boost.
Those characteristics aren’t necessarily bad when you’re casually listening to music.
They can become problematic when you’re making decisions about the music itself.
Suppose your headphones exaggerate bass.
While mixing, your 808 sounds enormous.
You turn it down.
Everything sounds balanced.
Then you play the mix through another system and discover that your 808 is barely audible.
The problem wasn’t necessarily your mixing ability.
You were reacting to the frequency response of your headphones.
SoundID Reference uses calibration profiles designed to compensate for those characteristics.
What Does Headphone Calibration Actually Mean?
Here’s the easiest way to understand it.
Imagine your headphones naturally boost a particular frequency.
SoundID Reference knows about that boost through the calibration profile for your headphone model.
The software can then compensate for it.
Likewise, if another frequency range is recessed, the calibration curve can compensate in the opposite direction.
The objective isn’t necessarily to make your headphones sound more exciting.
It’s to provide a more reliable reference for making mixing decisions.
That’s an important distinction.
SoundID Reference isn’t:
“Make my headphones sound amazing” software.
It’s:
“Help me make better decisions about my music” software.
Why Would a Beginner Need SoundID Reference?
Beginners often assume they need expensive studio monitors before they can create professional mixes.
That’s not necessarily true.
Headphones have several advantages for home producers.
You don’t have to worry as much about:
- Room reflections
- Speaker placement
- Acoustic treatment
- Disturbing neighbors
- Mixing late at night
- Having a large studio
That makes headphones an extremely practical monitoring solution.
The problem is learning to trust them.
SoundID Reference can help give beginners a more standardized starting point.
It won’t teach you how to EQ.
It won’t automatically balance your drums.
And it won’t turn a bad mix into a good one.
But it can help you hear your mix more accurately while you’re learning those skills.
Step 1: Make Sure Your Headphones Are Supported
Before purchasing SoundID Reference for Headphones, check whether Sonarworks supports your exact headphone model.
SoundID Reference includes calibration profiles for hundreds of headphone models.
Popular studio headphones from manufacturers such as:
- Beyerdynamic
- Audio-Technica
- Sennheiser
- Sony
- AKG
- Audeze
are represented throughout the profile library.
However, don’t assume your headphones are supported simply because the manufacturer appears on the list.
Check the exact model.
Sometimes different versions or impedance variants of a headphone can have separate profiles.
Step 2: Install SoundID Reference
After installing and authorizing SoundID Reference, you’ll generally have two important ways to use it:
DAW Plugin
and
Systemwide
These accomplish similar goals but are useful in different situations.
What Is the SoundID Reference DAW Plugin?
The plugin version can be inserted into your music-production workflow.
Depending on your DAW and monitoring setup, you’ll typically place SoundID Reference at the end of your monitoring or master signal path.
The important concept is:
SoundID Reference should affect what you’re hearing — not the final sound you’re creating for listeners.
Think about wearing corrective glasses.
The glasses help you see the picture more accurately.
You wouldn’t attach the glasses to the picture when giving it to someone else.
SoundID Reference works similarly.
It’s correcting your monitoring perspective.
What Is SoundID Reference Systemwide?
Systemwide lets you use your calibration profile outside your DAW.
This is extremely useful.
You can listen to:
- Streaming music
- YouTube
- Reference tracks
- Videos
- Music players
- Other applications
through your calibrated monitoring environment.
For beginners, I strongly recommend spending time listening to professionally released music through SoundID Reference.
You need to learn what good records sound like through your calibrated headphones.
Step 3: Select Your Headphone Profile
Open SoundID Reference and search for your headphones.
Make sure you’re choosing the correct model.
For example, if you own a particular version of the Beyerdynamic DT 770 Pro, select the corresponding profile rather than simply choosing the first DT 770 option you see.
Load the profile.
Then enable calibration.
You may immediately hear a significant difference.
Step 4: Don’t Panic When Your Headphones Sound Different
This is one of the most important things beginners need to understand.
Your calibrated headphones may initially sound worse to you.
The bass might suddenly seem weaker.
The treble might change.
The mids might become more noticeable.
Your favorite songs may sound different.
That doesn’t automatically mean SoundID Reference is doing something wrong.
You’ve probably spent months or years becoming accustomed to the natural frequency response of your headphones.
Your brain knows that sound.
When calibration changes it, your first reaction may simply be:
“This sounds weird.”
That’s normal.
Give yourself time.
Step 5: Listen to Music Before You Start Mixing
Don’t install SoundID Reference and immediately start changing every mix you’ve ever made.
Spend some time listening first.
Choose five or ten professionally mixed songs you know extremely well.
Listen through calibration.
Pay attention to:
- Bass level
- Kick level
- Vocal level
- Treble
- Midrange
- Stereo width
- Reverb
- Overall balance
If you produce Hip Hop or R&B, use professional records from those genres.
The objective is to develop a new internal reference.
You’re teaching yourself:
“This is what a professional mix sounds like through my calibrated headphones.”
Step 6: Understand the Flat Target
For beginners, this is where I’d start.
Don’t immediately begin designing elaborate custom curves.
Learn the default calibrated sound first.
Spend several mixing sessions with it.
Listen to commercial music.
Produce.
Mix.
Compare.
The more familiar you become with the calibrated response, the more useful it becomes.
Step 7: Learn the Before and After Difference
One of the best exercises for beginners is frequently switching calibration on and off.
Play a professional song.
Listen with calibration:
ON
Then:
OFF
What changes?
Maybe the bass becomes dramatically louder without calibration.
Maybe the treble suddenly jumps forward.
Maybe the mids become recessed.
Now try the same exercise with your own music.
You’re beginning to learn the natural characteristics of your headphones.
That’s incredibly useful information.
Eventually you may start thinking:
“My headphones naturally exaggerate this area, so I need to be careful when judging it.”
That’s exactly the kind of monitoring awareness good engineers develop.
Step 8: Start Your Mix With Volume
Now you’re ready to mix.
And the first plugin you should reach for isn’t an EQ.
It’s the volume fader.
Build what engineers often call a static mix.
Try balancing the track using primarily:
- Volume
- Panning
- Sound selection
before adding lots of processing.
For a Hip Hop beat, you might establish the relationship between:
Kick → 808 → Snare → Melody → Hi-Hats → Percussion
For an R&B song:
Lead Vocal → Kick → Bass → Snare → Main Instrument → Supporting Instruments
The exact order isn’t a rule.
The point is to establish the important relationships before trying to fix everything with plugins.
Step 9: Pay Special Attention to the Low End
Low-frequency balance is one of the biggest reasons producers become interested in headphone calibration.
This is especially important for:
- Hip Hop
- Trap
- R&B
- Trap Soul
- Pop
- Electronic music
Listen carefully to the relationship between your kick and bass or 808.
Ask yourself:
Can I hear both clearly?
Does the 808 overwhelm the kick?
Does the kick overwhelm the bass?
Does the low end feel balanced compared with my reference track?
Avoid immediately boosting bass because calibrated monitoring doesn’t feel as exciting.
Remember:
You’re mixing.
You’re not trying to create the most entertaining headphone listening experience.
Step 10: Use Reference Tracks
Reference tracks are one of the most powerful tools available to beginners.
Choose a professionally released song with a similar style to your production.
Level-match it reasonably closely with your mix.
Then compare.
Listen to the professional record for 15–30 seconds.
Switch to your mix.
Ask:
- Is my bass much louder?
- Are my vocals quieter?
- Are my hi-hats brighter?
- Is my mix darker?
- Is my snare too aggressive?
- Is my mix dramatically wider?
- Am I using much more reverb?
You aren’t trying to copy the other song.
You’re resetting your perspective.
Step 11: Understand Custom Target Curves
Once you’ve become comfortable with the standard calibration, you can explore Custom Target controls.
Custom targets allow you to modify the monitoring response.
For example, you might prefer a slightly different bass response while producing.
But there’s an important beginner rule here:
Don’t use a custom target simply to make everything sound more exciting.
If you immediately add a huge bass boost because you miss the sound of your uncalibrated headphones, you’re partially defeating the purpose of calibration.
Start neutral.
Learn it.
Customize later when you understand why you’re making the change.
Step 12: Learn Translation Check
Translation Check is one of SoundID Reference’s most useful tools for beginners.
Your audience isn’t listening through your studio headphones.
They’re using things like:
- Phones
- Earbuds
- Laptop speakers
- Bluetooth speakers
- Car stereos
- Consumer headphones
Translation Check lets you audition your mix through different simulated listening scenarios.
This can help reveal problems.
How Beginners Should Use Translation Check
Don’t try to make your mix sound identical through every simulation.
That’s impossible.
Instead, ask whether the important elements survive.
If you’re mixing a Hip Hop song, can you still hear:
- Vocal
- Kick
- Snare
- Bass harmonics
- Main melody
on smaller playback systems?
The deepest part of your 808 may disappear.
That’s normal.
Tiny speakers physically can’t reproduce extremely deep bass.
What matters is whether the musical information still works.
Step 13: Don’t Chase Every Translation Problem
This is another important lesson.
Suppose your mix sounds good through your calibrated headphones.
It sounds good against your reference.
It sounds good in mono.
It sounds good through several Translation Check options.
But one particular simulation sounds slightly strange.
Don’t immediately rebuild your entire mix.
Every playback system sounds different.
You’re looking for consistent problems.
If your vocal sounds too quiet everywhere, that’s worth addressing.
If your 808 overwhelms every bass-capable system, that’s worth addressing.
If one simulation sounds slightly different?
That may simply be the playback system.
Step 14: Check Your Mix in Mono
Even if you’re mixing on headphones, check mono periodically.
Mono can reveal:
- Phase problems
- Excessive stereo widening
- Instruments masking each other
- Weak center information
- Effects that disappear when summed
Your mix doesn’t need to sound identical in mono.
But the important elements should generally survive.
Step 15: Mix at a Comfortable Volume
SoundID Reference doesn’t protect you from one of the biggest mixing mistakes:
Mixing too loud.
Loud music sounds exciting.
Bass feels powerful.
Treble sounds detailed.
Compression feels impressive.
Then your ears become fatigued.
Mix primarily at a comfortable level.
Occasionally turn the volume very low.
At low volume, listen for the relationships between:
- Vocal
- Kick
- Snare
- Bass
- Main melody
This can tell you a surprising amount about your mix balance.
Step 16: Don’t Forget to Bypass SoundID Reference Before Exporting
This is extremely important.
SoundID Reference is correcting your monitoring environment.
The calibration shouldn’t become part of the music you’re delivering to listeners.
If SoundID Reference is inserted directly on your master output, make sure your workflow prevents the calibration processing from being included in the final exported audio.
The exact method depends on your DAW and monitoring configuration.
Always verify your export workflow.
Step 17: Still Check Your Mix in the Real World
SoundID Reference can reduce some of the uncertainty involved with headphone mixing.
Translation Check can give you additional perspectives.
But real-world listening is still valuable.
Export the song and listen through:
- Your car
- Phone
- Earbuds
- Bluetooth speaker
- Another pair of headphones
Take notes.
Then return to your studio.
Here’s the important part:
Don’t fix every difference.
Look for repeated problems.
If the vocal sounds too quiet on four systems, turn your attention to the vocal.
If the 808 overwhelms everything everywhere, investigate the low end.
Repeated problems are much more meaningful than isolated differences.
A Simple SoundID Reference Workflow for Beginners
If everything we’ve covered feels like a lot, here’s a simple routine you can follow every time you mix.
Before Mixing
- Select the correct headphone profile.
- Enable calibration.
- Listen to one or two professional reference tracks.
- Set your monitoring level comfortably.
During Mixing
- Build your static mix.
- Focus on kick and bass balance.
- Mix vocals and important instruments in context.
- Check your reference track periodically.
- Occasionally bypass calibration.
- Check the mix in mono.
Near the End
- Use Translation Check.
- Listen at low volume.
- Take a break.
- Return with fresh ears.
- Perform real-world playback tests.
Before Exporting
- Make sure SoundID calibration isn’t being printed into your final master.
- Export.
- Listen to the exported file outside your DAW.
That’s enough.
You don’t need to make SoundID Reference complicated.
Common SoundID Reference Beginner Mistakes
Mistake #1: Expecting Calibration to Sound Better
Calibration is about accuracy and consistency, not excitement.
Your uncalibrated headphones might actually sound more enjoyable.
That’s fine.
Mistake #2: Immediately Changing the Target Curve
Learn the standard calibration first.
Customize once you understand what you’re changing and why.
Mistake #3: Mixing Without Reference Tracks
Calibration gives you a reference environment.
Professional songs teach you how successful mixes behave inside that environment.
Use both.
Mistake #4: Turning the Bass Back Up
If calibration dramatically reduces the apparent bass response of your headphones, resist the temptation to immediately compensate.
Listen to professional tracks first.
Your ears need time to adjust.
Mistake #5: Leaving Calibration on the Export
SoundID Reference is for monitoring.
Always verify that your correction isn’t being rendered into the final audio.
Mistake #6: Thinking SoundID Reference Will Mix for You
SoundID Reference doesn’t make mixing decisions.
It won’t tell you:
- Where to EQ
- How much compression to use
- How loud your vocal should be
- Which kick works with your 808
- How much reverb sounds appropriate
It gives you a more consistent environment for making those decisions yourself.
Does SoundID Reference Replace Studio Monitors?
No.
But that doesn’t mean you need studio monitors to start mixing.
Headphones and monitors provide different experiences.
Speakers interact with your room.
Headphones remove much of that room interaction but introduce their own characteristics.
SoundID Reference addresses part of the headphone side of that equation.
A practical home-studio setup might eventually include:
Calibrated Headphones + Studio Monitors + Reference Tracks + Real-World Checks
But if you’re starting with only headphones, that’s completely workable.
Learn your headphones first.
Does SoundID Reference Replace Acoustic Treatment?
Not exactly.
If you’re mixing through headphones, the acoustics of your room have dramatically less influence over what you’re hearing.
That’s one reason headphone mixing is attractive to bedroom producers.
But SoundID Reference isn’t acoustic treatment.
If you’re using speakers, your room still matters.
The Headphones edition is primarily about compensating for headphone frequency-response characteristics.
Is SoundID Reference Worth It for Beginners?
It can be.
I’d especially consider SoundID Reference if:
- You primarily mix on headphones
- You produce in an untreated bedroom
- Your mixes don’t translate well
- Your bass sounds different everywhere
- You’re constantly second-guessing EQ decisions
- Your headphones have a supported calibration profile
- You want a more consistent monitoring setup
But there’s an important expectation to set.
SoundID Reference won’t instantly make your mixes professional.
Your mixing ability still comes from practice.
You’ll still need to learn:
- Level balancing
- EQ
- Compression
- Saturation
- Reverb
- Delay
- Panning
- Stereo imaging
- Automation
- Critical listening
What SoundID Reference can do is give you a more reliable environment in which to develop those skills.
And that’s where its value becomes much greater over time.
The Best Way to Learn SoundID Reference
If you’re completely new to the software, don’t try to master every feature immediately.
For your first week, keep things simple.
Days 1–2
Listen to your favorite professional music with calibration enabled.
Days 3–4
Mix normally using the standard calibration.
Compare frequently against reference tracks.
Day 5
Experiment with Translation Check.
Day 6
Compare calibration on versus off and make notes about your headphones.
Day 7
Take one finished mix through your full translation process:
SoundID → Reference Track → Mono → Translation Check → Car → Phone → Earbuds
Write down what you discover.
Do this repeatedly and you’ll begin learning exactly how your headphone setup translates.
That’s far more valuable than constantly switching between random plugins and monitoring configurations.
SoundID Reference for Beginners: Final Thoughts
SoundID Reference can look technical when you first open it.
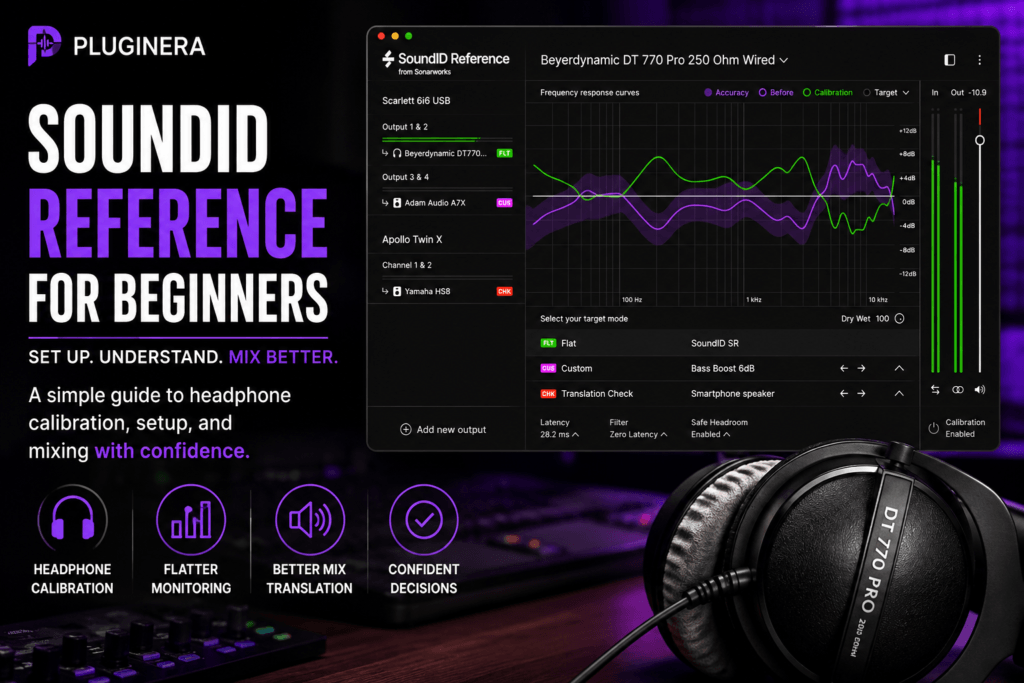
Frequency-response graphs, calibration curves, target modes, filter settings, and Translation Check options can make it seem like something designed only for experienced mixing engineers.
But the basic concept is surprisingly simple:
Your headphones color what you’re hearing. SoundID Reference attempts to compensate for that coloration so you have a more consistent reference for making mixing decisions.
That’s really it.
For beginners, the best approach is to avoid overcomplicating it.
Load the correct headphone profile.
Start with the standard calibration.
Listen to professional music.
Learn what good mixes sound like through your calibrated headphones.
Mix at reasonable levels.
Use reference tracks.
Check mono.
Use Translation Check.
And still listen to your music on real-world systems.
Most importantly, give your ears time to adjust.
The goal isn’t to make your headphones sound impressive.
The goal is to reach the point where you can sit down, put on your headphones, start mixing and feel more confident that the decisions you’re making will translate outside your studio.
That’s when SoundID Reference becomes more than another piece of software.
It becomes part of your monitoring workflow.
Ready to Try SoundID Reference?
If you’re mixing primarily on headphones and want a more consistent monitoring reference, SoundID Reference for Headphones is worth exploring.
Check the latest price for Sonarworks SoundID Reference for Headphones at Plugin Boutique.
You can also read our SoundID Reference for Headphones Review for a deeper look at the software, or check out our guide to How to Mix Hip Hop & R&B on Headphones with SoundID Reference for a genre-specific mixing workflow.
Disclosure: This article may contain affiliate links. If you purchase through one of these links, Pluginera may earn a commission at no additional cost to you.