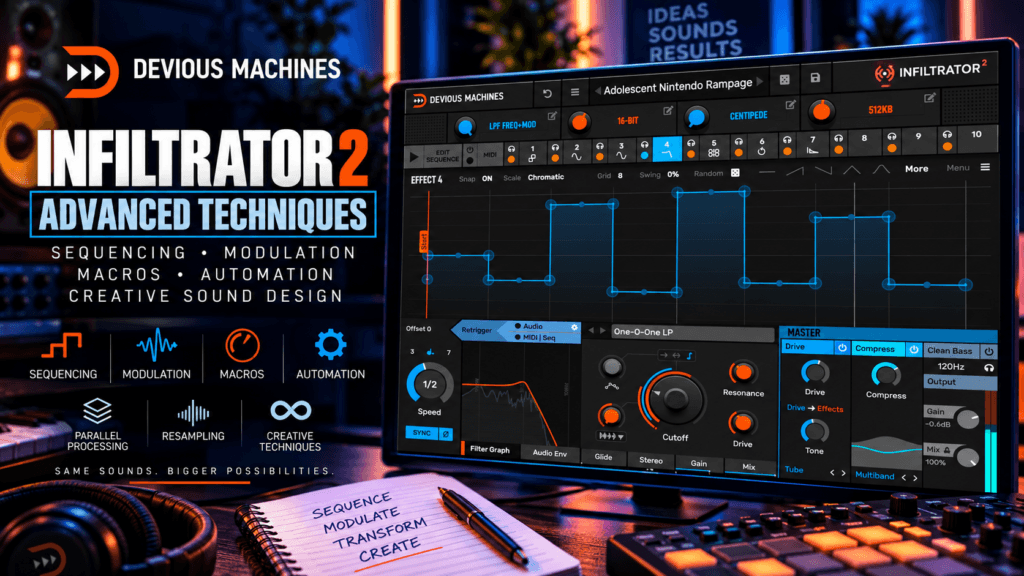
 Infiltrator 2 Advanced Techniques: Sequencing, Modulation & Macros
Once you understand the basics of Devious Machines Infiltrator 2, something interesting happens.
You stop thinking of it as a collection of effects.
Instead, you start thinking about movement.
You aren’t simply adding distortion to a melody. You’re deciding when that distortion appears. You aren’t simply filtering a Rhodes. You’re designing how the filter moves throughout the phrase. You aren’t just adding delay and reverb. You’re controlling how multiple effects interact as the music develops.
That’s where Infiltrator 2 becomes much deeper.
Its combination of effect sequencing, envelopes, modulation, macros, tempo synchronization, and up to 10 effect slots allows you to create processing that behaves almost like another instrument inside your production.
In this guide, we’ll explore Infiltrator 2 advanced techniques, with a particular focus on sequencing, modulation, macros, evolving effects, parallel processing, resampling, and techniques you can use to develop your own signature effects.
Moving Beyond Infiltrator 2 Presets
Infiltrator 2 includes a huge preset library, and presets are an excellent way to learn the plugin.
But eventually, you want to reach the point where you hear something in your head and know how to build it.
Instead of:
“Which preset sounds good?”
you start asking:
“What do I want this sound to do?”
Maybe you want your Rhodes to gradually become darker every four bars.
Maybe you want a drum loop to glitch only during the final beat.
Maybe you want a synth to alternate between clean, distorted, and delayed textures.
Maybe you want one macro to transform an entire melody before the chorus.
Those are intentional production decisions.
And that’s where the more advanced features of Infiltrator 2 become extremely useful.
1. Think of Infiltrator as an Effects Sequencer
The first major mindset shift is understanding that Infiltrator isn’t simply an effects rack.
Think of it as an effects sequencer.
A conventional chain might look like:
Filter → Distortion → Chorus → Delay → Reverb
Normally, those processors remain active unless you automate them.
With Infiltrator, the effects can become part of a rhythmic sequence.
You could create:
Beat 1: Filter
Beat 2: Filter + distortion
Beat 3: Modulation
Beat 4: Delay + reverb
Now the processing itself contributes to the groove.
This distinction is what makes Infiltrator particularly powerful.
2. Build Sequences Around the Musical Phrase
It’s easy to create a complicated effect sequence.
The harder skill is creating one that actually supports the music.
Listen to the phrase before programming anything.
Suppose you have a four-bar Rhodes progression.
Maybe bars one through three should remain relatively clean.
Then bar four becomes more heavily processed.
Your effects sequence could follow that structure:
Bars 1–2: Minimal processing
Bar 3: Filter movement
Bar 4: Filter + delay + reverb
Then the pattern resets.
The effects now reinforce the composition instead of competing with it.
3. Use the 32-Step Sequencer to Create Development
The 32-step sequencer gives you enough resolution to create patterns that develop over time.
You don’t need every step to contain dramatic processing.
Try thinking in stages.
Steps 1–8
Keep the sound relatively clean.
Steps 9–16
Introduce filtering.
Steps 17–24
Add distortion or modulation.
Steps 25–28
Increase the intensity.
Steps 29–32
Introduce delay and reverb.
Then reset.
You now have an effect sequence with a beginning, middle, climax, and resolution.
That’s almost like creating a miniature arrangement.
4. Leave Space Inside Your Sequences
Advanced doesn’t mean complicated.
In fact, one of the best things you can do is leave some steps relatively untouched.
If every step contains:
Filter + Distortion + Pitch + Delay + Glitch + Reverb
the listener has nowhere to focus.
Instead, create contrast.
Think:
Clean → Clean → Effect → Clean → Effect → Effect → Clean → Transition
The clean moments make the processed moments more noticeable.
This is especially important for Hip Hop and R&B, where groove often benefits from space.
5. Create Polyrhythmic-Style Movement
One interesting technique is making your effects feel as though they’re operating independently from the main musical rhythm.
For example, your melody may follow a straightforward four-beat pattern while your effects create movement at different rhythmic intervals.
A filter could move slowly.
Distortion could pulse more quickly.
Delay could appear occasionally.
Stereo movement could evolve over a longer period.
The interaction between these different movements can make a simple sound feel significantly more complex.
You don’t necessarily need to change the notes.
You’re creating complexity through processing rhythm.
6. Combine Fast and Slow Modulation
This is one of the easiest ways to create evolving textures.
Not every parameter should move at the same speed.
Imagine:
Filter cutoff: Slow movement
Stereo position: Medium movement
Distortion: Fast rhythmic movement
Delay: Occasional activation
Reverb: Slow increase
Now the sound is changing on several different timescales.
Some movement is immediately noticeable.
Other changes happen gradually.
This creates a sense that the sound is continuously evolving.
7. Use Modulation to Make Static Sounds Feel Organic
Start with a sustained pad.
Without modulation:
AAAAAAAAAAAA
The sound stays relatively consistent.
Now slowly modulate:
- Filter cutoff
- Resonance
- Stereo width
- Distortion
- Delay amount
The MIDI hasn’t changed.
The chord hasn’t changed.
But the tone continuously shifts.
This is particularly useful for atmospheric R&B, Trap Soul, cinematic production, and ambient textures.
8. Don’t Modulate Everything at Maximum Depth
This is an important advanced lesson.
Just because a parameter can move dramatically doesn’t mean it should.
Small amounts of modulation can create surprisingly sophisticated results.
Try moving the filter cutoff just enough that you feel the tonal change without immediately hearing an obvious sweep.
Do the same with stereo movement.
Do the same with distortion.
Do the same with delay.
Several subtle movements layered together can sound more expensive than one extreme effect.
9. Use Different Envelope Shapes for Different Jobs
Envelope shapes can dramatically change how an effect feels.
Rising Shape
Useful for:
- Buildups
- Filter openings
- Increasing distortion
- Growing reverb
- Transitions
Falling Shape
Useful for:
- Pluck-like effects
- Downlifters
- Filter decay
- Short effect bursts
Pulsing Shape
Useful for:
- Rhythmic filtering
- Tremolo-style effects
- Gating
- Percussion processing
Gradual Curves
Useful for:
- Pads
- Rhodes
- Atmospheric textures
- Slow transitions
Don’t just draw random shapes.
Ask what role the movement should perform.
10. Create Call-and-Response With Effects
This is a really useful musical technique.
Suppose your melody has two phrases:
Phrase A → Phrase B
Leave Phrase A relatively clean.
Process Phrase B.
For example:
Phrase A: Original melody
Phrase B: Filter + delay
Then repeat.
The processing itself creates a call-and-response relationship.
You can use the same technique on:
- Vocal chops
- Guitars
- Rhodes
- Synth leads
- Percussion
The effect becomes part of the composition.
11. Create Multiple Versions of the Same Instrument
One of my favorite uses of Infiltrator is creating several identities from one sound.
Take a Rhodes.
Create:
Version A — Clean
Almost no processing.
Version B — Dark
Low-pass filtering and subtle saturation.
Version C — Wide
Modulation and stereo movement.
Version D — Atmospheric
Delay and reverb.
Version E — Destroyed
Distortion, pitch, glitch, and spectral processing.
Now use those versions throughout the arrangement.
You don’t need five keyboard instruments.
You have one instrument with five personalities.
12. Use Macros as Performance Controls
Macros are where Infiltrator becomes particularly powerful.
Instead of thinking of macros as simple shortcuts, think of them as performance controls.
One macro can control several parameters simultaneously.
You could create:
DARK
SPACE
MOVEMENT
DESTROY
BUILD
BREAKDOWN
Each macro represents a musical idea rather than a technical parameter.
That’s a much more intuitive way to work.
13. Build a DARK Macro
Let’s say you’re processing an R&B melody.
Create a macro called:
DARK
As you turn it up:
- Filter cutoff decreases
- Saturation increases slightly
- Stereo width decreases
- Reverb increases
- High-frequency content becomes softer
Now one knob changes the emotional character of the melody.
Automate DARK during the verse.
Then pull it back when the chorus arrives.
The chorus suddenly feels brighter and larger.
14. Build a SPACE Macro
Create another macro called:
SPACE
As you increase it:
- Delay mix increases
- Delay feedback increases
- Reverb increases
- Stereo movement increases
At:
0%
the sound remains relatively dry.
At:
50%
it becomes spacious.
At:
100%
it can disappear into an atmospheric cloud.
This works beautifully on vocals, Rhodes, guitars, synths, and pads.
15. Build a DESTROY Macro
Now let’s have some fun.
Create:
DESTROY
As it increases:
- Distortion increases
- Bit reduction increases
- Filtering becomes more aggressive
- Pitch processing increases
- Glitch processing becomes stronger
- Delay feedback rises
At zero:
Original sound
At maximum:
Chaos
You probably won’t leave DESTROY at 100% throughout a song.
Instead, automate it during:
- Transitions
- Final beats
- Breakdowns
- Drum fills
- Special effects
A single automation curve can create a massive transformation.
16. Build a BUILD Macro
This is perfect for transitions.
Assign:
- Filter opening
- Increasing distortion
- Increasing delay
- Increasing reverb
- More stereo movement
to one macro.
Now automate:
0 → 25 → 50 → 75 → 100
throughout the final bar.
When the hook arrives:
Return to 0.
That’s an entire buildup controlled from one automation lane.
17. Build a BREAKDOWN Macro
Now create the opposite.
As BREAKDOWN increases:
- Low-pass filter closes
- Stereo image narrows
- Bit reduction increases
- Reverb increases
- Dry signal decreases
Automate this when moving from a chorus into a verse or bridge.
The production gradually collapses inward.
Then the next section begins.
18. Automate Macros Instead of Individual Parameters
This can dramatically simplify your DAW session.
Without macros, you might automate:
- Cutoff
- Resonance
- Delay feedback
- Reverb amount
- Distortion
- Width
That’s six automation lanes.
With a macro:
One lane.
This isn’t just cleaner.
It encourages you to think musically.
Instead of automating “filter cutoff,” you’re automating:
TENSION
or:
SPACE
or:
DARKNESS
That’s a very different creative mindset.
19. Use Several Macros Together
Once you’re comfortable with individual macros, combine them.
Imagine:
Macro 1 — DARK
Macro 2 — SPACE
Macro 3 — MOVEMENT
Macro 4 — DESTROY
Now your sound has four dimensions.
You could create:
Verse
DARK 60%
SPACE 20%
MOVEMENT 20%
DESTROY 0%
Pre-Chorus
DARK 40%
SPACE 50%
MOVEMENT 40%
DESTROY 10%
Chorus
DARK 0%
SPACE 25%
MOVEMENT 30%
DESTROY 0%
Transition
DARK 80%
SPACE 80%
MOVEMENT 70%
DESTROY 60%
One preset can now support several sections of your song.
20. Use Parallel Processing
Parallel processing becomes extremely powerful with Infiltrator.
Instead of inserting heavy processing directly onto your main instrument, create a send or duplicate track.
Now you have:
Dry signal
and:
Infiltrator signal
Process the second version aggressively.
Then blend it underneath the original.
This is particularly useful for:
- Drums
- Vocals
- Rhodes
- Pads
- Synths
- 808s
The original maintains clarity while the Infiltrator layer provides movement and texture.
21. Create Parallel Drum Destruction
Keep your main drums clean.
Send them to another channel containing Infiltrator.
On the processed channel, try:
Distortion → Bit Reduction → Filter → Glitch → Delay
Push it hard.
Then blend the processed signal quietly underneath the clean drums.
You can automate that layer louder during transitions.
This gives you aggressive texture without sacrificing the punch of the original drums.
22. Create Parallel Vocal Textures
The same concept works beautifully on vocals.
Keep the original vocal or vocal chop relatively clean.
Send a copy into:
Pitch → Filter → Delay → Reverb
Process it heavily.
Then place that layer quietly behind the original.
The listener hears the vocal clearly while an atmospheric version surrounds it.
This can be extremely effective for modern R&B.
23. Resample Your Effects
One of the most powerful advanced techniques has nothing to do with leaving Infiltrator running.
Record it.
Take a simple sound.
Run it through an aggressive Infiltrator preset.
Record several minutes of experimentation.
Then bounce the audio.
Now listen through the recording.
You may find:
- Glitches
- Textures
- Percussion sounds
- Reverb tails
- Pitch effects
- Rhythmic fragments
- Transitions
- One-shots
Chop them out.
Now you have completely new audio material.
24. Create Your Own Sample Packs
Take resampling even further.
Spend an hour processing:
- Piano
- Rhodes
- Synths
- Vocals
- Drums
- Percussion
- Guitar
- Field recordings
through Infiltrator.
Bounce everything.
Then organize the results into folders:
Textures
Transitions
Drum FX
Vocal FX
Glitches
Risers
Atmospheres
One-Shots
You have essentially created your own custom sample library.
And because the sounds came from your own sources and processing decisions, they can become part of your signature.
25. Resample the Resample
Here’s where things can get really interesting.
Take something you’ve already processed through Infiltrator.
Bounce it.
Then put the bounced audio through Infiltrator again.
For example:
Rhodes
becomes:
Atmospheric Rhodes
which becomes:
Glitched Atmospheric Texture
which becomes:
Transition FX
At some point, the original Rhodes may become completely unrecognizable.
That’s not necessarily a problem.
You’ve created a new sound.
26. Chop Your Effects Instead of Using the Whole Sequence
Sometimes an Infiltrator experiment is 90% unusable.
But one second sounds incredible.
Keep that second.
Sound design isn’t about every moment being perfect.
It’s about discovering interesting material.
A tiny glitch could become percussion.
A reverb tail could become ambience.
A distorted vocal fragment could become a transition.
A strange transient could become a snare layer.
Think like a sampler.
27. Create Controlled Randomness
Randomization can be great for inspiration.
But you don’t necessarily want your entire production to feel random.
Use randomness to generate ideas.
Then capture the best results.
A useful workflow is:
Randomize → Listen → Adjust → Record → Chop
You’re using unpredictability as a creative partner rather than letting it dictate the entire production.
28. Use Infiltrator to Generate Ear Candy
Ear candy consists of those tiny sounds that appear briefly and keep the listener interested.
Maybe:
A vocal glitch at bar 4
A delay throw at bar 8
A filtered percussion hit at bar 12
A reversed texture at bar 16
Infiltrator is excellent for generating these moments.
Create a heavily processed version of an existing sound.
Bounce it.
Then chop small pieces from the result and strategically place them around your arrangement.
29. Create an Effect Only Once
Not every cool effect should repeat.
Sometimes a strange sound is powerful precisely because the listener only hears it once.
Place a unique Infiltrator-generated effect:
- Before verse two
- Before the final hook
- At the beginning of the bridge
- During a drum dropout
This creates memorable moments.
If you repeat every effect every eight bars, they stop feeling special.
30. Create Long-Term Evolution
Most producers think about effects in terms of beats and bars.
Try thinking bigger.
What if a sound gradually changed across 16 bars?
The first four bars might be mostly clean.
Then filtering slowly appears.
Stereo movement increases.
Delay becomes more prominent.
Distortion gradually enters.
By bar 16, the sound is significantly different from where it started.
Then reset everything when the chorus arrives.
This kind of long-term movement can make relatively minimal arrangements feel sophisticated.
31. Use Effects to Create Arrangement Instead of Adding Instruments
This is one of the most important advanced concepts.
Suppose you have:
Rhodes + Bass + Drums + Melody
Instead of adding another five instruments, change how those four elements behave.
Intro
Filtered Rhodes.
Verse
Mostly clean.
Pre-Chorus
More modulation and delay.
Chorus
Full-frequency and wide.
Verse 2
Introduce subtle distortion.
Bridge
Heavy atmospheric processing.
Final Chorus
Return to the full sound.
The arrangement evolves even though the core instrumentation barely changes.
That’s efficient production.
32. Build Signature Infiltrator Presets
Eventually, stop trying to create a completely different preset every session.
Start developing a handful of effects that sound like you.
Maybe you consistently like:
- Dark filtering
- Subtle pitch instability
- Warm distortion
- Wide delays
- Long atmospheric reverbs
- Occasional glitches
Combine those preferences into your own presets.
You might build:
Dark Rhodes
Trap Soul Melody
Jus.Chrstn Vocal Space
R&B Transition
Drum Destroyer
Midnight Texture
Hook Buildup
Now Infiltrator becomes part of your production identity rather than simply another plugin.
An Advanced Infiltrator 2 R&B Chain
Let’s put everything together.
Start with a Rhodes progression.
Slot 1 — Filter
Create slow cutoff movement.
Slot 2 — Saturation
Add subtle harmonics.
Slot 3 — Modulation
Introduce gentle stereo movement.
Slot 4 — Delay
Sequence it so it appears near phrase endings.
Slot 5 — Reverb
Increase during transitions.
Then create:
Macro 1 — DARK
Controls filter and saturation.
Macro 2 — SPACE
Controls delay and reverb.
Macro 3 — MOVEMENT
Controls modulation depth.
Macro 4 — TRANSITION
Increases several effects simultaneously.
You now have one Infiltrator preset capable of changing throughout an entire song.
An Advanced Hip Hop Drum Chain
Keep your main drums clean and create a parallel Infiltrator channel.
Try:
Slot 1 — Filter
For tonal changes.
Slot 2 — Distortion
For grit.
Slot 3 — Lo-Fi/Bit Processing
For texture.
Slot 4 — Glitch/Stutter
For fills.
Slot 5 — Delay
For rhythmic repeats.
Sequence the effects so the most aggressive processing occurs toward the end of the phrase.
Then automate the parallel channel louder during transitions.
Your drums remain punchy while the processed layer creates excitement.
An Advanced Trap Soul Texture
Start with a simple pad or vocal chop.
Try:
Filter → Pitch → Saturation → Modulation → Delay → Reverb
Use slow modulation across several parameters.
Then create:
DARK
SPACE
and
MOVEMENT
macros.
Automate them slowly across eight or sixteen bars.
The sound can evolve almost continuously without requiring additional MIDI notes.
The Most Important Advanced Infiltrator 2 Technique
After all of these techniques, there’s one principle that matters more than everything else:
Intentionality.
Don’t add modulation because modulation exists.
Don’t use all 10 slots because Infiltrator gives you 10 slots.
Don’t randomize everything because you can.
Don’t make every transition enormous.
Ask:
What does this section need?
Maybe it needs movement.
Maybe it needs space.
Maybe it needs tension.
Maybe it needs darkness.
Maybe it needs chaos.
Or maybe it needs absolutely nothing.
Once you know the musical goal, use Infiltrator to accomplish it.
That’s when you’re no longer simply experimenting with a plugin.
You’re producing.
Final Thoughts: Mastering Infiltrator 2
Learning the individual effects inside Infiltrator 2 is only the beginning.
The real power comes from understanding how to combine:
Sequencing
Modulation
Envelopes
Macros
Automation
Parallel processing
Resampling
into a workflow.
That’s where Infiltrator can become much more than a multi-effects plugin.
It can become an instrument for manipulating sound.
You can make one Rhodes progression evolve across an entire song.
You can turn clean drums into glitch textures without destroying their punch.
You can transform vocals into atmospheric layers.
You can create transitions from sounds already inside your beat.
You can turn one synth patch into an entire folder of samples.
And you can build macros that allow a single control to change the emotional character of a sound.
The goal isn’t to make your productions more complicated.
It’s to gain more control over movement.
Because once you can control how sounds evolve over time, even a relatively simple production can feel detailed, dynamic, and finished.