 A great beat doesn’t need something new happening every four bars.
But it does need movement.
One of the biggest differences between a loop and a finished production is what happens when the music moves from one section to another. Filters sweep, drums disappear, reverbs bloom, delays repeat, melodies become distorted, and tiny effects signal that something new is about to happen.
These details are transitions.
And Devious Machines Infiltrator 2 is practically built for creating them.
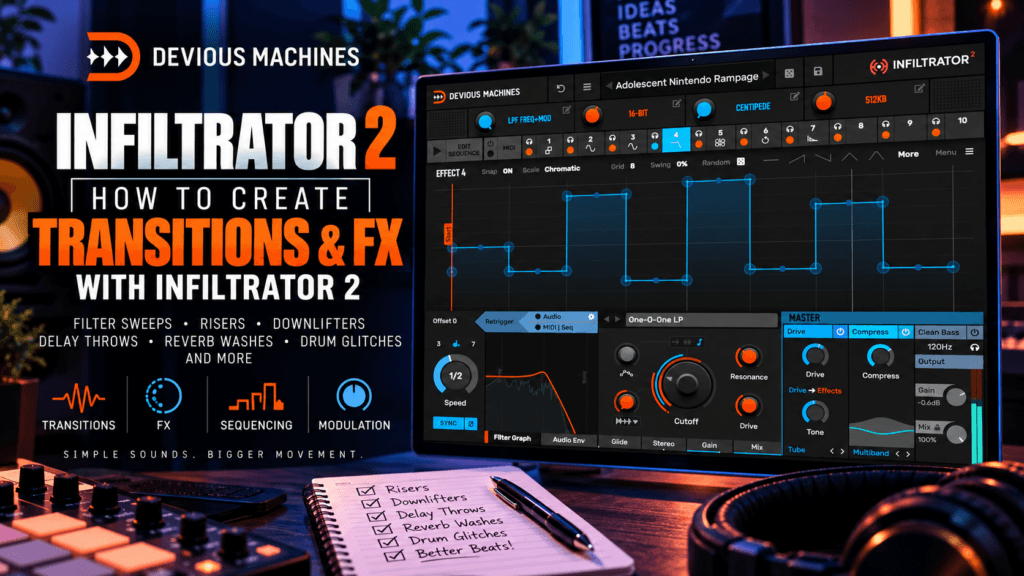
With 54 effects, up to 10 effect slots, a 32-step sequencer, modulation, envelopes, macros, and extensive tempo synchronization, Infiltrator 2 lets you create transitions from sounds that are already inside your beat.
In this guide, we’ll explore how to create transitions and FX with Infiltrator 2, including filter sweeps, delay throws, reverb washes, drum glitches, risers, downlifters, vocal effects, and techniques for turning repetitive loops into complete arrangements.
Why Transitions Matter
Imagine you’ve created an eight-bar R&B loop.
You have:
- Rhodes
- Bass
- Drums
- Pad
- Melody
- Percussion
Everything sounds good.
So you duplicate those eight bars.
Then duplicate them again.
And again.
Technically, you now have a song-length production.
Musically, however, it still sounds like an eight-bar loop.
Transitions help solve that problem.
They tell the listener:
Something is about to change.
That change might be subtle.
A delay on the final melody note may be enough.
Or it might be dramatic.
The entire drum bus could glitch, filter down, and disappear into reverb before the hook arrives.
Infiltrator 2 gives you both options.
1. Start With Sounds Already in Your Beat
Before reaching for another riser or transition sample, look at the sounds already inside your production.
Try using:
- Melodies
- Rhodes
- Pads
- Vocal chops
- Drum loops
- Percussion
- Synths
- Samples
- Guitars
These sounds already share the musical identity of your track.
Processing them into transitions can therefore feel more natural than introducing an unrelated FX sample.
For example, instead of adding a generic riser before your chorus, you could transform your main synth melody into the riser.
That’s where Infiltrator becomes especially useful.
2. Create a Simple Filter Transition
Filtering is probably the easiest place to start.
Suppose your verse is about to transition into the hook.
Load Infiltrator 2 onto your melody.
Choose a low-pass filter.
During the final bar, gradually close the filter:
Full melody → darker → darker → almost completely filtered
Then return to the full-frequency melody when the hook begins.
That contrast can make the chorus feel larger even though you haven’t added anything.
You can also reverse the concept.
Start filtered and gradually open the cutoff:
Dark → brighter → brighter → full frequency
This creates anticipation leading into the next section.
3. Create a Filter Sweep With Modulation
Instead of manually drawing every automation point, use Infiltrator’s modulation system.
Create an envelope that gradually changes the cutoff throughout the bar.
For a buildup, draw an upward movement.
For a breakdown, create downward movement.
Try synchronizing the modulation to:
1 bar
or
2 bars
for smoother R&B transitions.
Faster settings can work well for Trap, Hip Hop, and more aggressive effects.
4. Make Delay Throws
Delay throws are one of the most useful transition techniques in modern production.
The idea is simple.
Instead of having delay constantly active, let it appear on a specific note.
Imagine your melody ends:
Da — da — da — DAAAA
Apply delay only to that final note.
Now you get:
DAAAA → da → da → da
while the next section begins.
This works especially well on:
- Vocal chops
- Synth leads
- Guitars
- Pianos
- Rhodes
- Percussion
- Snare hits
Infiltrator’s sequencing makes it possible to introduce the delay at specific moments instead of leaving it active throughout the phrase.
5. Create Reverb Washes
Reverb can also become a transition rather than simply an ambience effect.
Take the final chord or note before a section change.
Increase the reverb dramatically.
Let the tail wash into the next section.
For example:
Dry Rhodes → increasingly wet → huge reverb tail → chorus
You can combine this with filtering.
Try:
Filter → Delay → Reverb
As the filter closes, the delay increases and the reverb expands.
The original instrument gradually disappears into space.
6. Combine Filter, Delay, and Reverb
This is one of my favorite basic transition chains.
Set up:
Filter → Delay → Reverb
During the final bar:
Beginning of the bar
Mostly dry.
Middle
Start closing the filter.
Final beats
Increase delay.
Final beat
Increase reverb.
Next section
Return everything to normal.
This creates a complete transition using only three effects.
You don’t need to fill all 10 Infiltrator slots.
7. Create Drum Glitch Transitions
Drums are perfect for more aggressive transitions.
Take your drum bus or drum loop and apply Infiltrator only during the final beat or bar of a section.
Experiment with:
- Stutter effects
- Filtering
- Distortion
- Bit reduction
- Delay
- Pitch processing
- Glitch effects
For example:
Bars 1–7: Normal drums
Bar 8, beats 1–3: Normal drums
Bar 8, beat 4: Glitch
Bar 9: Clean drums return
That tiny moment can completely change how the next section feels.
8. Create a Stutter Before the Hook
Stutters are particularly effective immediately before a hook or drop.
Take the final snare, vocal chop, melody note, or entire mix element and repeat it rhythmically.
You might create:
Normal → normal → 1/8 stutter → 1/16 stutter → DROP
The increasing rhythmic speed creates tension.
Then suddenly remove the processing when the hook arrives.
That return to normality provides the payoff.
The transition works because of contrast.
9. Make a Lo-Fi Breakdown
Not every transition needs to be a riser.
Sometimes making the production temporarily smaller is more effective.
Try processing the final bar with:
Filtering → Bit Reduction → Saturation
The beat can gradually sound narrower, darker, and lower fidelity.
Then remove the processing when the chorus begins.
Suddenly the full-frequency production feels enormous.
This technique works beautifully for Hip Hop and R&B because it doesn’t require adding another musical element.
10. Create Your Own Risers
Risers are traditionally noise sweeps or pitched effects that increase in intensity before a section change.
But Infiltrator lets you create risers from almost anything.
Start with a sustained:
- Synth
- Pad
- Vocal
- Piano chord
- Guitar
- Cymbal
- Sample
Then gradually increase several parameters.
For example:
Filter cutoff ↑
Pitch ↑
Distortion ↑
Stereo width ↑
Delay feedback ↑
Reverb ↑
The sound becomes increasingly intense as the transition approaches.
At the beginning of the next section:
Cut everything.
That sudden release creates impact.
11. Turn Your Melody Into a Riser
This is more interesting than reaching for a generic white-noise sweep.
Duplicate your main melody.
Place the duplicate immediately before the chorus.
Process it heavily with Infiltrator.
Use filtering, pitch manipulation, delay, distortion, or reverb to gradually transform it.
You might start with something recognizable:
Original melody
and finish with:
Abstract rising texture
Because the riser came from the melody itself, it feels connected to the song.
12. Create Downlifters
Downlifters perform the opposite role.
Instead of building tension, they help the production settle into a quieter section.
Start with an intense sound.
Then gradually:
Close the filter
Lower the pitch
Reduce high frequencies
Increase reverb
Let the volume fade
You could use this when moving from:
Chorus → Verse
or:
Hook → Breakdown
The effect helps the energy fall naturally.
13. Turn Cymbals Into Custom FX
Cymbals are fantastic source material.
Take a crash or ride cymbal and process it with:
Pitch → Filter → Delay → Reverb
You can turn a normal cymbal into:
- Riser
- Downlifter
- Impact tail
- Atmospheric texture
- Reverse-style effect
Bounce the result to audio and save it.
Now you’ve created your own transition effect.
14. Create Vocal Transitions
Vocal chops can produce some of the most musical transitions.
Start with a short vocal phrase.
Then experiment with:
Pitch → Filter → Delay → Reverb
You could pitch the vocal downward while increasing reverb.
Or create a rising pitch effect before the chorus.
Another option is sequencing the vocal through several effects so each repetition becomes progressively more processed.
For atmospheric R&B and Trap Soul, this can sound incredible.
15. Make Vocal Delay Throws
Try isolating the final word or syllable of a vocal phrase.
Then send it through Infiltrator.
Create:
Filter + Delay + Reverb
Allow the repeated vocal to become progressively darker.
The effect might sound like:
You → you → you → you…
while disappearing into the background.
This works especially well for vocal chops and ad-libs.
16. Use Infiltrator 2 for Impact Effects
Transitions aren’t only about what happens before the new section.
What happens on the first beat matters too.
Try processing an impact, kick, crash, snare, or percussion hit.
Add:
Distortion + Reverb
or:
Pitch + Delay + Reverb
Place it on the first beat of the chorus.
This gives the new section a clear arrival point.
You can even create the impact from a drum sound already inside your production.
17. Use the 32-Step Sequencer for Transition Patterns
The 32-step sequencer is particularly useful because your transition doesn’t have to be one continuous effect.
Different processing can happen at different moments.
For example:
Steps 1–8: Filter
Steps 9–16: Filter + distortion
Steps 17–24: Pitch processing
Steps 25–28: Stutter
Steps 29–32: Delay + reverb
Then:
Everything resets.
You’ve essentially created a miniature effects arrangement inside Infiltrator.
18. Make Transitions Progressively More Intense
One of the easiest ways to create anticipation is increasing the amount of processing over time.
Don’t immediately start at maximum intensity.
Think:
10% → 25% → 50% → 75% → 100%
The listener senses that something is developing.
Then when the next section arrives:
0%.
That sudden contrast creates the payoff.
This principle works with:
- Distortion
- Filtering
- Reverb
- Delay
- Pitch
- Modulation
- Stereo movement
19. Automate the Macros
Infiltrator’s macros are perfect for transitions.
Instead of automating five different controls inside your DAW, assign them to one macro.
Create something like:
BUILD
As BUILD increases:
- Filter opens
- Distortion increases
- Delay feedback increases
- Reverb increases
- Stereo movement becomes stronger
Now automate:
BUILD: 0% → 100%
over the final bar.
When the chorus begins:
BUILD: 0%
One automation lane can control an entire transition.
20. Create a “Breakdown” Macro
You can create another macro that does the opposite.
Call it:
BREAKDOWN
As you increase it:
- Low-pass filter closes
- Stereo width decreases
- Bit reduction increases
- Reverb increases
- Dry signal decreases
Automate this during the final bar before a breakdown.
Now one knob can make the production feel progressively smaller and more distant.
21. Automate the Mix Control
This is one of the simplest techniques in the entire guide.
Create an aggressive Infiltrator preset.
Then automate the overall Mix.
For example:
Bar 1: 0%
Bar 2: 10%
Bar 3: 25%
Bar 4: 50%
Then:
Chorus: 0%
The source gradually becomes more processed as the section develops.
You don’t necessarily need complicated automation inside the effect itself.
Sometimes one Mix automation curve is enough.
22. Use Parallel Processing for Transitions
Parallel processing gives you even more control.
Keep your original sound clean.
Then send it to another channel containing Infiltrator 2.
Now you have:
Original signal
plus:
Transition FX
Automate the processed channel into the mix as the transition approaches.
This works especially well for:
- Vocals
- Drums
- Melodies
- Rhodes
- Pads
Your original remains clear while the effects gradually surround it.
23. Turn an 8-Bar Loop Into an Arrangement
Here’s where all of this becomes practical.
Suppose you’ve created an eight-bar loop.
Instead of duplicating it unchanged, create four versions.
Section 1 — Intro
Filter the melody.
Remove some drums.
Use subtle reverb.
Section 2 — Verse
Return the melody closer to normal.
Keep effects minimal.
Transition
Process the final bar with filter + delay.
Section 3 — Hook
Bring back the full melody and drums.
Add an impact on beat one.
Transition
Use a drum glitch on the final beat.
Section 4 — Verse 2
Introduce another processed variation.
Suddenly your eight-bar loop has become the foundation of an actual arrangement.
24. Don’t Put a Transition Every Four Bars
Once you discover how easy it is to create effects with Infiltrator, there’s a temptation to use them constantly.
Resist it.
If every four bars contains:
Glitch!
Riser!
Delay!
Stutter!
Reverb!
The effects lose their impact.
Think in terms of hierarchy.
A small four-bar change might only need a subtle delay.
An eight-bar transition could use filtering.
A major verse-to-hook transition might deserve a larger combination of effects.
Save your biggest moments for your biggest structural changes.
25. Silence Is Also a Transition Effect
This might be the most important technique in this article.
Sometimes the best effect is:
Nothing.
Use Infiltrator to create a huge buildup.
Then cut everything for half a beat.
Silence.
Then let the chorus hit.
That tiny gap can create more impact than adding another processor.
Effects create tension.
Silence creates contrast.
Use both.
A Simple Infiltrator 2 Transition Chain
If you’re not sure where to begin, try this:
Effect 1 — Filter
Gradually reduce or increase the frequency range.
Effect 2 — Distortion
Add intensity as the transition progresses.
Effect 3 — Delay
Introduce rhythmic echoes toward the end.
Effect 4 — Reverb
Create a large tail on the final beat.
Then automate the overall processing so it increases throughout the final bar.
Think:
Clean → Filtered → Distorted → Delayed → Reverb → Silence → DROP
That’s an entire transition created from one sound.
A Simple R&B Transition Recipe
For smoother R&B production, try:
Rhodes → Low-Pass Filter → Delay → Reverb
Keep everything subtle.
During the final two beats:
- Close the filter slightly.
- Increase the delay.
- Increase the reverb.
- Remove the drums briefly.
- Return everything when the next section begins.
This creates movement without making the production sound overly electronic.
A Hip Hop Transition Recipe
For a harder Hip Hop transition, try processing your drums.
During the final beat:
Filter → Distortion → Stutter → Delay
Then cut the drums immediately before the next section.
When the clean drums return, they’ll feel harder simply because you’ve created contrast around them.
A Trap Soul Transition Recipe
Start with a vocal chop or dark melody.
Use:
Pitch → Filter → Delay → Reverb
Gradually pitch or filter the sound while increasing the ambience.
Allow the final reverb tail to overlap the beginning of the next section.
This can create the dark, spacious transition style that works particularly well in Trap Soul.
Build Your Own Transition Preset Library
Once you find combinations you like, save them.
Create categories such as:
R&B Smooth Transition
Dark Trap Soul FX
Drum Glitch
Hook Buildup
Vocal Throw
Melody Wash
Lo-Fi Breakdown
Riser
Downlifter
Impact FX
Eventually, instead of designing every transition from scratch, you’ll have your own collection of starting points.
That can dramatically speed up your workflow.
Final Thoughts: Creating Transitions With Infiltrator 2
Infiltrator 2 is powerful for sound design, but transitions might be one of its most practical uses.
You can take sounds already inside your beat and turn them into:
- Risers
- Downlifters
- Delay throws
- Reverb washes
- Drum glitches
- Stutters
- Filter sweeps
- Vocal effects
- Impacts
- Atmospheric transitions
More importantly, these effects can help solve one of the biggest problems producers face:
Getting beyond the loop.
Instead of asking what new instrument you should add to the next eight bars, ask:
How can I make the sounds I already have behave differently?
Maybe the Rhodes becomes darker.
Maybe the drums glitch.
Maybe the melody disappears into delay.
Maybe the vocal chop becomes a riser.
Maybe everything drops out for half a beat.
Those changes create movement.
Movement creates sections.
And sections turn loops into songs.
That’s where Infiltrator 2 can become much more than another multi-effects plugin.
It can become part of your arrangement workflow.
What To Learn Next
At this point, we’ve covered the fundamentals, Hip Hop and R&B production, sound design, and transitions.
The next step is going deeper.
In Infiltrator 2 Advanced Techniques: Sequencing, Modulation & Macros, we’ll explore more complex effect sequences, multi-parameter modulation, macro design, evolving patterns, parallel processing, resampling, and ways to build your own signature Infiltrator 2 effects from scratch.