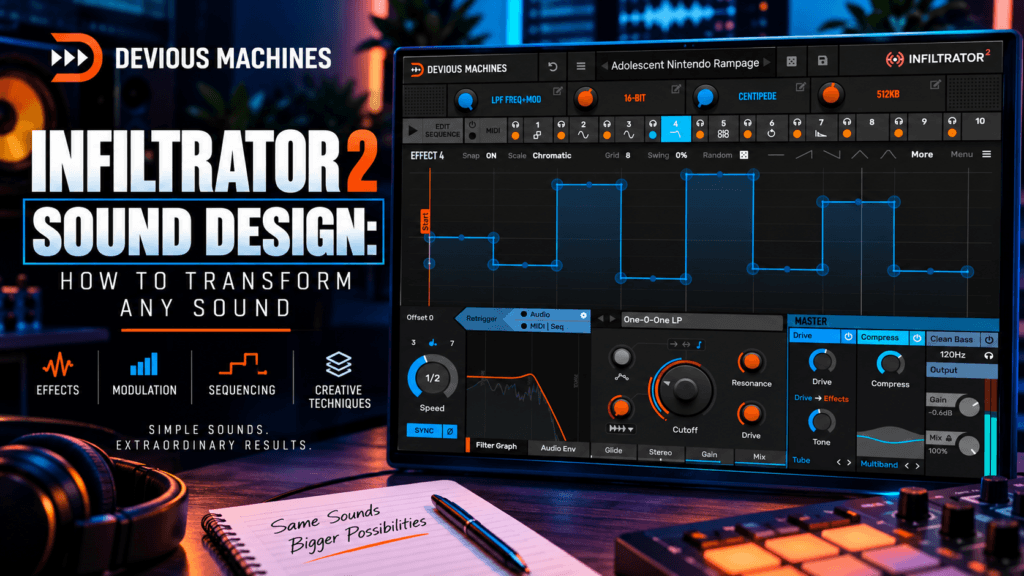
 Infiltrator 2 Sound Design: How To Transform Any Sound
Great sound design doesn’t always start with a complicated synthesizer.
Sometimes it starts with an ordinary sound and the right effects.
A simple piano note can become an atmospheric texture. A basic synth can turn into a rhythmic sequence. A vocal chop can become an ambient layer. A drum loop can transform into something almost unrecognizable.
That’s where Devious Machines Infiltrator 2 becomes incredibly powerful.
With 54 effects, up to 10 effect slots, extensive modulation, a 32-step sequencer, envelopes, macros, and more than 1,500 presets, Infiltrator 2 gives you the tools to completely reshape sounds you already have.
In this Infiltrator 2 sound design guide, we’ll explore practical techniques for transforming melodies, chords, drums, vocals, synths, pads, and samples into entirely new sounds.
Why Infiltrator 2 Is So Powerful for Sound Design
Traditional effects processing is often static.
You load a chorus.
Choose some settings.
And the chorus remains essentially the same until you automate it.
Infiltrator 2 approaches effects differently.
Processing can become part of the rhythm and movement of the sound itself.
You can combine multiple effects and then use sequencing and modulation to continuously change how those processors behave.
For example, a simple synth might travel through:
Filter → Distortion → Pitch Processing → Delay → Reverb
But those effects don’t necessarily have to remain active or behave identically throughout the sequence.
That’s the important difference.
You’re designing how the sound changes over time.
1. Start With a Simple Sound
Here’s something that might initially seem counterintuitive:
Simple sounds are often excellent sources for sound design.
You don’t necessarily need a complicated synth patch.
Try starting with:
- Piano
- Rhodes
- Sine wave
- Saw wave
- Basic pad
- Pluck
- Guitar
- Vocal
- Percussion hit
- Drum loop
- Field recording
- Sample
The simpler the source, the easier it can be to hear exactly what each processing stage contributes.
For this guide, imagine we’re starting with a sustained synth chord.
By itself, it isn’t particularly interesting.
That’s perfect.
Let’s transform it.
2. Start With Filtering
Filtering is one of the easiest ways to begin reshaping a sound.
Load a low-pass filter into your first effect slot.
Now lower the cutoff.
Immediately, your bright synth becomes darker.
But don’t stop there.
Use Infiltrator’s modulation tools to move the cutoff over time.
Instead of:
Dark → Dark → Dark → Dark
you might create:
Dark → Bright → Dark → Bright
Now the filter has become part of the performance.
For atmospheric sound design, try slower movement.
For rhythmic sound design, increase the speed.
One filter can already dramatically change the personality of the source.
3. Add Distortion for Harmonic Complexity
Now place distortion after the filter.
Your chain becomes:
Filter → Distortion
Distortion can add harmonics that weren’t prominent in the original source.
This becomes particularly useful when starting with relatively clean sounds.
You don’t necessarily need aggressive distortion either.
Small amounts can add:
- Warmth
- Grit
- Density
- Harmonics
- Texture
- Presence
Push it harder and the sound can become completely different.
This is one of the fundamental concepts of sound design:
Create frequencies, then manipulate them.
Distortion creates additional harmonic information that your other effects can reshape later in the chain.
4. Introduce Pitch Movement
Pitch processing can quickly take your sound into more experimental territory.
Try adding subtle pitch movement after distortion.
Your chain might now look like:
Filter → Distortion → Pitch → Delay
The amount matters tremendously.
Small pitch variations can make a sound feel unstable, vintage, or organic.
Extreme pitch changes can turn the original source into an entirely different musical element.
For dark R&B and Trap Soul, subtle pitch instability can be especially effective on:
- Rhodes
- Pads
- Guitars
- Bells
- Vocal samples
- Synths
The goal doesn’t always have to be an obvious pitch effect.
Sometimes you simply want the sound to feel slightly imperfect.
5. Use Delay as a Sound-Design Tool
Delay isn’t only for creating echoes.
It can fundamentally change the rhythm and texture of a sound.
Experiment with shorter delay times.
Then increase feedback.
Try synchronizing the delay with your DAW.
Combine it with filtering.
You might start with:
One synth note
and end with:
A repeating rhythmic pattern.
This becomes particularly powerful when Infiltrator’s sequencer is controlling other effects simultaneously.
The original sound is no longer simply playing notes.
The effects are generating additional rhythmic information.
6. Turn Reverb Into Texture
Reverb is another effect that becomes much more interesting when you stop thinking of it solely as a mixing tool.
Instead of asking:
“How much room should this sound have?”
ask:
“What happens if the reverb becomes part of the sound?”
Try larger reverbs with longer tails.
Then process those textures with filtering or modulation.
A simple piano chord can become an atmospheric wash.
A vocal can turn into a pad.
A percussion hit can become an ambient texture.
For sound design, reverb doesn’t always need to sound realistic.
Sometimes unrealistic is exactly what you want.
7. Turn a Piano Into an Atmospheric Texture
Let’s build a practical sound.
Start with a simple piano chord.
Try:
Low-Pass Filter → Modulation → Delay → Reverb
First, darken the piano with the filter.
Then introduce subtle modulation.
Add a quiet delay.
Finally, create a large reverb tail.
Reduce the overall Mix control if necessary.
Your piano can now sit behind the production as an atmospheric layer rather than behaving like a traditional piano.
This technique works beautifully for:
- R&B
- Trap Soul
- Lo-fi Hip Hop
- Ambient music
- Cinematic production
8. Turn Rhodes Into a Moving Pad
Rhodes already contain rich harmonics, making them excellent sound-design material.
Start with a sustained chord progression.
Try:
Filter → Chorus/Modulation → Saturation → Delay → Reverb
Now create slow modulation.
Allow the filter to gradually move.
Let the stereo image change subtly.
Sequence the delay so it appears at selected moments.
The original Rhodes can gradually become something closer to an evolving pad.
You can even duplicate the original track.
Keep one Rhodes relatively clean and process the duplicate heavily with Infiltrator.
Blend the two together.
Now you have:
Original Rhodes + atmospheric texture derived from the Rhodes
This can create a much more cohesive arrangement than simply adding an unrelated pad.
9. Transform Vocal Chops
Vocals are incredibly flexible sound-design sources.
Even a short syllable can become something entirely different.
Try:
Pitch → Filter → Modulation → Delay → Reverb
Pitch the vocal.
Darken it with filtering.
Introduce movement.
Then use delay and reverb to push it deeper into the background.
At extreme settings, listeners may not even recognize the original source as a vocal.
You can create:
- Ambient textures
- Vocal pads
- Rhythmic chops
- Background ear candy
- Transition effects
- Ghostly textures
This is particularly useful for atmospheric R&B production.
10. Turn a Drum Hit Into a Transition
Take a snare, clap, percussion hit, or cymbal.
Instead of using it as a drum, turn it into an effect.
Try:
Pitch → Distortion → Delay → Reverb
Then automate or sequence the processing.
Reverse-style movement, pitch changes, long echoes, and reverb tails can transform a basic drum hit into something suitable for transitioning between sections.
This means you don’t always need dedicated transition sample packs.
You can create transitions from sounds already inside your song.
11. Destroy a Drum Loop
Sometimes subtle isn’t the goal.
Load Infiltrator onto a drum loop and experiment aggressively.
Try combinations of:
Filtering
Distortion
Bit reduction
Stuttering
Pitch processing
Delay
Glitch effects
Spectral processing
The result may sound completely unusable at first.
That’s okay.
Record or bounce the processed output.
Then find the interesting moments.
You might discover a half-second glitch or strange percussion sound worth chopping out and reusing.
This is a classic sound-design technique:
Process → record → chop → resample.
12. Resample Your Infiltrator 2 Experiments
This is where Infiltrator becomes significantly more powerful.
Don’t always leave the plugin running live.
Record the output.
Suppose you process a four-bar synth loop through a crazy Infiltrator preset.
Bounce it to audio.
Now chop the resulting audio.
Maybe you find:
- One interesting texture
- One strange transient
- One reversed moment
- One atmospheric tail
- One glitch
- One rhythmic fragment
Take those pieces and use them elsewhere in your production.
You have effectively created your own sample pack from one original sound.
13. Use the Sequencer to Create Rhythm From Sustained Sounds
One of the coolest tricks is starting with something that has almost no rhythm.
For example:
A sustained pad chord.
Hold the chord.
Then use Infiltrator’s sequencing and modulation capabilities to create rhythmic processing.
Filtering can pulse.
Distortion can appear intermittently.
Delay can generate repeats.
Other effects can activate at different points.
Suddenly:
Sustained chord → rhythmic texture
You created rhythm without changing the MIDI performance.
14. Create Movement With Different Envelope Shapes
Don’t underestimate envelope shapes.
A simple upward movement creates a very different sensation from a downward movement.
For example:
Rising envelope
Can create anticipation.
Falling envelope
Can create a pluck-like or decaying effect.
Alternating envelope
Can create rhythmic movement.
Slow curved movement
Can create evolving atmospheric textures.
Experiment with drawing different shapes instead of simply selecting presets.
You’ll start designing effects that react specifically to your music.
15. Layer Different Types of Movement
Advanced sound design often comes from multiple forms of movement occurring simultaneously.
For example:
Filter: Slow movement
Distortion: Rhythmic movement
Delay: Occasional activation
Stereo: Gradual movement
Reverb: Appears at the end of the sequence
Now the sound changes on several timescales.
Some changes happen quickly.
Others happen gradually.
This makes the texture feel much more complex than the original source.
16. Use the 32-Step Sequencer Creatively
Don’t think of the sequencer only as an on/off system.
Think of it as an arrangement tool for effects.
You might create a 32-step pattern where the sound gradually becomes more processed.
For example:
Steps 1–8: Mostly clean
Steps 9–16: Filtering
Steps 17–24: Filtering + distortion
Steps 25–28: Pitch processing
Steps 29–32: Delay + reverb
Then the sequence resets.
A static loop now has a beginning, development, and ending.
That’s almost like creating a miniature arrangement inside the effect itself.
17. Create Your Own Risers
You can use modulation to create rising effects without using a traditional riser sample.
Start with a sustained sound.
Then gradually:
- Open the filter
- Increase distortion
- Increase pitch
- Add stereo width
- Increase delay
- Increase reverb
As these parameters intensify, tension increases.
Place the resulting sound before your chorus or drop.
You’ve created a transition that originates from your own production.
18. Create Downlifters
Do the opposite.
Start bright, wide, and intense.
Then gradually:
- Close the filter
- Reduce distortion
- Lower pitch
- Increase reverb
- Allow the sound to disappear
This works well when moving from a large chorus into a quieter verse.
Risers create anticipation.
Downlifters create release.
Infiltrator can help create both.
19. Use Macros for Massive Transformations
Macros are particularly useful for sound design because they allow several parameters to move together.
Imagine creating a macro called:
DESTROY
At minimum:
- Distortion increases
- Filtering becomes more aggressive
- Pitch processing increases
- Delay feedback increases
- Reverb increases
At maximum, the original sound becomes almost unrecognizable.
Now automate the macro from:
0% → 100%
Your sound gradually transforms.
Or automate:
100% → 0%
The destroyed texture slowly returns to its original form.
One macro can become an entire transition.
20. Design With the Mix Control
Extreme sound design doesn’t always mean replacing the original sound.
Try creating a wild effect and then reducing the overall wet/dry mix.
At:
100% wet
the original might disappear completely.
At:
50%
you get an obvious processed layer.
At:
10–25%
you might get subtle texture.
This is one of the easiest ways to make experimental effects usable in conventional Hip Hop and R&B productions.
21. Parallel Processing Opens Even More Possibilities
Another approach is keeping your original track untouched and sending it to an auxiliary track containing Infiltrator 2.
Now you have:
Dry source
plus
Infiltrator texture
You can process the second signal as aggressively as you want.
This is especially useful for:
- Vocals
- Rhodes
- Pads
- Drums
- 808s
- Melodies
The clean source maintains clarity while the processed version adds character.
22. Turn One Sound Into Several Sounds
Here’s a powerful exercise.
Choose one source sound.
Let’s say it’s a piano.
Create five versions:
Version 1 — Dark Piano
Filtering + subtle saturation.
Version 2 — Atmospheric Piano
Modulation + delay + reverb.
Version 3 — Rhythmic Piano
Sequenced filtering and effects.
Version 4 — Destroyed Piano
Distortion + glitch + spectral processing.
Version 5 — Transition
Pitch movement + filtering + reverb.
Bounce all five.
You now have five production assets created from one source.
This is how sound design can dramatically expand your sonic palette.
23. Build Your Own Infiltrator 2 Presets
Once you create something useful, save it.
Over time, create categories such as:
R&B Rhodes
Dark Melodies
Vocal Textures
Drum Transitions
Lo-Fi Samples
Ambient Pads
Glitch FX
Risers
Beat Transitions
Instead of browsing thousands of presets every time you produce, you’ll gradually build a personalized collection based on your own sound.
That can become incredibly valuable.
A Simple Infiltrator 2 Sound Design Recipe
If you’re unsure where to begin, use this formula:
Step 1: Choose a simple sound
Start with a piano, synth, vocal, pad, or drum loop.
Step 2: Change the tone
Add filtering.
Step 3: Add harmonics
Introduce distortion or saturation.
Step 4: Create movement
Use modulation or envelopes.
Step 5: Add rhythm
Experiment with the sequencer.
Step 6: Add space
Introduce delay or reverb.
Step 7: Automate
Use macros or DAW automation.
Step 8: Blend
Adjust the Mix control.
Step 9: Resample
Bounce the result to audio.
Step 10: Chop
Find the most interesting moments and turn them into new sounds.
That’s an entire sound-design workflow inside one plugin.
The Biggest Infiltrator 2 Sound Design Mistake
The biggest mistake is believing every experiment needs to sound good immediately.
Sound design is experimentation.
Sometimes you’ll create something terrible.
Then you’ll change one parameter and suddenly discover something amazing.
Other times, 95% of your processed audio may be unusable.
But the remaining 5% could contain the sound that defines the entire beat.
That’s why resampling is so important.
Don’t judge every experiment as a finished sound.
Look for interesting moments.
Final Thoughts: Transforming Sounds With Infiltrator 2
The real strength of Devious Machines Infiltrator 2 isn’t simply the number of effects it contains.
It’s the ability to make those effects interact and evolve over time.
You can take a simple source and transform it through:
Filtering.
Distortion.
Pitch.
Modulation.
Sequencing.
Delay.
Reverb.
Automation.
Resampling.
And those techniques can turn an ordinary sound into something completely unique.
For Hip Hop and R&B producers, this can be especially valuable because you don’t always need another synth or sample library to find inspiration.
Sometimes you already have the sound you need.
You just haven’t transformed it yet.
Start with something simple.
Push it through Infiltrator 2.
Experiment.
Resample it.
Chop it.
And turn the results into something that belongs entirely to your production.
What To Learn Next
Once you’ve mastered basic sound transformation, there’s another area where Infiltrator 2 can dramatically improve your productions: transitions and arrangement.
Next in our Infiltrator 2 series, we’ll explore How To Create Transitions & FX With Infiltrator 2, including risers, downlifters, drum transitions, delay throws, reverb washes, glitch fills, and techniques for turning an eight-bar loop into a more dynamic arrangement.