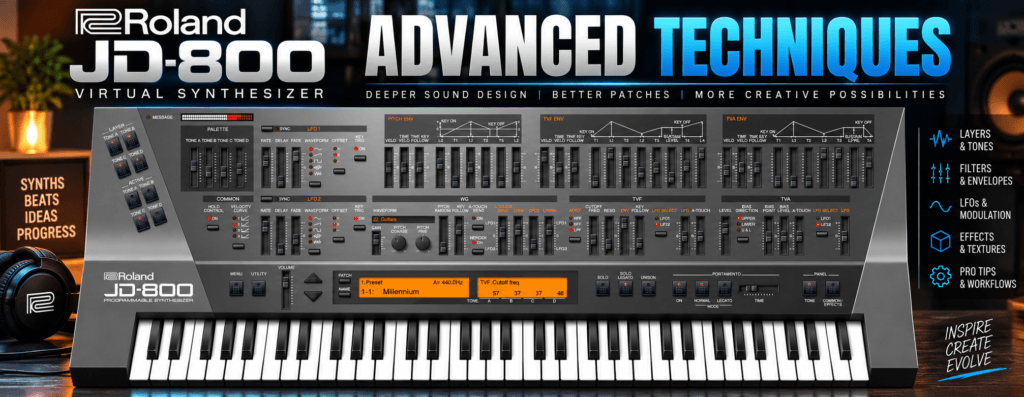
 Roland JD-800 VST Advanced Techniques: Take Your Sound Design Further
Once you understand the basics of the Roland JD-800 VST, the instrument becomes much more interesting.
At first, you might use it like any other software synthesizer: load a preset, adjust the filter, add some effects, and start playing.
But the JD-800’s real strength lies deeper inside its architecture.
With four independent Tones, separate envelopes, filters, LFOs, pitch controls, velocity response, and a distinctive effects section, you can build patches that evolve, react to your playing, and occupy very specific roles inside a production.
And that’s where we’re going in this guide.
These Roland JD-800 VST advanced techniques are designed to help you move beyond basic preset tweaking and use the JD-800 as a serious sound-design tool for R&B, Hip Hop, Trap Soul, Synthwave, Ambient, and electronic production.
The goal isn’t complexity for complexity’s sake.
It’s control.
1. Think in Layers, Not Presets
The biggest mental shift you can make with the JD-800 is to stop thinking of a Patch as one sound.
Think of it as a mini arrangement.
A Patch can contain four Tones:
Tone A
Tone B
Tone C
Tone D
Each can serve a completely different purpose.
For example:
| Tone | Function |
|---|---|
| Tone A | Body |
| Tone B | Attack |
| Tone C | Width and shimmer |
| Tone D | Evolving texture |
Press one key and you’re actually triggering several coordinated sonic events.
Once you start designing patches this way, the JD-800 becomes considerably more powerful.
2. Create Movement With Staggered Envelopes
One of my favorite advanced techniques is giving each Tone a different envelope.
Imagine creating a pad.
Instead of having all four Tones fade in simultaneously, try:
Tone A: Immediate attack
Tone B: 300–500 ms attack
Tone C: 1-second attack
Tone D: Very slow attack
Now hold a chord.
The sound continuously develops.
Tone A establishes the chord.
Tone B adds body.
Tone C introduces another texture.
Tone D slowly emerges behind everything.
You haven’t changed notes.
You’ve created movement through time.
This technique works beautifully for intros, breakdowns, R&B pads, cinematic textures, and ambient production.
3. Give the Release Envelopes Different Lengths
Do the same thing at the other end of the sound.
Instead of giving every Tone an identical release, stagger them.
For example:
Tone A: Short release
Tone B: Medium release
Tone C: Long release
Tone D: Very long release
When you release the chord, the patch slowly deconstructs itself.
Some elements disappear immediately while others continue floating.
This can create beautiful transitions without relying entirely on reverb.
4. Create Velocity-Sensitive Layering
Velocity shouldn’t only control volume.
Use it to change the personality of the sound.
Imagine an R&B keyboard patch where softer playing produces:
Warm + dark + smooth
but harder playing introduces:
Bright + aggressive + detailed
You can design your layers so the softer components dominate at lower velocities while brighter Tones become more prominent as you play harder.
Now the patch responds to your performance.
That’s dramatically more expressive than simply making harder notes louder.
5. Create a Velocity-Revealed Attack Layer
Here’s a practical variation.
Create a soft pad or keyboard sound using Tone A.
Then use Tone B as a bright attack layer.
Configure the patch so that Tone B becomes increasingly noticeable at higher velocities.
Play softly:
Smooth pad.
Play harder:
Pad + bright transient.
This is especially useful for R&B keyboard parts because you can introduce accents through performance instead of drawing automation afterward.
6. Use Different Filter Settings Across the Four Tones
Don’t treat the JD-800’s filters as one global tone control.
Each layer can contribute a different frequency range.
For example:
Tone A: Dark foundation
Tone B: Midrange presence
Tone C: Bright detail
Tone D: Heavily filtered texture
The result is almost like mixing four instruments inside one Patch.
You can then adjust the Tone levels to determine the overall tonal balance.
This is much more flexible than simply making the entire patch brighter or darker.
7. Create Filter Movement Without Making It Obvious
Large filter sweeps are easy to hear.
Subtle filter movement is often more useful.
Take an atmospheric Tone and use its filter envelope or modulation to create a very slow change in cutoff.
The listener might not consciously notice the filter moving.
But the sound will feel less static.
For R&B and Trap Soul, subtle movement often works better than obvious modulation because it creates atmosphere without distracting from the vocal.
8. Build Polyrhythmic-Feeling Modulation
Try assigning different LFO speeds across multiple Tones.
For example:
Tone A: Little or no modulation
Tone B: Slow LFO
Tone C: Slightly faster LFO
Tone D: Another slow rate
Because the layers aren’t moving together, their relationship constantly changes.
One moment Tone B might become more prominent.
Later Tone D might create more movement.
The resulting patch can feel almost polyrhythmic even though you’re holding a single chord.
This is excellent for evolving pads.
9. Use Opposing Modulation
Another interesting technique is to make layers move in opposite directions.
For example:
Tone A: Filter gradually brightens.
Tone B: Filter gradually darkens.
Or:
Tone C: Pitch modulation moves upward.
Tone D: Slight modulation moves in the opposite direction.
The changes don’t need to be dramatic.
Subtle opposing movement creates complexity because the layers are constantly interacting.
10. Create Width Before Reaching for Chorus
Chorus is one of the easiest ways to make a JD-800 patch sound wide.
But try building stereo interest through synthesis first.
Use:
- Slight detuning
- Different octave positions
- Contrasting waveforms
- Different LFO settings
- Different envelopes
- Different layer levels
Once the patch already has movement and dimension, introduce chorus carefully.
This often creates a more sophisticated result than relying on one large stereo effect.
11. Use Micro-Detuning Between Tones
Take two similar Tones.
Keep Tone A at its normal pitch.
Detune Tone B very slightly.
Not enough to sound obviously out of tune.
Just enough that the two layers don’t perfectly overlap.
Now hold a chord.
You’ll hear subtle beating between the layers.
That interaction creates natural thickness and movement.
It’s particularly effective for:
- Pads
- Digital keys
- Synth strings
- Leads
- Ambient textures
12. Build Octave Architecture Into the Patch
You can also treat the four Tones like different registers of an arrangement.
For example:
Tone A: Normal octave
Tone B: +1 octave
Tone C: +2 octaves
Tone D: -1 octave
But here’s the advanced part:
Don’t make them equally loud.
The +2 octave layer might be extremely quiet.
You don’t necessarily want to hear it as a separate sound.
You want to notice the air it adds when you mute it.
That’s a useful approach to layering in general.
13. Create a “Ghost Layer”
A ghost layer is a Tone that’s almost inaudible.
It might contain:
- Noise-like texture
- A high octave
- Heavy modulation
- A slow attack
- An unusual waveform
Turn it down until you barely notice it.
Then mute it.
If the Patch suddenly feels flatter, it’s doing its job.
This is an excellent way to add complexity without making the sound obviously layered.
14. Build Transients Separately From Sustain
One of the most powerful techniques in layered synthesis is separating the attack from the body.
Use Tone A for sustain.
Then create Tone B specifically for the transient.
Tone B might use:
- Bell
- Percussive waveform
- Bright PCM waveform
- Short envelope
- Higher octave
Give it:
Fast attack
Short decay
Low sustain
Now the beginning of the sound has its own identity.
You can make a pad feel like a keyboard.
Or make a soft digital key cut through the mix without making the entire sound brighter.
15. Create Hybrid Instruments
Once attack and sustain are separate, you can start creating sounds that don’t fit traditional categories.
Imagine:
Bell attack + warm pad sustain
or
Digital transient + synth string body
or
Pluck attack + atmospheric tail
These hybrid patches are particularly useful in modern production because they can sound familiar without immediately reminding the listener of a specific instrument.
16. Use Filtered Brightness Instead of EQ
Suppose your patch needs more high-frequency detail.
Instead of boosting the entire Patch with EQ, dedicate one Tone to brightness.
Choose a bright waveform.
Pitch it higher.
Filter it appropriately.
Turn it down.
Now you can control the brightness by adjusting one Tone rather than altering the entire sound.
That’s much more flexible.
17. Build a Patch Specifically Around the Vocal
This is an advanced production technique rather than purely a synthesis technique.
If you’re producing R&B, don’t create the biggest JD-800 patch possible.
Create the patch around the space the singer needs.
Maybe that means:
Low frequencies: minimal
Midrange: controlled
Upper frequencies: atmospheric
Stereo field: wide
Now your JD-800 provides the emotional environment around the vocal instead of fighting it.
Sometimes sophisticated sound design means intentionally creating a smaller sound.
18. Automate the Filter Between Song Sections
Your Patch doesn’t have to remain identical throughout the song.
Suppose the same JD-800 chords appear in both the verse and chorus.
During the verse:
Darker filter
During the pre-chorus:
Gradually opening filter
During the chorus:
Brighter filter
You’ve created arrangement movement without changing the MIDI.
This is an excellent way to move beyond static eight-bar loops.
19. Automate Tone Levels
Here’s an even more interesting approach.
Instead of automating only effects or filters, automate the relationship between layers.
Imagine:
Verse
Tone A + Tone B
Pre-Chorus
Tone C gradually enters.
Chorus
All four Tones.
Bridge
Tone A disappears and Tone D dominates.
Technically, you’re using one Patch.
Musically, it feels like several different sounds.
20. Use Effects as Arrangement Tools
The JD-800’s effects can also help distinguish sections.
For example:
Verse
Relatively dry.
Pre-Chorus
Introduce delay.
Chorus
More chorus and reverb.
Breakdown
Heavy reverb and filtered texture.
Final Chorus
Return to the full sound.
The Patch itself becomes part of your arrangement.
21. Create Delay Throws
You don’t need delay running heavily throughout the entire performance.
Instead, automate it onto specific notes.
For example, play a short JD-800 melody.
Keep most of it relatively dry.
On the final note before the chorus, increase the delay.
The note repeats into the next section.
That’s a delay throw.
It’s simple, but it can make transitions feel much more polished.
22. Use Reverb to Create Transition Material
Here’s another trick.
Play a JD-800 chord with a long reverb.
Record the reverb tail.
Bounce it to audio.
Now manipulate that tail.
You can:
- Reverse it
- Pitch it
- Stretch it
- Filter it
A reversed reverb tail makes an excellent transition into the next chord or section.
Now you’re creating your own transition effects directly from your synth.
23. Turn the JD-800 Into a Sample Generator
One of the most powerful advanced techniques is to stop thinking of the JD-800 as the final instrument.
Use it as source material.
Create a complicated Patch.
Record:
8 bars of chords
Then bounce it.
Now destroy it.
Pitch it down.
Reverse it.
Stretch it.
Chop it.
Filter it.
Saturate it.
Resample it again.
The result may no longer sound obviously like a JD-800.
That’s the point.
24. Resample at Different Pitches
Record the same JD-800 phrase at different pitches.
For example:
Original
-5 semitones
-12 semitones
+12 semitones
Each version will have a different personality.
Pitching digital textures downward can create especially interesting Hip Hop and Trap Soul material.
The high-frequency character becomes darker and more mysterious.
25. Create Your Own “Vintage Sample”
You don’t need to search endlessly for a sample that fits your beat.
Make one.
Create:
JD-800 pad
JD-800 bell
JD-800 texture
Small melody
Record eight bars.
Bounce them together.
Then process the audio as one piece.
Add:
- Saturation
- Filtering
- Compression
- Pitch changes
- Wow/flutter if desired
- Reverb
Now chop your own composition as if somebody else recorded it decades ago.
You retain complete control over the harmony while still getting a sample-based workflow.
26. Print Effects to Audio
Software makes it tempting to keep everything editable forever.
Sometimes that’s counterproductive.
Create an interesting JD-800 sound with delay, reverb, modulation, or distortion.
Then print it.
Now you’re working with audio.
The effects tails become part of the sample.
Chopping through those tails can create accidents you wouldn’t have programmed intentionally.
Those accidents are often where the interesting ideas happen.
27. Create a Dark Trap Soul Texture
Let’s build something practical.
Tone A — Foundation
Choose a warm digital waveform.
Lower the filter cutoff.
Use moderate Attack.
Use a long Release.
Tone B — Air
Choose a brighter waveform.
Pitch it +12 semitones.
Turn it down significantly.
Add subtle modulation.
Tone C — Transient
Choose something metallic or bell-like.
Use a very short envelope.
Keep it quiet.
Tone D — Ghost Texture
Choose something unusual.
Use a very slow Attack.
Apply more modulation.
Keep it extremely low.
Now add controlled chorus and reverb.
Play a minor 9th chord.
You should hear something that starts clearly, develops over time, and continues evolving while you hold the keys.
28. Create an Expressive R&B Key
For a more playable instrument, build the Patch around velocity.
Tone A
Warm body.
Always present.
Tone B
Bright attack.
More noticeable at higher velocities.
Tone C
High-octave shimmer.
Very quiet.
Tone D
Soft atmospheric tail.
Slow attack.
Now play gently.
The patch should sound smooth and intimate.
Play harder.
The transient becomes more noticeable and the sound feels more aggressive.
That’s a much more expressive instrument than a static preset.
29. Build an Evolving Pad That Never Feels Static
Use all four Tones.
Give each one:
Different waveform
Different Attack
Different Release
Different filter setting
Different LFO rate
Different volume
Now hold a chord for eight bars.
The goal is that the Patch shouldn’t sound exactly the same at bar eight as it did at bar one.
You don’t need dramatic modulation.
Several small movements layered together can create the illusion of a constantly changing sound.
30. Design Patches for Resampling
This is slightly different from designing patches for live playing.
If you know you’re going to bounce and manipulate the sound, you can be more extreme.
Use:
- Longer reverb
- More modulation
- Strange pitch relationships
- Excessive release
- Unusual effects
- Aggressive filtering
Why?
Because you aren’t necessarily using the Patch directly.
You’re capturing interesting information that you’ll transform later.
The uglier version might actually create the better sample.
31. Use Automation to Escape the 8-Bar Loop
Suppose you’ve created an eight-bar R&B progression.
Instead of immediately writing another progression, duplicate it across the arrangement.
Then change the JD-800.
Bars 1–8
Tone A only.
Bars 9–16
Introduce Tone B.
Bars 17–24
Open the filter.
Bars 25–32
Introduce Tone C.
Chorus
All layers + wider effects.
Same chords.
Completely different energy.
This is one of the easiest ways to turn a loop into an actual arrangement.
32. Build Multiple Patches From One Starting Point
Once you create a great Patch, don’t stop.
Duplicate it.
Then create variations.
For example:
R&B Pad 01
Original.
R&B Pad 01 Dark
Lower cutoff.
R&B Pad 01 Wide
More detuning and chorus.
R&B Pad 01 Dry
Reduced effects.
R&B Pad 01 Slow
Longer Attack.
R&B Pad 01 Sample
More extreme modulation and effects.
One sound-design session can produce an entire family of useful patches.
33. Create Your Own JD-800 Signature Bank
If you’re serious about using the JD-800 regularly, stop relying exclusively on the factory library.
Build your own collection.
I’d organize it something like this:
- R&B Pads
- R&B Keys
- Trap Soul Bells
- Dark Textures
- Hip Hop Sample Starters
- Leads
- Ambient
- Transitions
- Experimental
- Resampling Sources
Even creating five patches per category gives you 50 sounds designed specifically for the type of music you make.
That can be far more useful than owning another thousand presets.
34. Stop Trying to Make Every Patch Sound Impressive
This might be the most advanced lesson.
A sound doesn’t need to be impressive by itself.
It needs to be useful.
A huge four-Tone JD-800 patch with enormous chorus, delay, and reverb might sound incredible in isolation.
But inside an R&B record?
It could consume the entire arrangement.
Sometimes the better patch is:
Two Tones.
Less bass.
Less reverb.
Less width.
Less movement.
Because the singer, drums, bass, and other instruments complete the picture.
Production context should always win over soloed sound.
Roland JD-800 Advanced Technique Cheat Sheet
| Goal | Technique |
|---|---|
| More evolution | Stagger Tone envelopes |
| More expression | Velocity-sensitive layers |
| More width | Micro-detune Tones |
| More complexity | Different LFO rates |
| Better attack | Dedicated transient Tone |
| More atmosphere | Slow ghost layer |
| Less mud | Remove low-octave layers |
| More brightness | Dedicated upper Tone |
| Better vocal space | Darker, wider midrange |
| Bigger chorus | Automate Tone levels |
| Better transitions | Delay/reverb throws |
| Original samples | Bounce and resample |
| More arrangement | Automate layers and filters |
| Better patches | Give every Tone one job |
Advanced JD-800 Workflow
If you want to put these techniques into practice, use this workflow:
- Start with one Tone and establish the core sound.
- Add a second Tone only to solve a specific problem.
- Use Tone 3 for transient, width, or brightness.
- Use Tone 4 for subtle movement or atmosphere.
- Give the Tones different envelopes.
- Use different filter settings across layers.
- Introduce subtle LFO movement.
- Experiment with velocity response.
- Create width through synthesis before effects.
- Add effects intentionally.
- Design the sound while the beat is playing.
- Automate the Patch across the arrangement.
- Bounce interesting performances to audio.
- Resample and manipulate them.
- Save several variations of your best patches.
The more you work this way, the less the JD-800 feels like a collection of vintage presets and the more it starts feeling like your instrument.
Final Thoughts
The most useful Roland JD-800 VST advanced techniques aren’t about making the most complicated Patch possible.
They’re about using the architecture intentionally.
Give every Tone a purpose.
Let different layers enter and disappear at different times.
Use velocity to make patches react to your performance.
Create movement with subtle LFO differences.
Separate the transient from the sustain.
Automate layers across your arrangement.
And don’t be afraid to bounce everything to audio and completely destroy what you created.
For R&B and Trap Soul, the JD-800 can become a source of lush harmony and evolving atmosphere.
For Hip Hop, it can become a personal sample generator.
For Synthwave and Ambient music, its digital character can become the centerpiece of the production.
The deeper you go, the more important one idea becomes:
You don’t need to make the JD-800 sound more complicated. You need to make it more intentional.
That’s where advanced sound design begins.