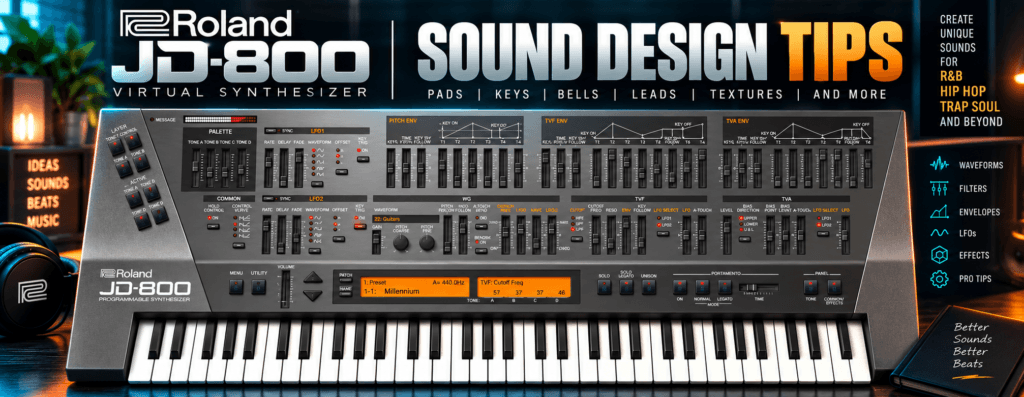
 Roland JD-800 VST Sound Design Tips: Create Better Patches From Scratch
The Roland JD-800 VST is easy to approach as a preset machine.
Load a patch, play a few chords, add it to the beat, and move on.
But that barely scratches the surface of what makes the JD-800 interesting.
The real power of this synth comes from its four-Tone architecture, PCM waveforms, filters, envelopes, LFOs, and effects. Once you understand how those pieces interact, the JD-800 becomes a surprisingly deep sound-design instrument for everything from lush R&B pads to dark Hip Hop textures, bells, keys, leads, and experimental samples.
In this guide, we’re going beyond basic operation and exploring practical Roland JD-800 VST sound design tips you can use to create more original sounds.
You don’t need to become a synthesis expert first.
Let’s start with one principle:
Give every layer a purpose.
1. Understand the JD-800’s Four-Tone Architecture
The most important concept for JD-800 sound design is its four-Tone architecture.
A single Patch can contain up to four Tones:
Tone A
Tone B
Tone C
Tone D
Instead of thinking of these as four copies of the same sound, think of them as four ingredients.
For example, an atmospheric pad might use:
| Tone | Purpose |
|---|---|
| Tone A | Main body |
| Tone B | Bright shimmer |
| Tone C | Attack/transient |
| Tone D | Movement/texture |
This approach is much more useful than simply stacking four big sounds.
One layer provides warmth.
Another provides detail.
Another creates movement.
Together, they create something more complex than any individual Tone.
2. Start With One Tone
Here’s one of the best JD-800 sound-design habits you can develop:
Don’t start with all four Tones enabled.
Start with one.
Choose Tone A and disable the others.
Now build a useful sound with just that layer.
Work through:
Waveform → Pitch → Filter → Envelope → Modulation
Once Tone A sounds good, ask yourself:
What is this sound missing?
Maybe it needs brightness.
That’s Tone B.
Maybe it needs a stronger attack.
That’s Tone C.
Maybe it needs movement.
That’s Tone D.
Now you’re layering intentionally instead of making a patch complicated simply because four layers are available.
3. Choose Waveforms Based on Their Role
The waveform is your raw material.
Instead of endlessly scrolling until something sounds impressive, decide what job the Tone needs to perform first.
For a foundation, choose something with enough body to support the sound.
For shimmer, look for something brighter.
For an attack layer, choose something with a strong transient.
For texture, choose something unusual.
The waveform doesn’t need to sound perfect by itself.
That’s what the rest of the synthesizer is for.
You’re choosing ingredients, not finished sounds.
4. Combine Contrasting Waveforms
Layering becomes much more interesting when the Tones aren’t identical.
Suppose Tone A is dark and smooth.
Instead of adding another dark waveform, make Tone B brighter.
Now you can balance the two:
Tone A = body
Tone B = definition
That gives you much more control than trying to make one waveform accomplish both jobs.
This is particularly useful for R&B.
You can keep the main pad dark enough to sit behind vocals while adding just enough high-frequency detail from another Tone to keep the patch from disappearing.
5. Use Octaves to Make Patches Larger
Not every Tone needs to occupy the same octave.
Try something like:
Tone A: Normal pitch
Tone B: +1 octave
Tone C: Normal pitch
Tone D: -1 octave
Instantly, your patch covers a much wider range.
But be careful with that lower octave.
If your production contains an 808 or bass, a low JD-800 layer can quickly create unnecessary competition.
For Hip Hop and R&B, I often prefer using the JD-800’s layering power in the midrange and upper frequencies while letting the bass own the bottom.
6. Try Slight Detuning Instead of Another Effect
Want width?
Don’t immediately reach for chorus.
Try subtly detuning two Tones.
Keep Tone A centered around its normal tuning.
Detune Tone B slightly.
The interaction between the layers can create natural movement.
The important word is slightly.
Extreme detuning creates an obvious effect.
Small differences create thickness.
This technique can work beautifully for pads, keys, and sustained synth sounds.
7. Use the TVF Cutoff as a Tone Control
The JD-800’s TVF, or Time Variant Filter, is one of the quickest ways to reshape a sound.
If something sounds:
Too bright → lower the cutoff.
Too dull → raise the cutoff.
That sounds simple, but it’s incredibly powerful.
Many presets that initially seem unusable can become excellent production sounds after adjusting their filtering.
For modern R&B and Trap Soul, try taking a bright digital patch and lowering its cutoff until the sound becomes darker and softer.
You can retain the JD-800 character without having it dominate the mix.
8. Don’t Use the Same Filter Setting on Every Tone
Here’s where four-Tone synthesis becomes interesting.
Your layers don’t necessarily need identical filtering.
You might have:
Tone A: Dark
Tone B: Moderately bright
Tone C: Bright
Tone D: Heavily filtered
Now the frequency spectrum of the patch is being constructed from multiple layers.
Instead of one giant sound occupying everything, each Tone contributes a different frequency characteristic.
9. Experiment With Resonance
Resonance emphasizes frequencies around the filter’s cutoff.
Used subtly, it can give a sound additional character.
Used aggressively, it can make the filter much more obvious.
Try this:
Hold a chord.
Move the cutoff.
Then gradually increase resonance.
Listen to how the personality of the filter changes.
Don’t worry about memorizing numbers.
Train your ears to recognize what the control does.
That’s ultimately more useful for production.
10. Design Movement With the Filter Envelope
A static filter setting gives you one timbre.
An envelope allows the timbre to change over time.
This is where you can make sounds feel considerably more sophisticated.
Instead of a pad simply appearing and remaining identical, the filter can gradually open.
Or close.
Or create a short burst of brightness at the beginning.
Try making Tone A relatively stable while Tone B slowly changes its filter character.
The entire Patch now evolves even though you’re simply holding one chord.
11. Master Attack and Release
If you’re only going to learn two envelope concepts initially, learn:
Attack
and
Release
Attack controls how quickly the sound reaches its level.
Release determines how it behaves after you release the key.
For pads:
Slower attack + longer release
For plucks:
Fast attack + short decay/release
For keys:
Fast attack + controlled release
For textures:
Slow attack + long release
Those aren’t rules.
They’re starting points.
12. Give Different Tones Different Envelopes
This is one of my favorite JD-800 sound-design techniques.
Don’t make every Tone enter and leave at the same time.
Imagine this:
Tone A: Immediate
Tone B: Slightly delayed
Tone C: Very quick attack that disappears
Tone D: Slowly fades in
Press one chord.
Initially you hear A + C.
Then C fades.
B becomes more noticeable.
Finally D appears.
You’re holding the same notes, but the sound is continuously changing.
That’s how you create evolving patches.
13. Create a Dedicated Attack Layer
Tone C doesn’t necessarily need to be audible throughout the entire note.
Use it only for the beginning.
Choose something percussive, metallic, bell-like, or bright.
Give it:
Fast attack
Short decay
Low sustain
Now it adds definition to the front of the sound before disappearing.
This technique can transform a soft pad into something that feels almost like a hybrid keyboard instrument.
14. Create a Slow-Blooming Texture Layer
Do the opposite with Tone D.
Choose an atmospheric waveform.
Give it a slow attack.
Keep its level relatively low.
Now when you play a chord, the main sound appears first and the texture gradually emerges underneath it.
This is fantastic for:
- R&B
- Trap Soul
- Ambient
- Cinematic production
- Synthwave
It creates movement without requiring a complicated performance.
15. Use LFOs Subtly
LFOs can add automatic movement to parameters.
But there’s an easy mistake:
Using too much modulation.
You don’t always want obvious wobbling.
Try using very small modulation amounts.
A little pitch modulation can create movement.
A little filter modulation can make a pad breathe.
A little amplitude modulation can add subtle pulsing.
The listener doesn’t necessarily need to hear the LFO.
They just need to feel that the sound isn’t static.
16. Use Different LFO Rates Across Layers
Here’s where things become more interesting.
Instead of applying identical movement to all four Tones, use different modulation characteristics.
Tone B might move slowly.
Tone D might move slightly faster.
Because those modulation cycles aren’t behaving identically, the relationship between the layers changes over time.
That can make a sustained chord feel organic and unpredictable.
17. Don’t Automatically Add Chorus
The JD-800 and lush chorus effects naturally belong together.
But try designing width before adding chorus.
You can use:
- Detuning
- Different waveforms
- Different octaves
- Different modulation
- Layer balance
Then add chorus only if the patch still needs it.
You’ll often get a more controlled sound.
18. Use Effects as Part of the Patch
The JD-800’s effects shouldn’t necessarily be an afterthought.
They can be part of the actual sound design.
Its effects architecture includes processing such as:
- Distortion/Overdrive
- Enhancer
- Spectrum
- Phaser
- Chorus
- Delay
- Reverb
Instead of thinking:
“My patch is finished. Now I’ll add reverb.”
Think:
“What role should the effects play in the identity of this patch?”
That’s a different approach.
19. Use Distortion Before Making a Sound Darker
Distortion isn’t only for aggressive leads.
Try adding subtle distortion to a digital texture.
Then filter it.
You can create something that feels warmer, dirtier, or more sample-like.
This is particularly useful if you’re trying to move away from the polished digital character associated with some vintage PCM synthesis.
20. Use Delay as a Rhythmic Tool
Delay doesn’t just create space.
It can create rhythm.
Design a simple pluck or bell.
Play only a few notes.
Then use delay to generate additional rhythmic activity.
Suddenly:
One note becomes three events.
This allows you to create intricate-sounding melodic patterns without programming dozens of MIDI notes.
For Hip Hop and R&B, that’s incredibly useful because it preserves space.
21. Build Reverb Into Only Part of the Sound
Here’s an interesting production approach.
Instead of making your entire patch extremely wet, create the sensation of depth using the layers.
For example:
Tone A: Dry/forward foundation
Tone B: Wide
Tone C: Short attack
Tone D: Atmospheric/reverb-heavy character
The result can feel huge without losing all of its definition.
You get a clear foreground plus an atmospheric background.
22. Design Sounds While the Beat Is Playing
This might be the most important tip in this article.
Stop designing every sound in solo.
A JD-800 patch can sound absolutely incredible by itself and be completely useless in your beat.
Loop your production.
Then adjust the patch.
Listen to how it interacts with:
- Drums
- Bass
- Vocals
- Other keys
- Percussion
If the sound becomes less impressive in solo but works better inside the record, you’ve improved it.
23. Design Patches Around Frequency Roles
Before creating a sound, decide where it belongs.
For example:
Low
Bass and low synth layers.
Low-Mid
Warm keys and body.
Midrange
Chords and melodic information.
Upper-Mid
Bells, plucks, attack layers.
High
Shimmer and atmosphere.
If your production already has an 808, maybe your JD-800 patch doesn’t need a huge lower-octave Tone.
If your vocalist occupies the midrange, perhaps your pad should be darker or wider.
Sound design and mixing aren’t completely separate processes.
24. Build a Dark R&B Pad
Let’s create something practical.
Start with Tone A.
Choose a warm waveform and lower the cutoff.
Give it a moderate attack and longer release.
Tone B
Choose something brighter.
Pitch it one octave higher.
Lower its volume.
Add slight modulation.
Tone C
Choose a soft attack texture.
Fast attack.
Shorter decay.
Keep it quiet.
Tone D
Choose an atmospheric waveform.
Slow attack.
Long release.
Subtle LFO movement.
Now add a little chorus and reverb.
Play a minor 9th chord.
You should have a patch that’s dark at its core but still contains enough high-frequency detail and movement to feel alive.
25. Build a Glassy R&B Key
Now let’s create something more immediate.
Tone A
Choose a digital keyboard-style waveform.
Use a fast attack.
Moderate decay.
Tone B
Add a brighter waveform one octave higher.
Keep it quieter than Tone A.
Tone C
Use a subtle bell-like layer.
Short decay.
Tone D
Either disable it or use it very quietly for body.
Then add:
Small amount of chorus
Short delay
Controlled reverb
Now play some major 7th or minor 9th voicings.
This type of patch can work beautifully for contemporary R&B.
26. Build a Trap Soul Bell
Bells don’t need to be complicated.
Start with a bright waveform.
Use:
Fast attack
Short-to-medium decay
Low sustain
Controlled release
Add another Tone one octave higher at a much lower volume.
Then add delay.
Try playing only four or five notes in your melody.
Let the delay create some of the complexity.
Add reverb carefully.
Now you have something that can sit above an 808 without filling the entire arrangement.
27. Build an Evolving Intro Texture
For intros and transitions, forget traditional keyboard sounds.
Use all four Tones as texture generators.
Give each one:
- Different waveform
- Different attack
- Different filtering
- Different modulation
- Different level
Then hold one note or chord.
Record 8 or 16 bars.
Now bounce it to audio.
That’s when the real fun starts.
28. Resample Your JD-800 Patches
The JD-800 can be an excellent sample-generation machine.
Create a patch.
Record it.
Bounce it to audio.
Then:
- Reverse it
- Pitch it down
- Chop it
- Stretch it
- Filter it
- Saturate it
- Resample it again
At that point, the listener might never recognize the original synthesizer.
That’s good.
You’re using the JD-800 as raw material for creating your own sonic identity.
29. Try the “One Patch, One Beat” Challenge
Here’s an excellent exercise for learning the JD-800.
Create an entire beat using one custom Patch as the original source.
Record:
Chords
Then modify the Patch.
Record:
Melody
Modify it again.
Record:
Texture
Modify it again.
Record:
Bell/pluck
Bounce everything to audio.
Now arrange your beat.
This forces you to understand how dramatically one synthesis engine can be transformed.
30. Reverse-Engineer the Factory Presets
You don’t have to learn everything by starting from an initialized patch.
Factory presets are lessons.
Find a sound you love.
Then solo:
Tone A
Listen.
Tone B
Listen.
Tone C
Listen.
Tone D
Listen.
Look at the waveform choices.
Look at the envelopes.
Look at the filtering.
Look at the modulation.
Turn the effects off.
Ask:
What actually makes this patch sound good?
That’s one of the fastest ways to improve your sound-design skills.
31. Make “Wrong” Sounds
Don’t always design another pad.
Choose a waveform you wouldn’t normally use.
Push the pitch somewhere strange.
Use excessive resonance.
Create extreme envelopes.
Add unusual modulation.
Distort it.
Then filter it.
Sometimes the best patches come from going too far and then dialing the sound back.
This is especially useful if you want to create sounds that don’t resemble the factory library.
32. Save Variations, Not Just Finished Patches
Suppose you create a great pad.
Save it.
Then make it darker.
Save:
Dark Pad 01
Remove the shimmer layer.
Save:
Dark Pad 01 Soft
Increase the attack.
Save:
Dark Pad 01 Slow
Change the effects.
Save:
Dark Pad 01 Dry
One sound-design session can produce four or five useful patches.
That’s how you start building a personal library quickly.
Create Your Own JD-800 Sound Library
I’d organize your custom patches into categories.
For example:
R&B Pads
R&B Keys
Trap Soul Bells
Dark Textures
Ambient
Leads
Plucks
Sample Starters
Transitions
Experimental
Over time, this becomes much more valuable than endlessly browsing factory presets.
Imagine opening the JD-800 six months from now and having 100 sounds that were specifically designed around your production style.
That’s when a synth starts becoming part of your identity as a producer.
Roland JD-800 Sound Design Cheat Sheet
When you want to create something quickly, use this formula:
| If You Want… | Try… |
|---|---|
| Darker sound | Lower TVF cutoff |
| Brighter sound | Raise cutoff/add bright Tone |
| Softer pad | Increase Attack |
| Longer atmosphere | Increase Release |
| More movement | Add subtle LFO |
| More width | Detune/layer/chorus |
| More attack | Add short transient Tone |
| More shimmer | Add quiet upper-octave Tone |
| Less mud | Remove/reduce low Tone |
| More complexity | Different envelopes per Tone |
| Rhythmic movement | Add delay |
| Vintage/sample character | Distortion + filtering |
| Evolving texture | Slow envelopes + different LFOs |
Final Thoughts
The best Roland JD-800 VST sound design doesn’t come from moving every slider.
It comes from understanding what each part of the patch is supposed to accomplish.
Start with one Tone.
Give it a purpose.
Then add another only when the sound actually needs something.
Use contrasting waveforms.
Experiment with different octaves.
Give each layer its own envelope.
Use subtle modulation.
Shape brightness with the filter.
And treat the effects as part of the sound rather than something you automatically throw on afterward.
Most importantly, design your sounds inside actual music.
If you’re producing R&B, create patches while your extended chords are playing.
If you’re making Hip Hop, design around the drums and 808.
If you’re making Trap Soul, leave space for the vocalist.
And when you create something interesting, resample it.
The JD-800 may be based on a synthesizer introduced decades ago, but its architecture can still produce sounds that feel completely modern.
The trick is not trying to recreate 1991.
Use the JD-800’s character to create sounds that belong to you.